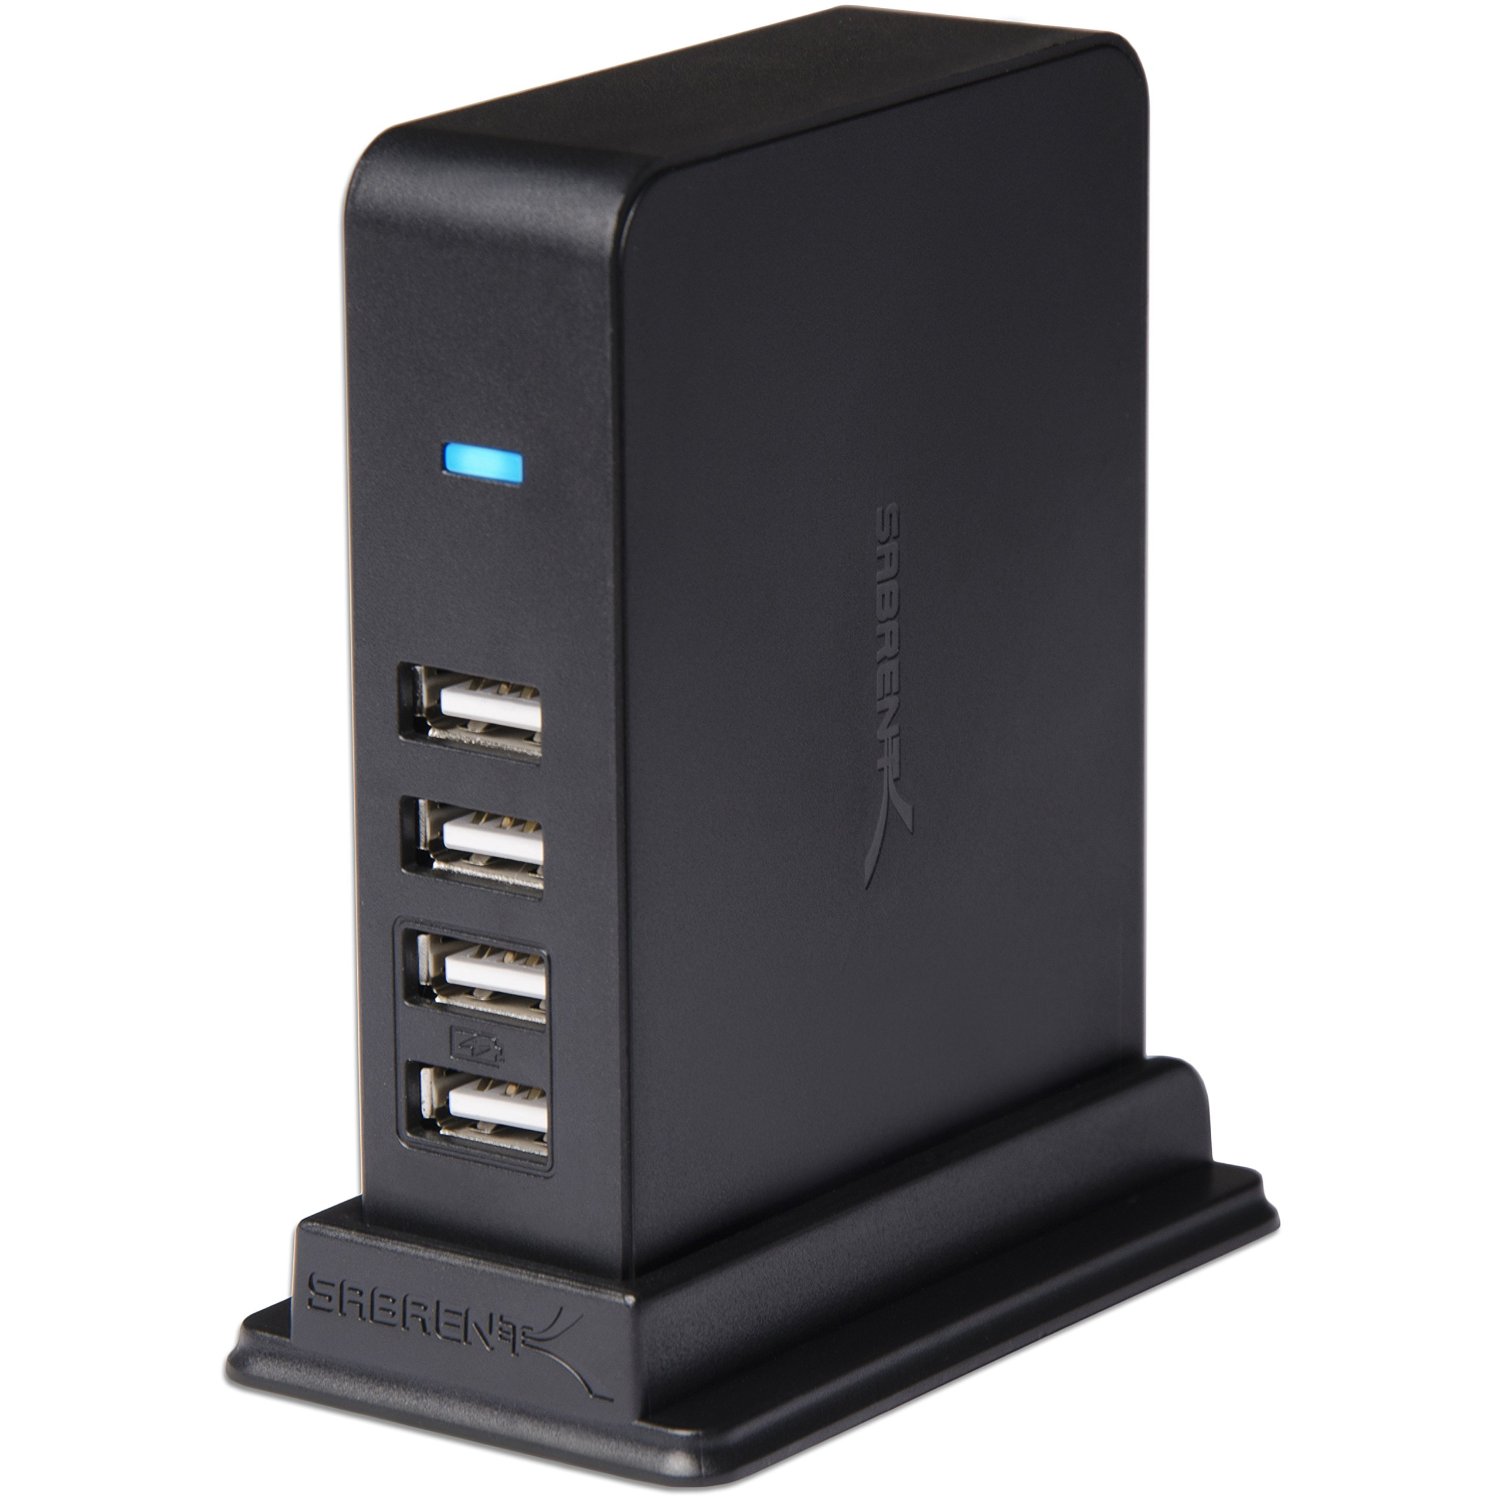
I’ve been getting some questions about which USB hubs I use. I have several of the “Sabrent 7 Port USB 2.0 HUB + 2 Charging Ports with 5V/4A Power Adapter (HB-UST9)” hubs. They work fine, have charging ports as well as data ports, and you can attach them to the panel base with Velcro tape. Remember not to attach more that four devices at a time or you’ll get unreliable results (assume each device needs 500mA of power). They are here on Amazon.
Category: Construction
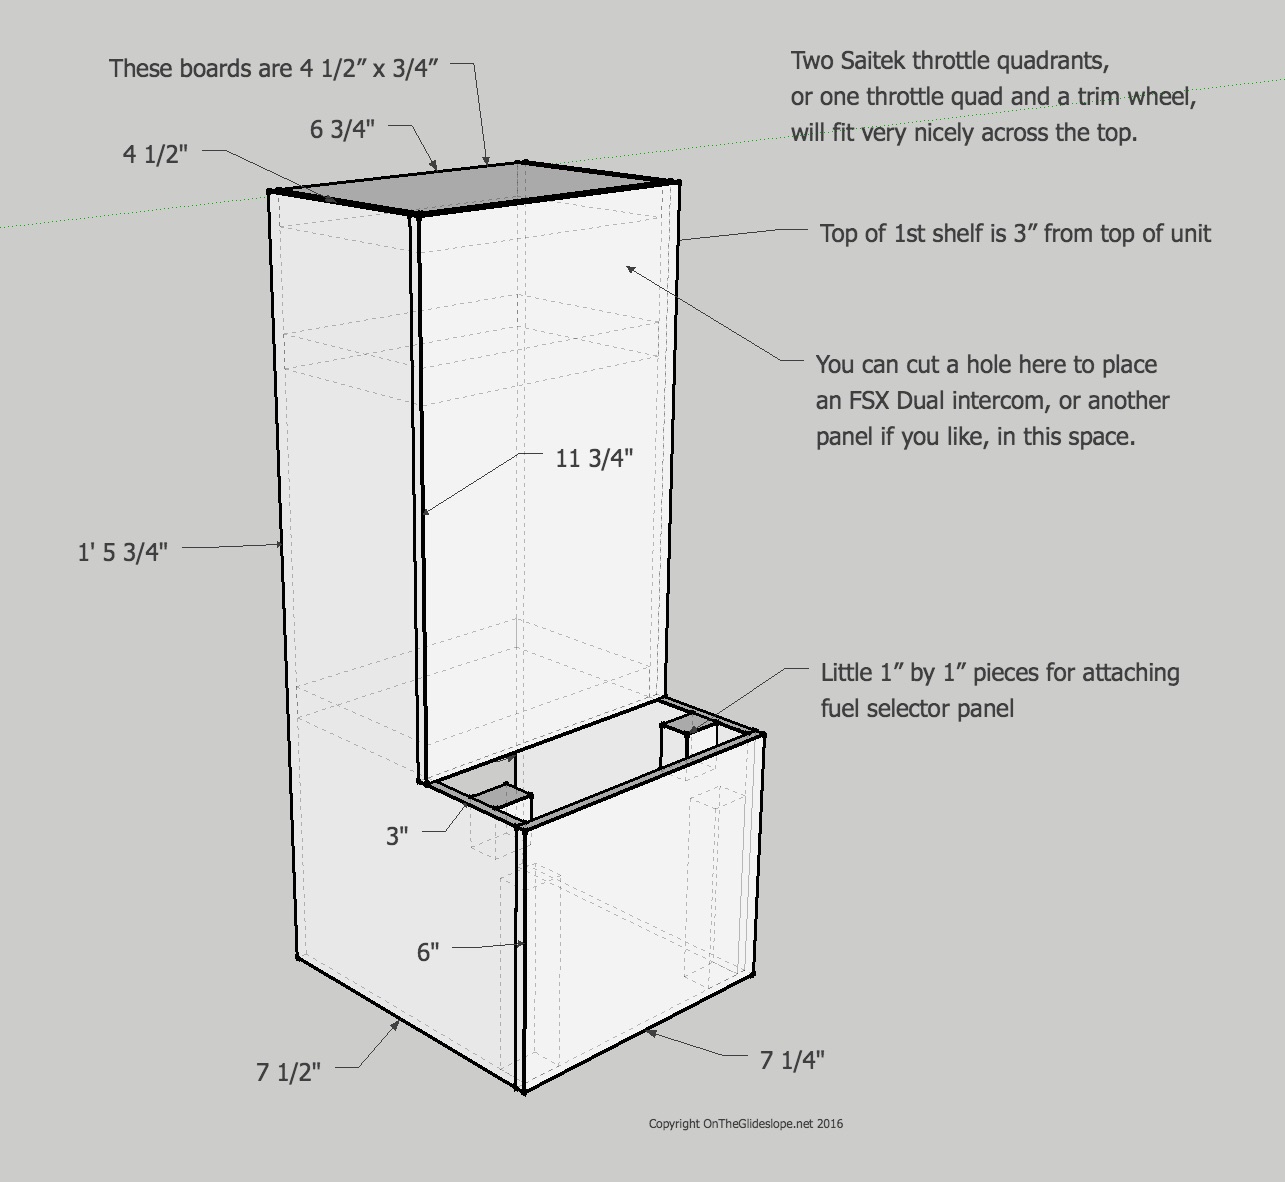
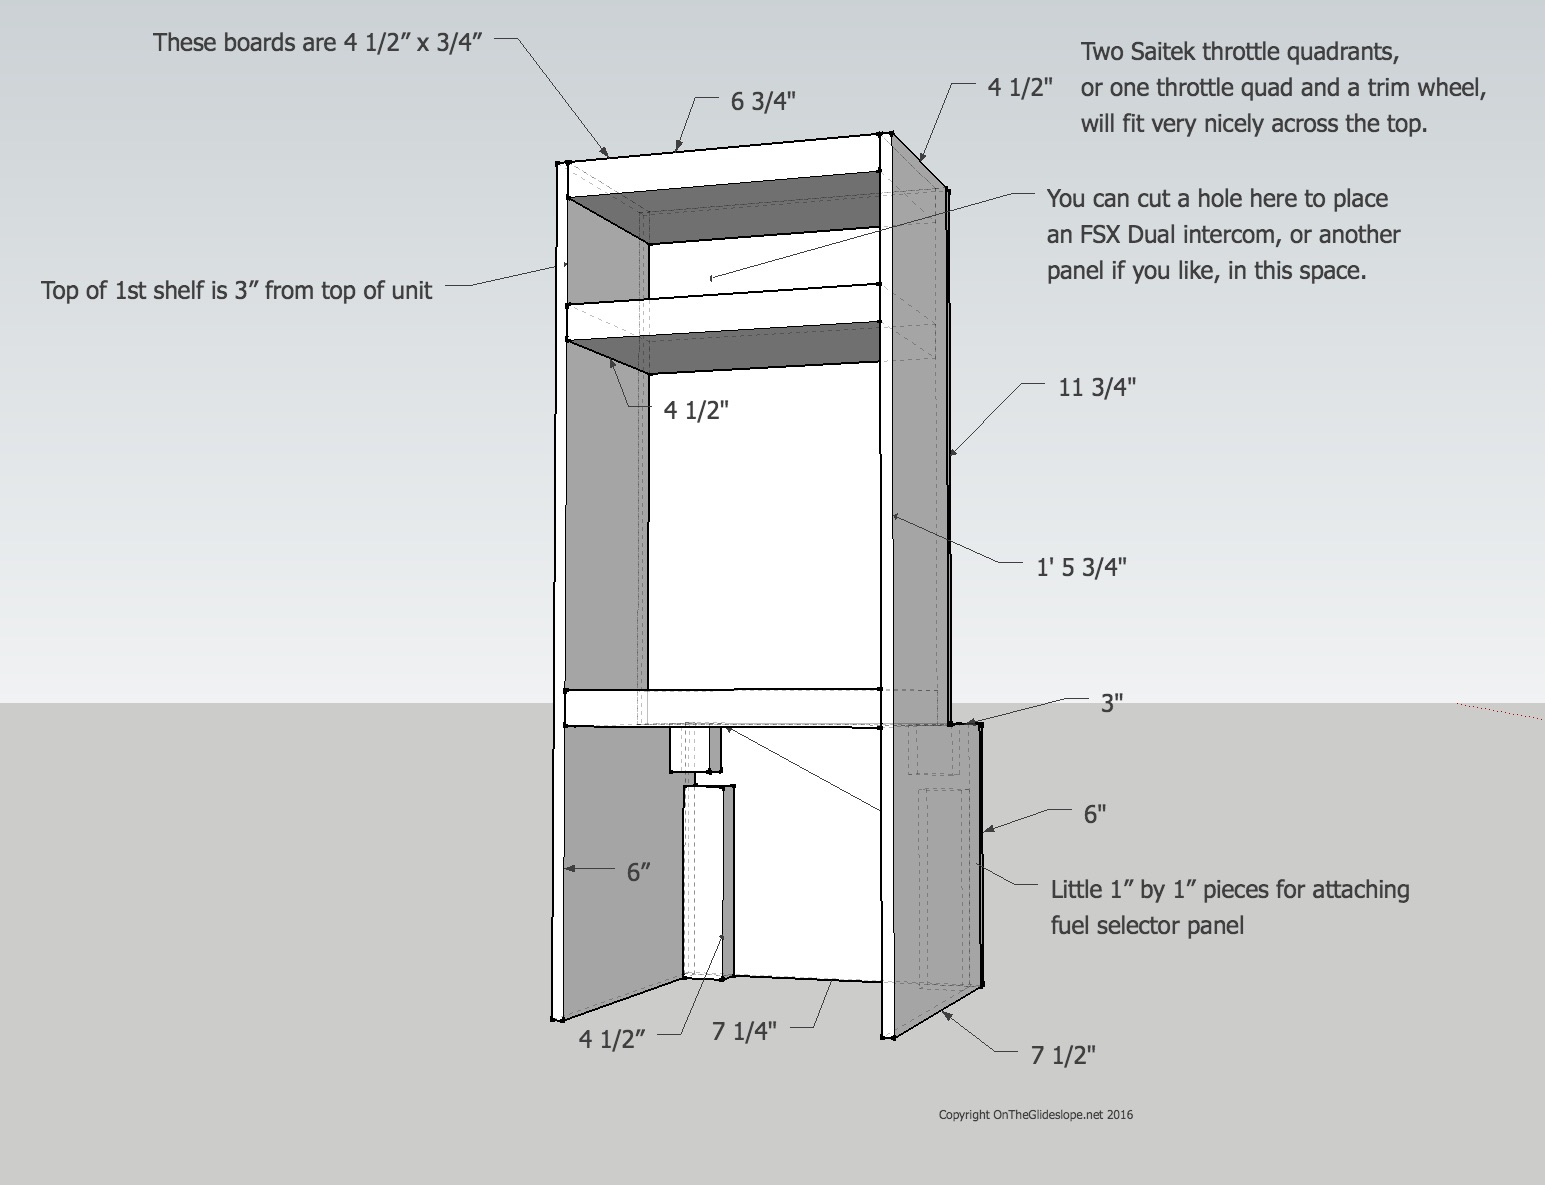
Center Pedestal Console Plans (An Early Holiday Gift For You)
Yesterday I was able to build the center pedestal console I’ve been wanting to build for some time, and I thought that today it would be nice to share my plans here as a holiday gift to the cockpit builders who frequent the site, and as a thank you for their readership. So here they are (and this is a preview of what will be in the guide I’m writing). Happy holidays!
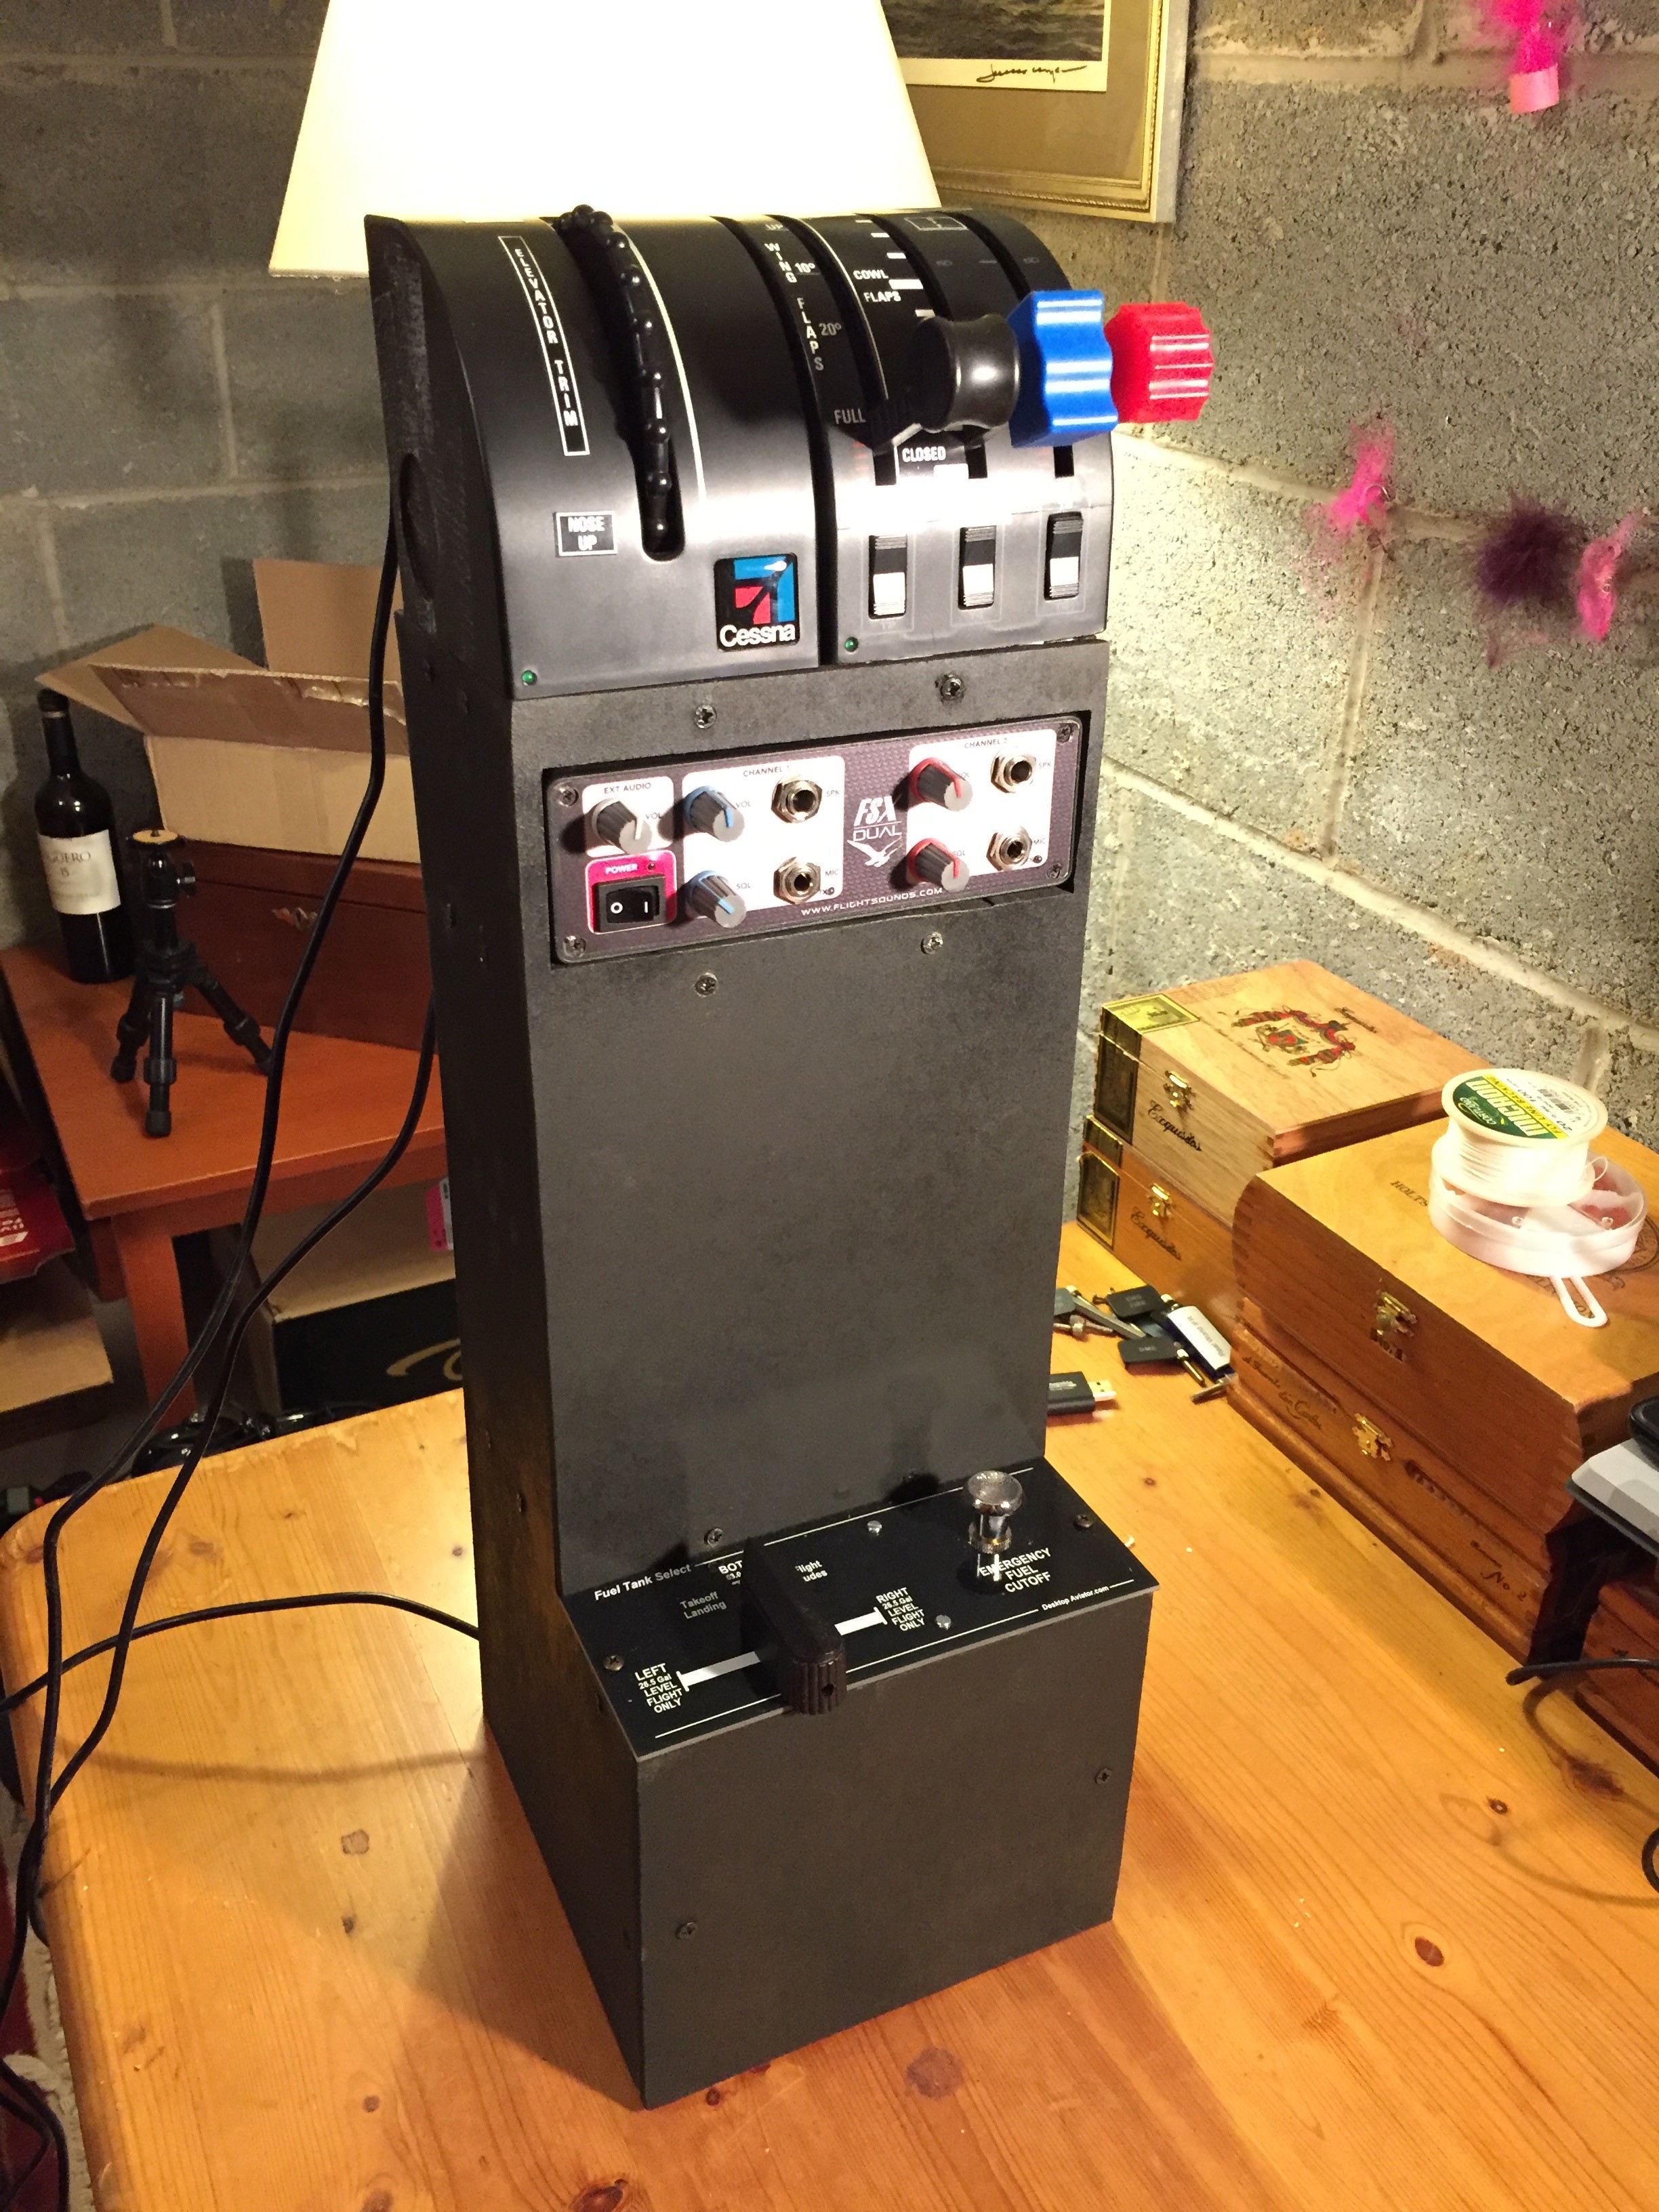
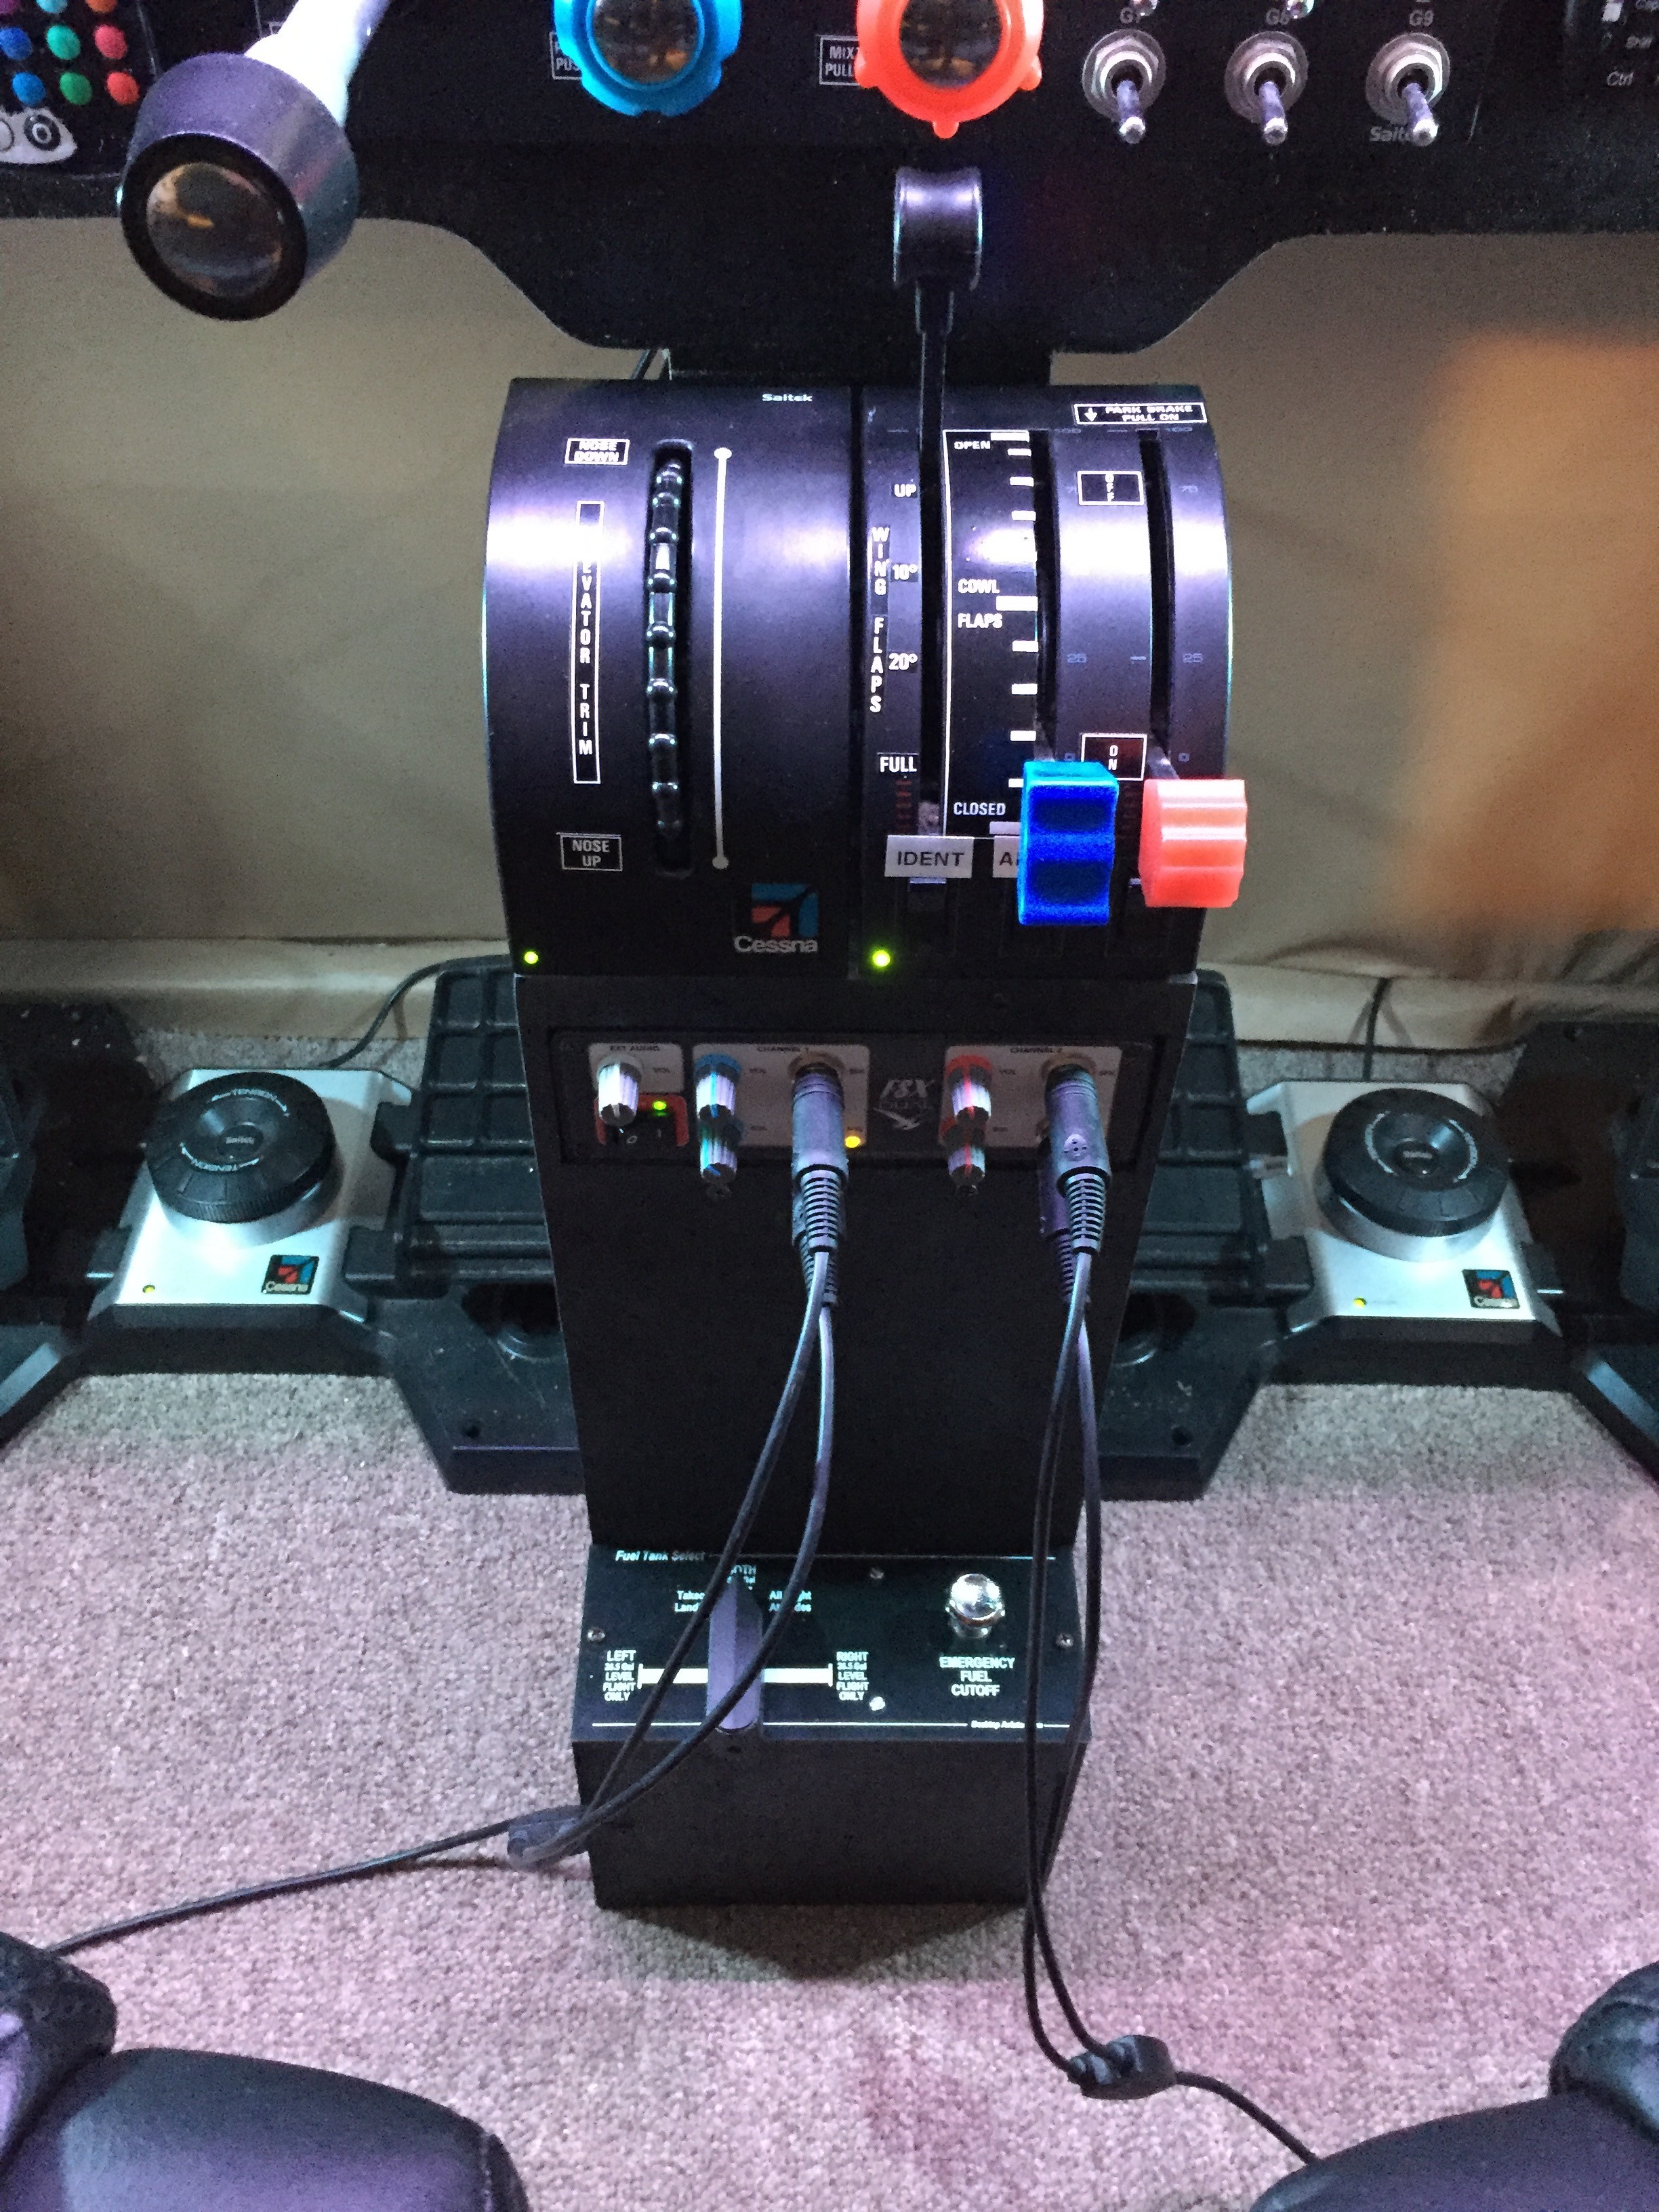
Finished!
Today’s Project
The New Panel (And A General Update)
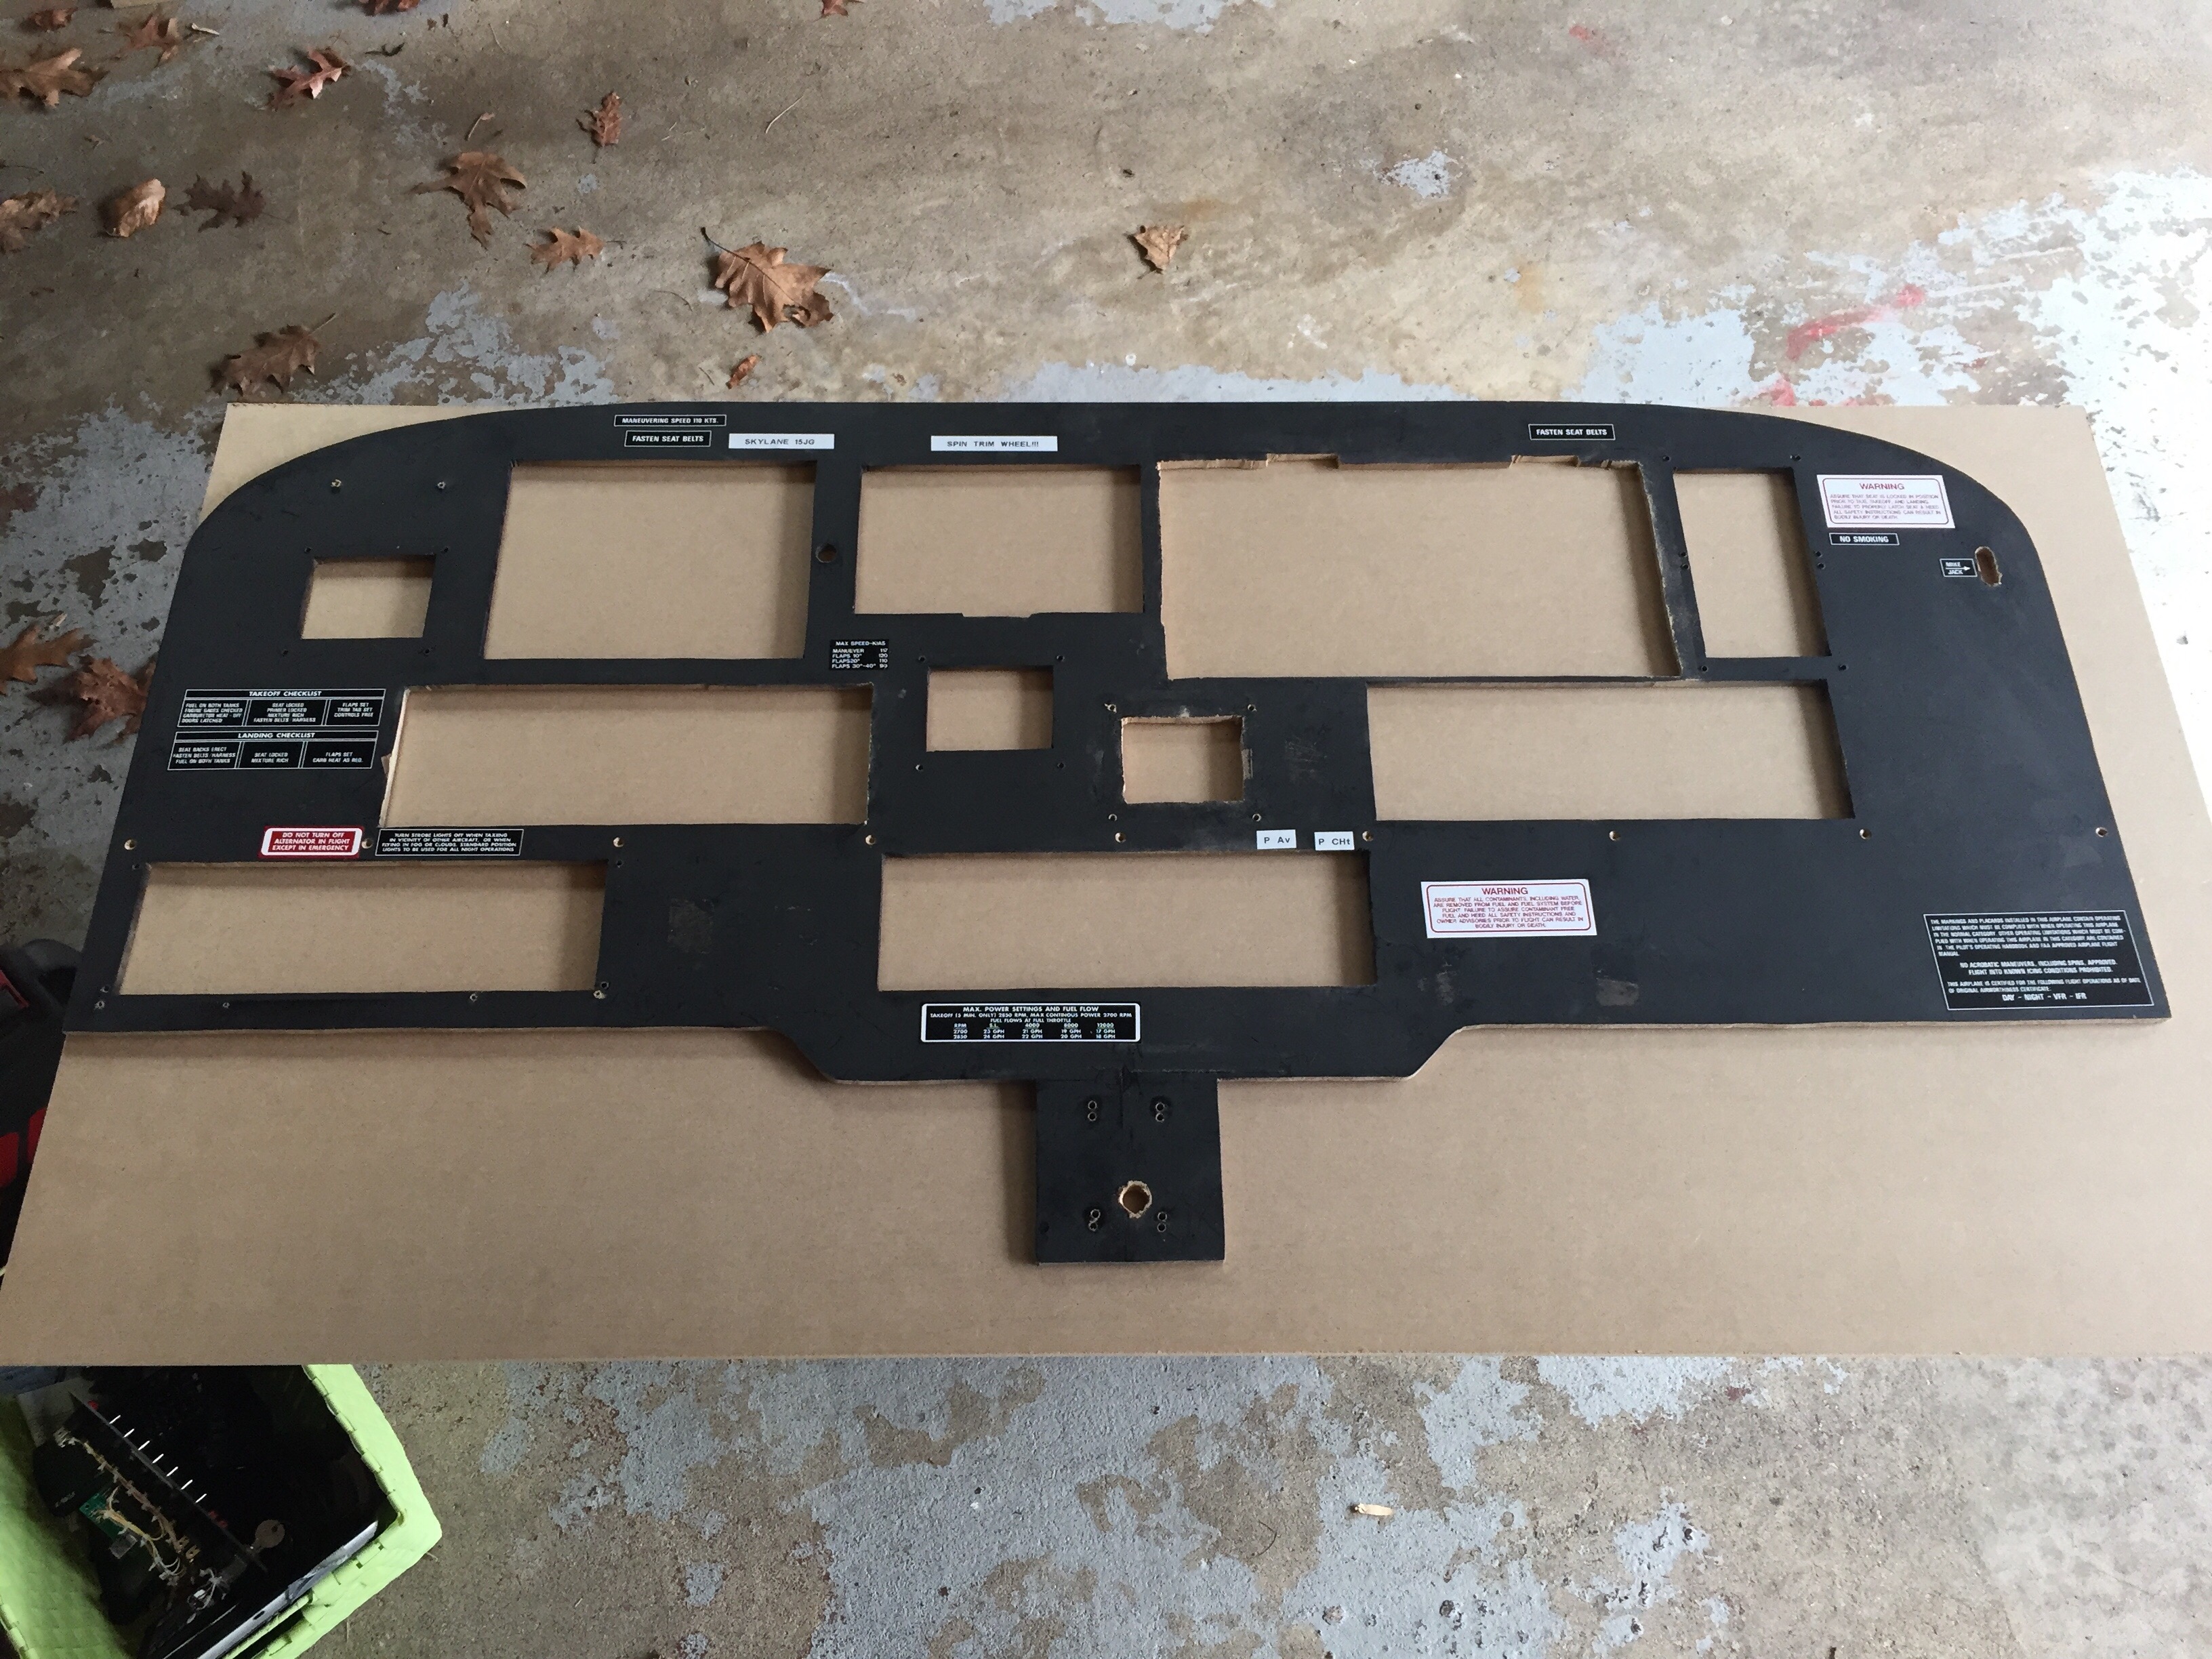
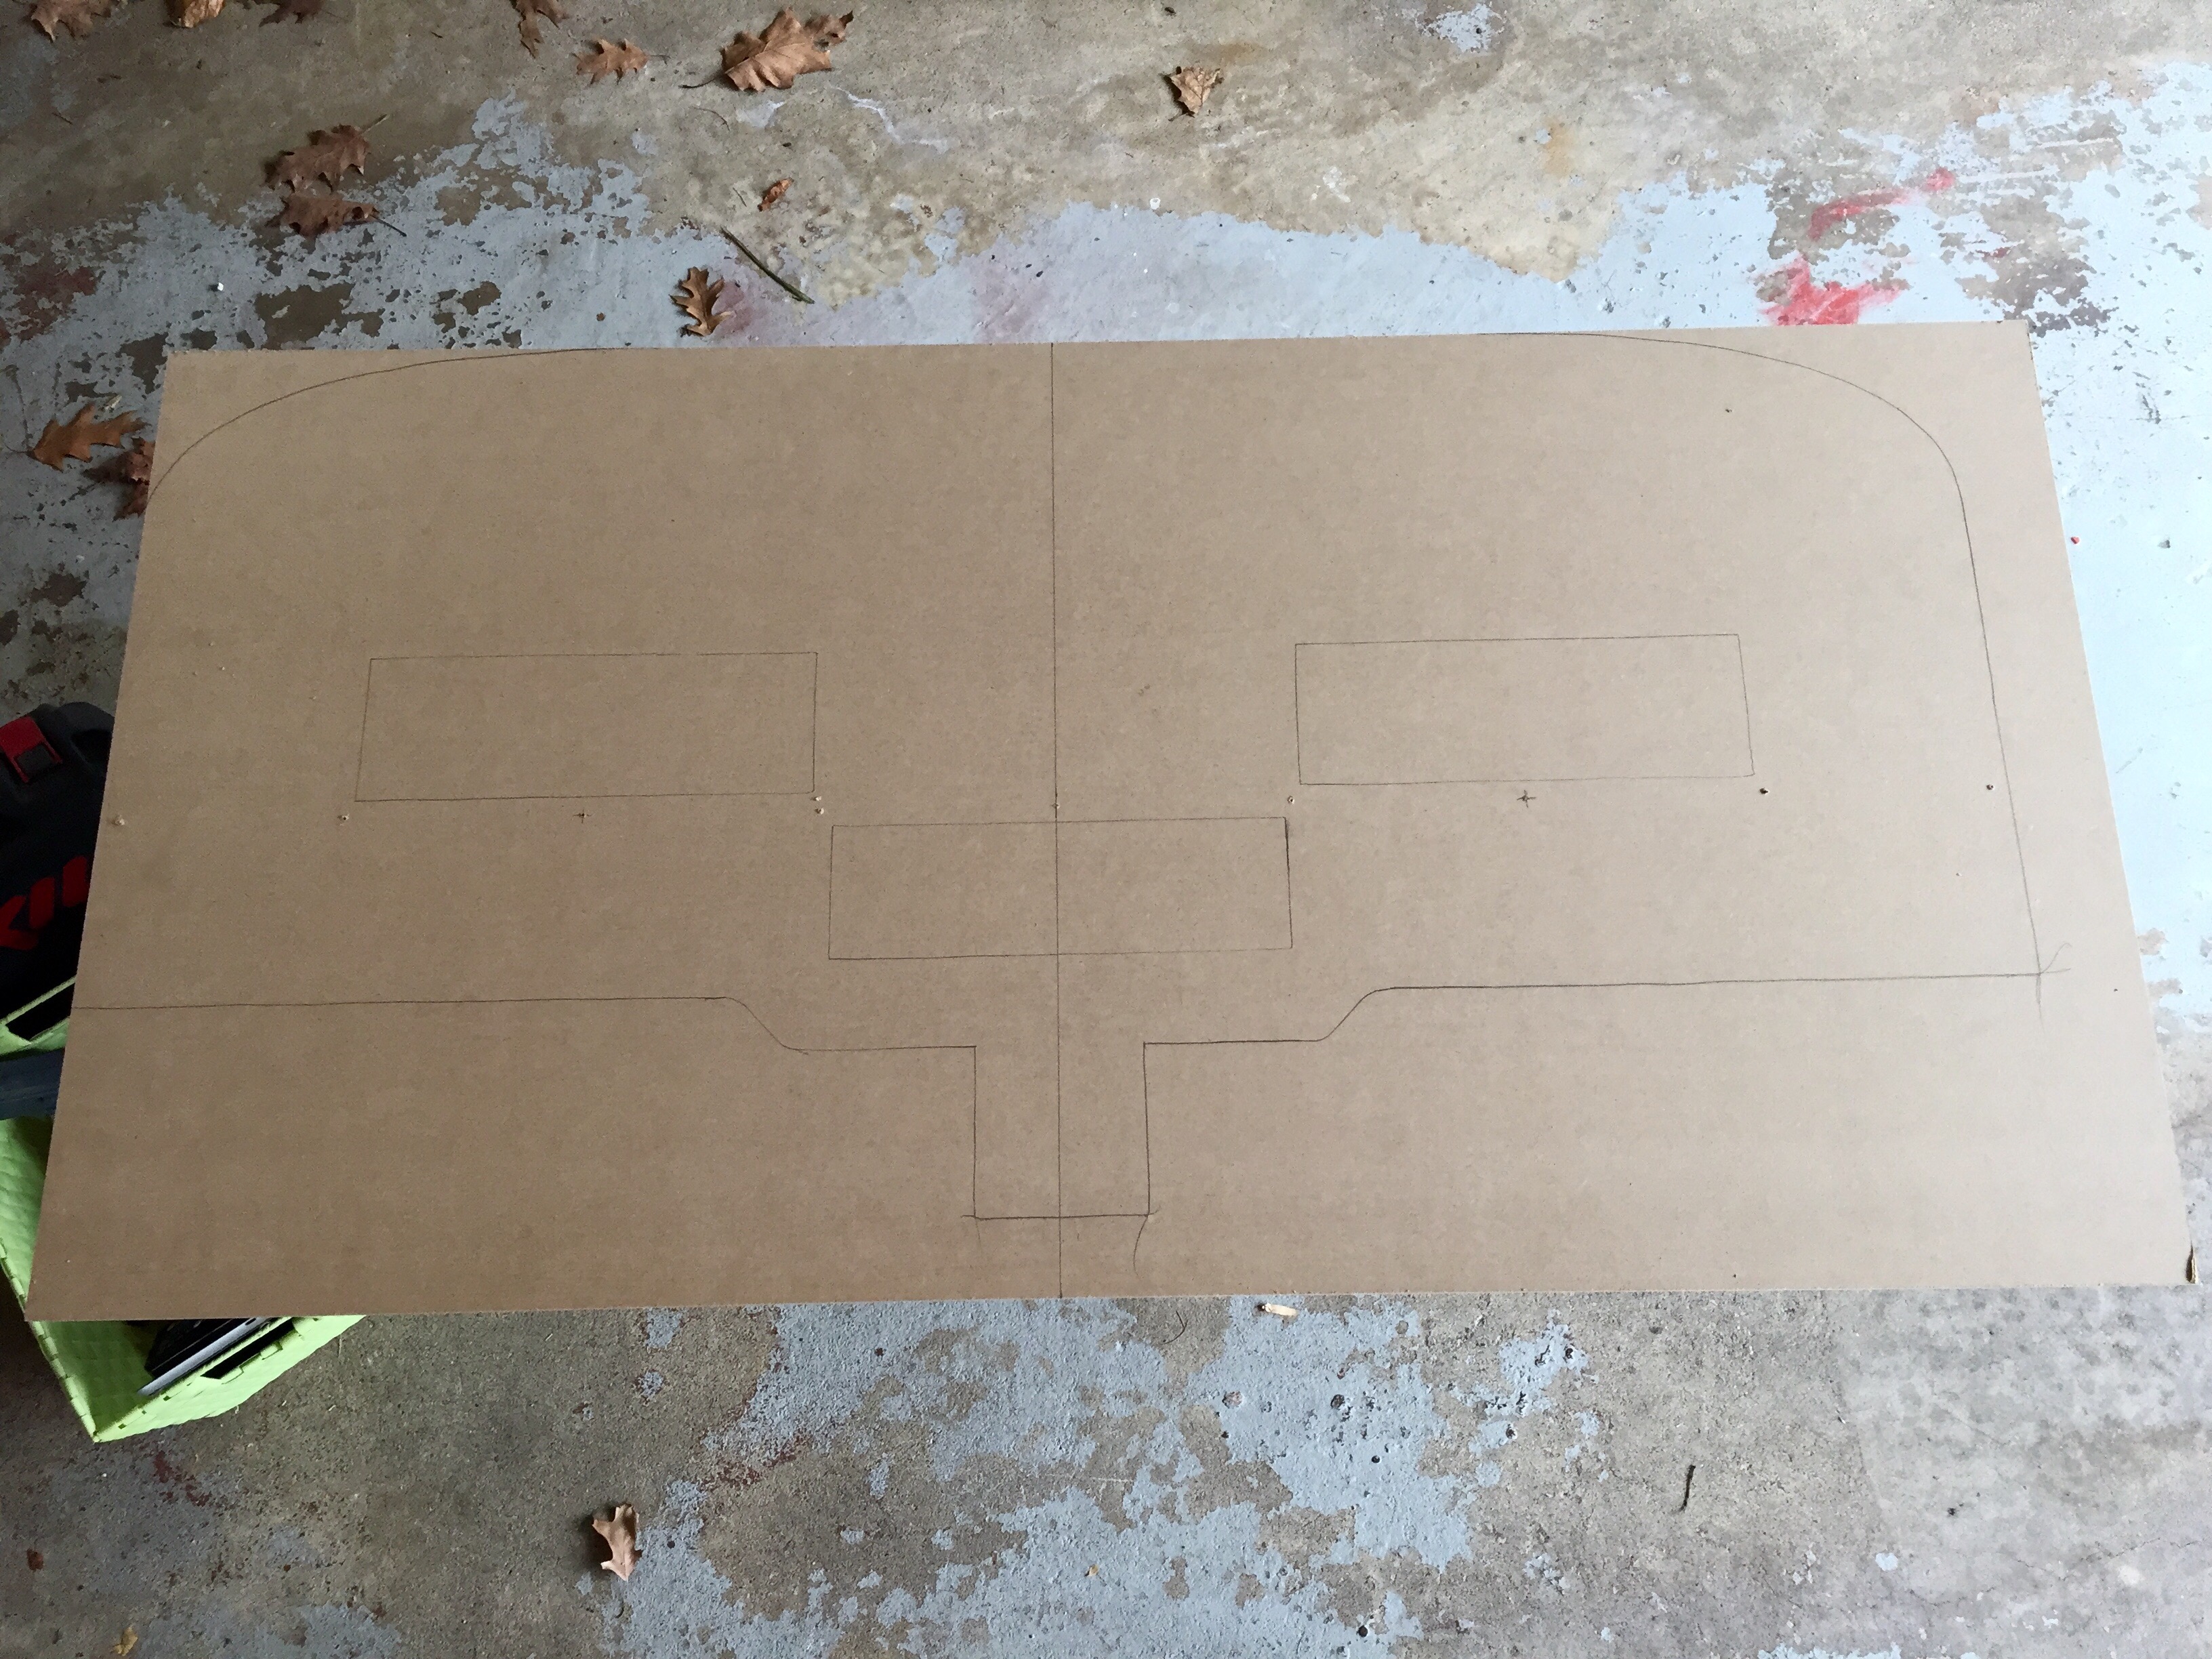
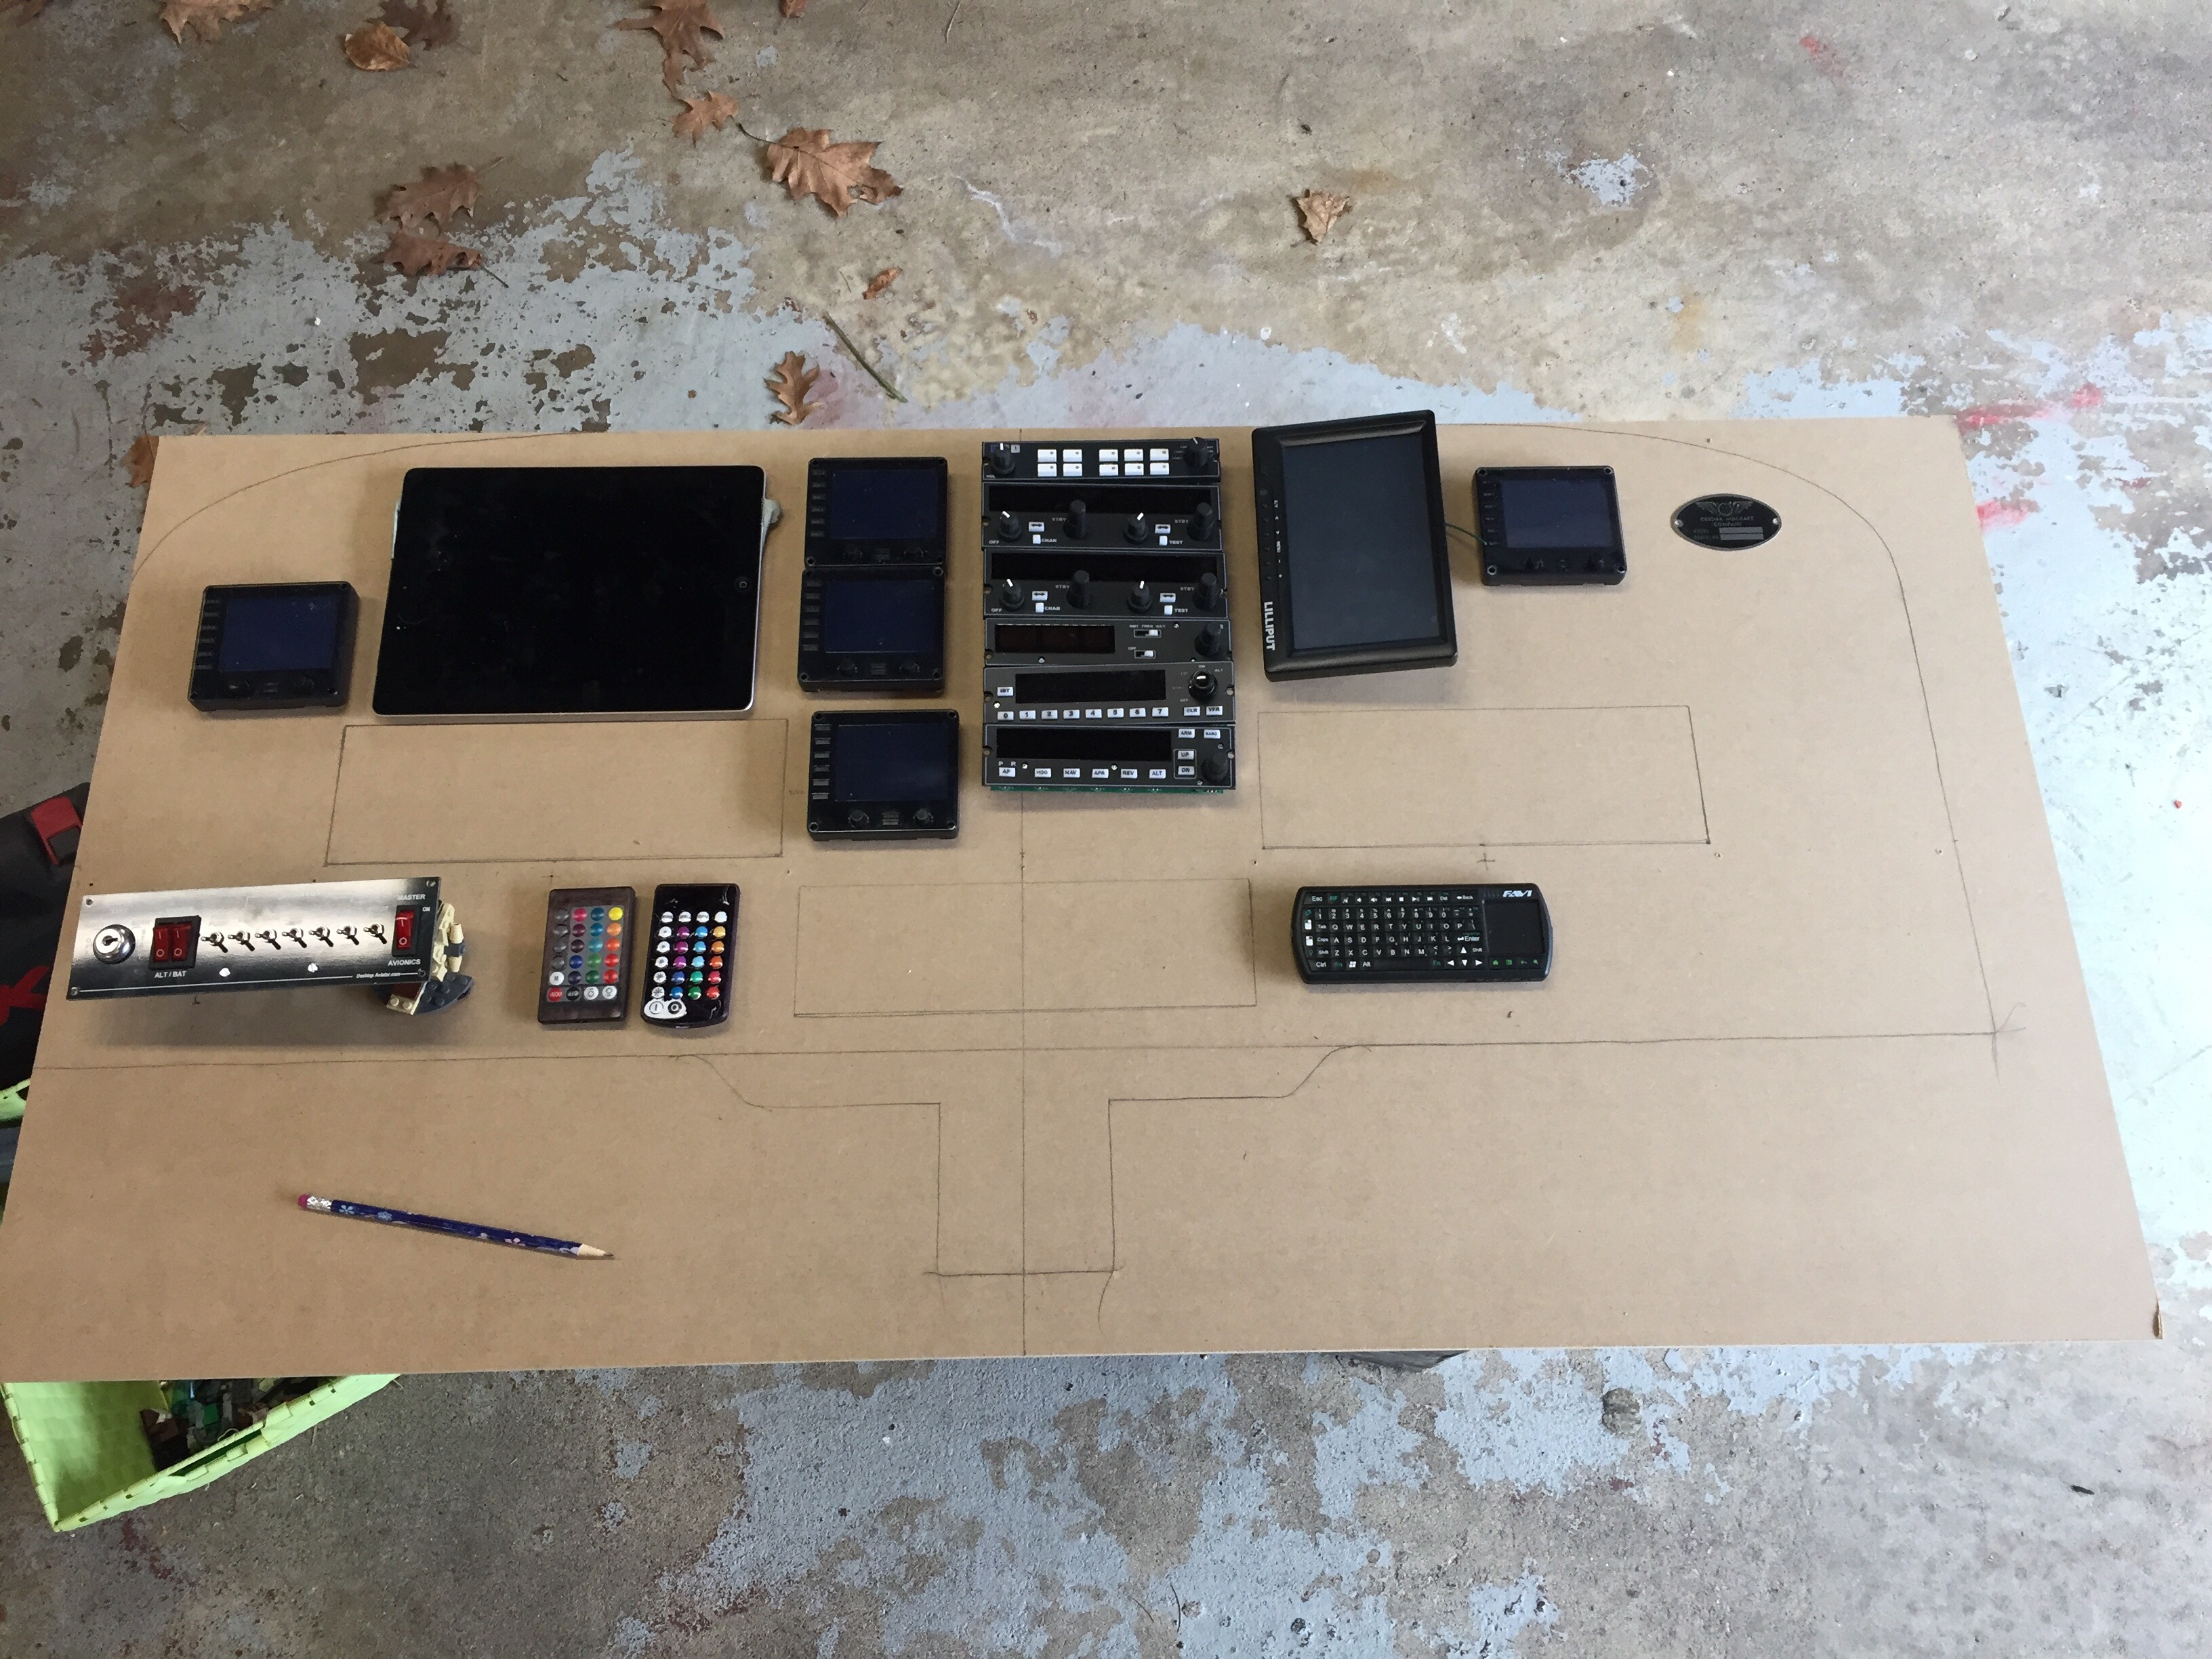
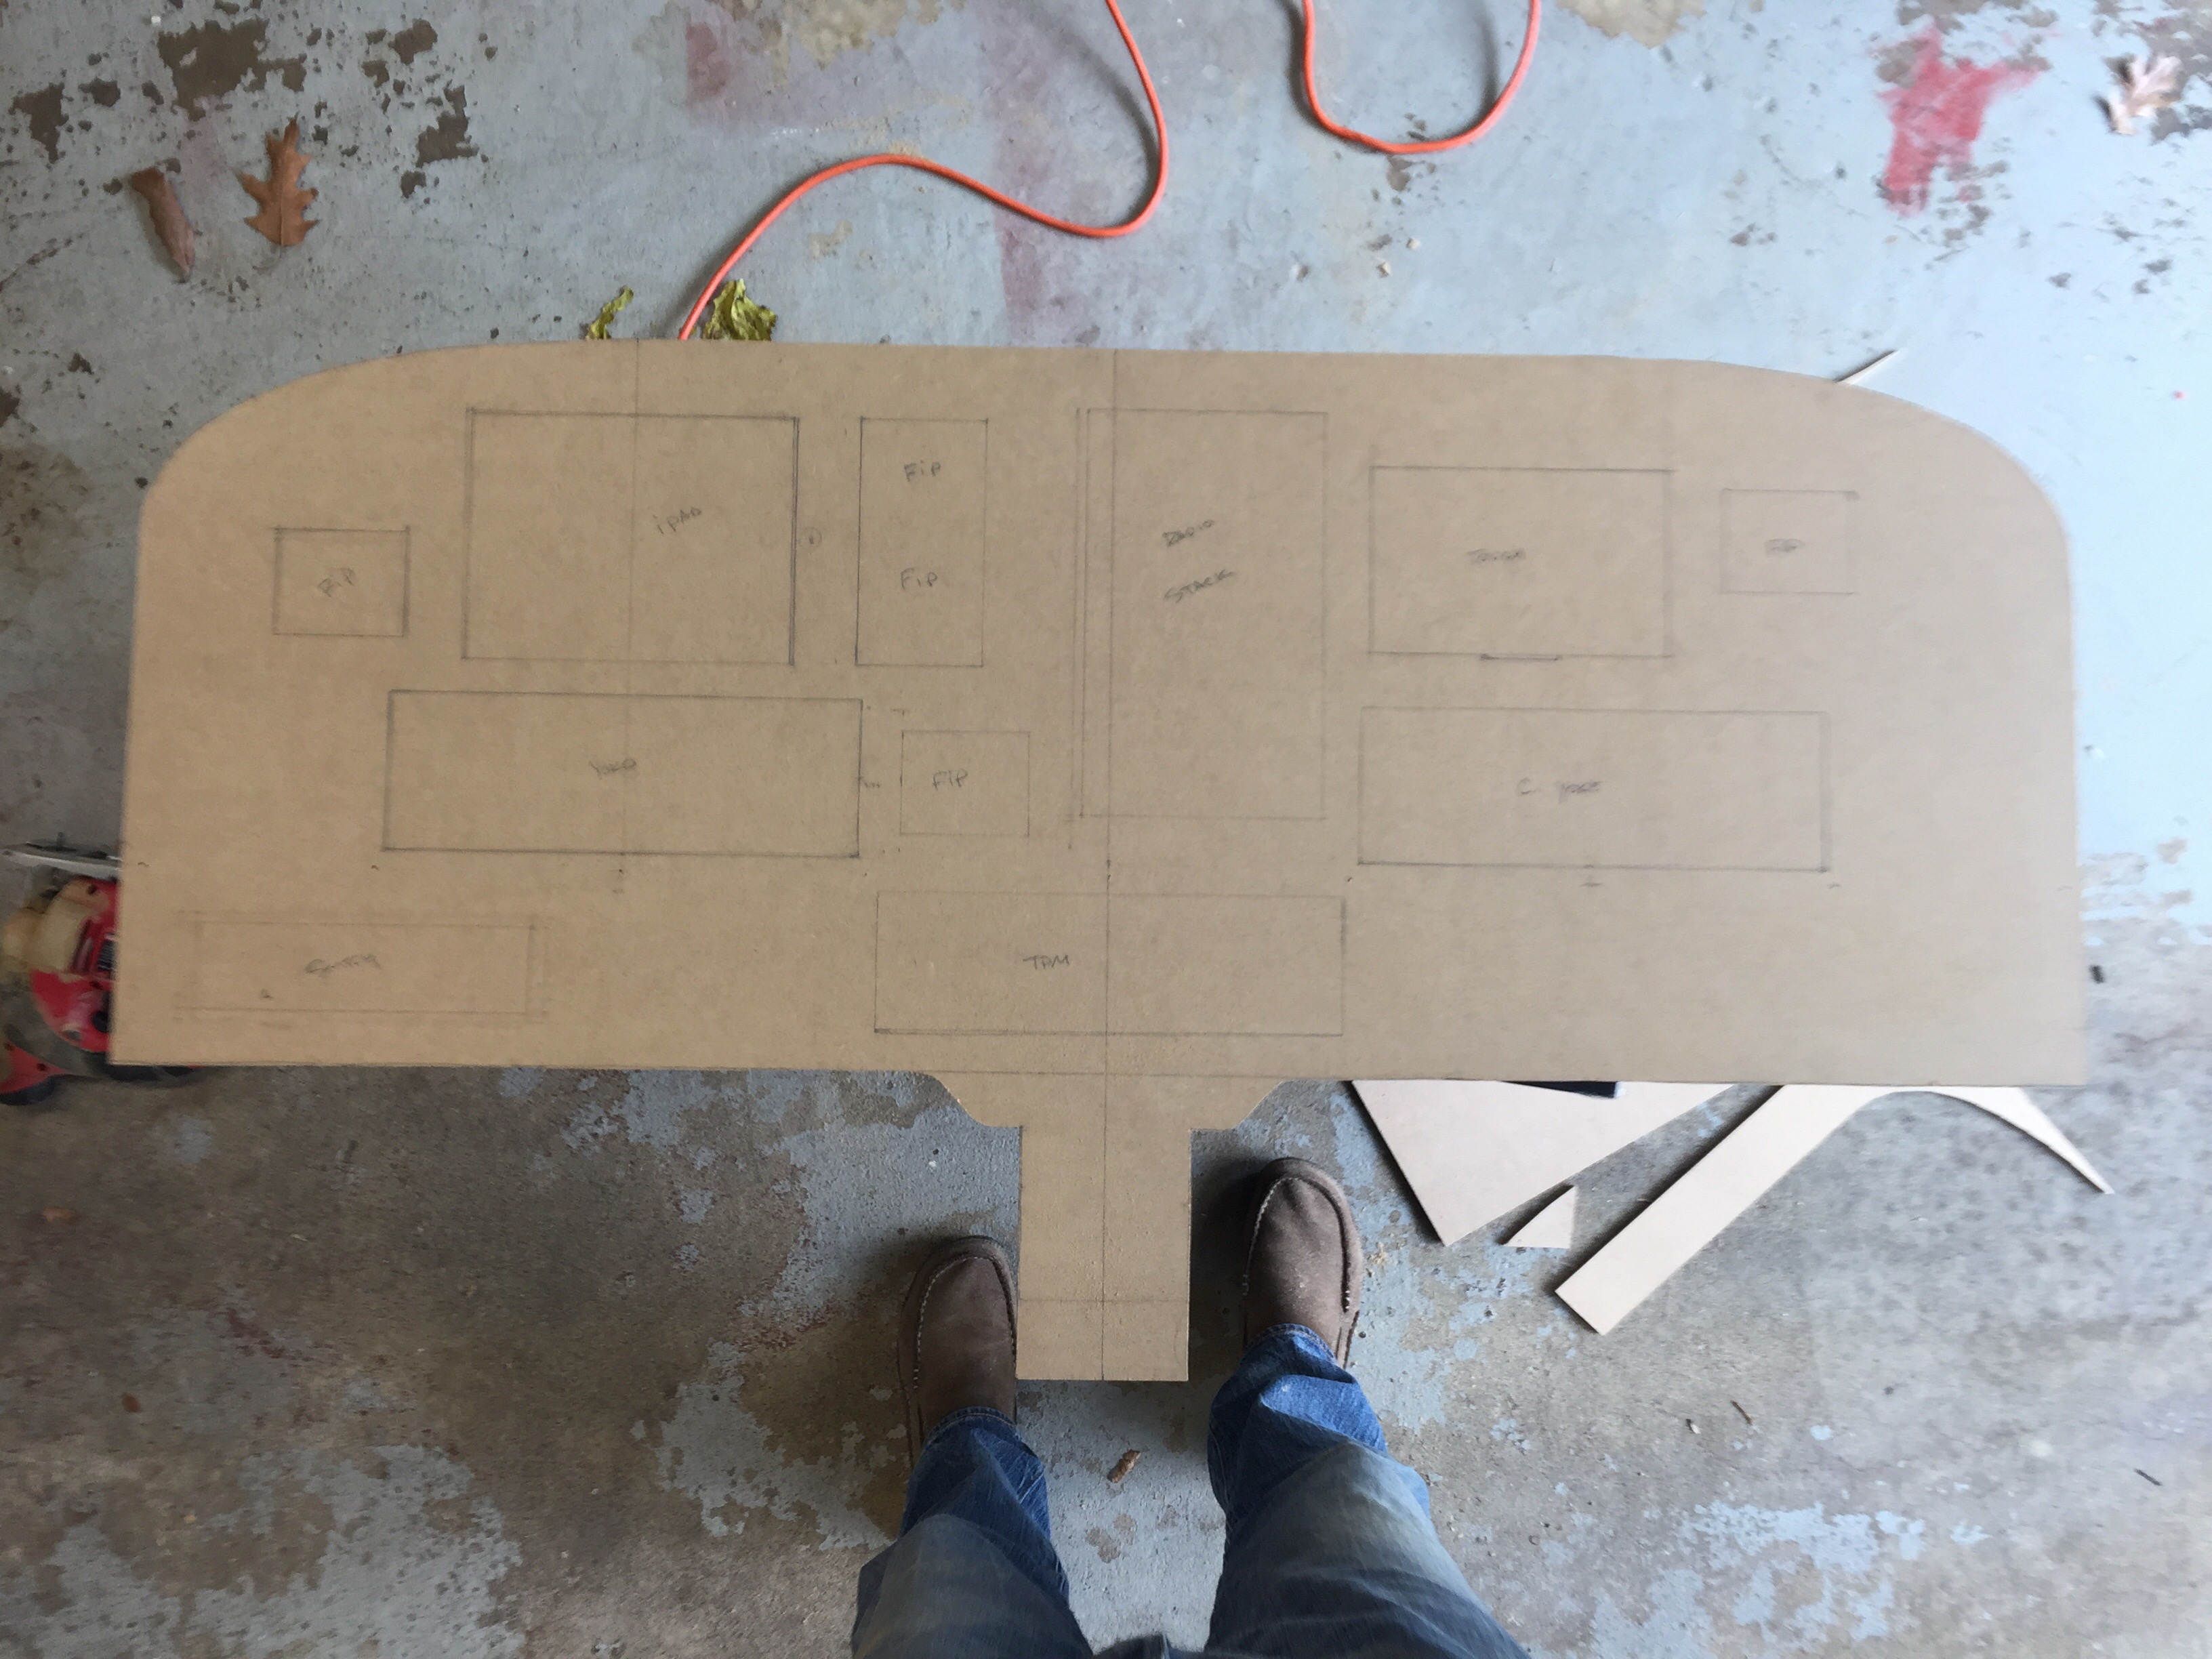
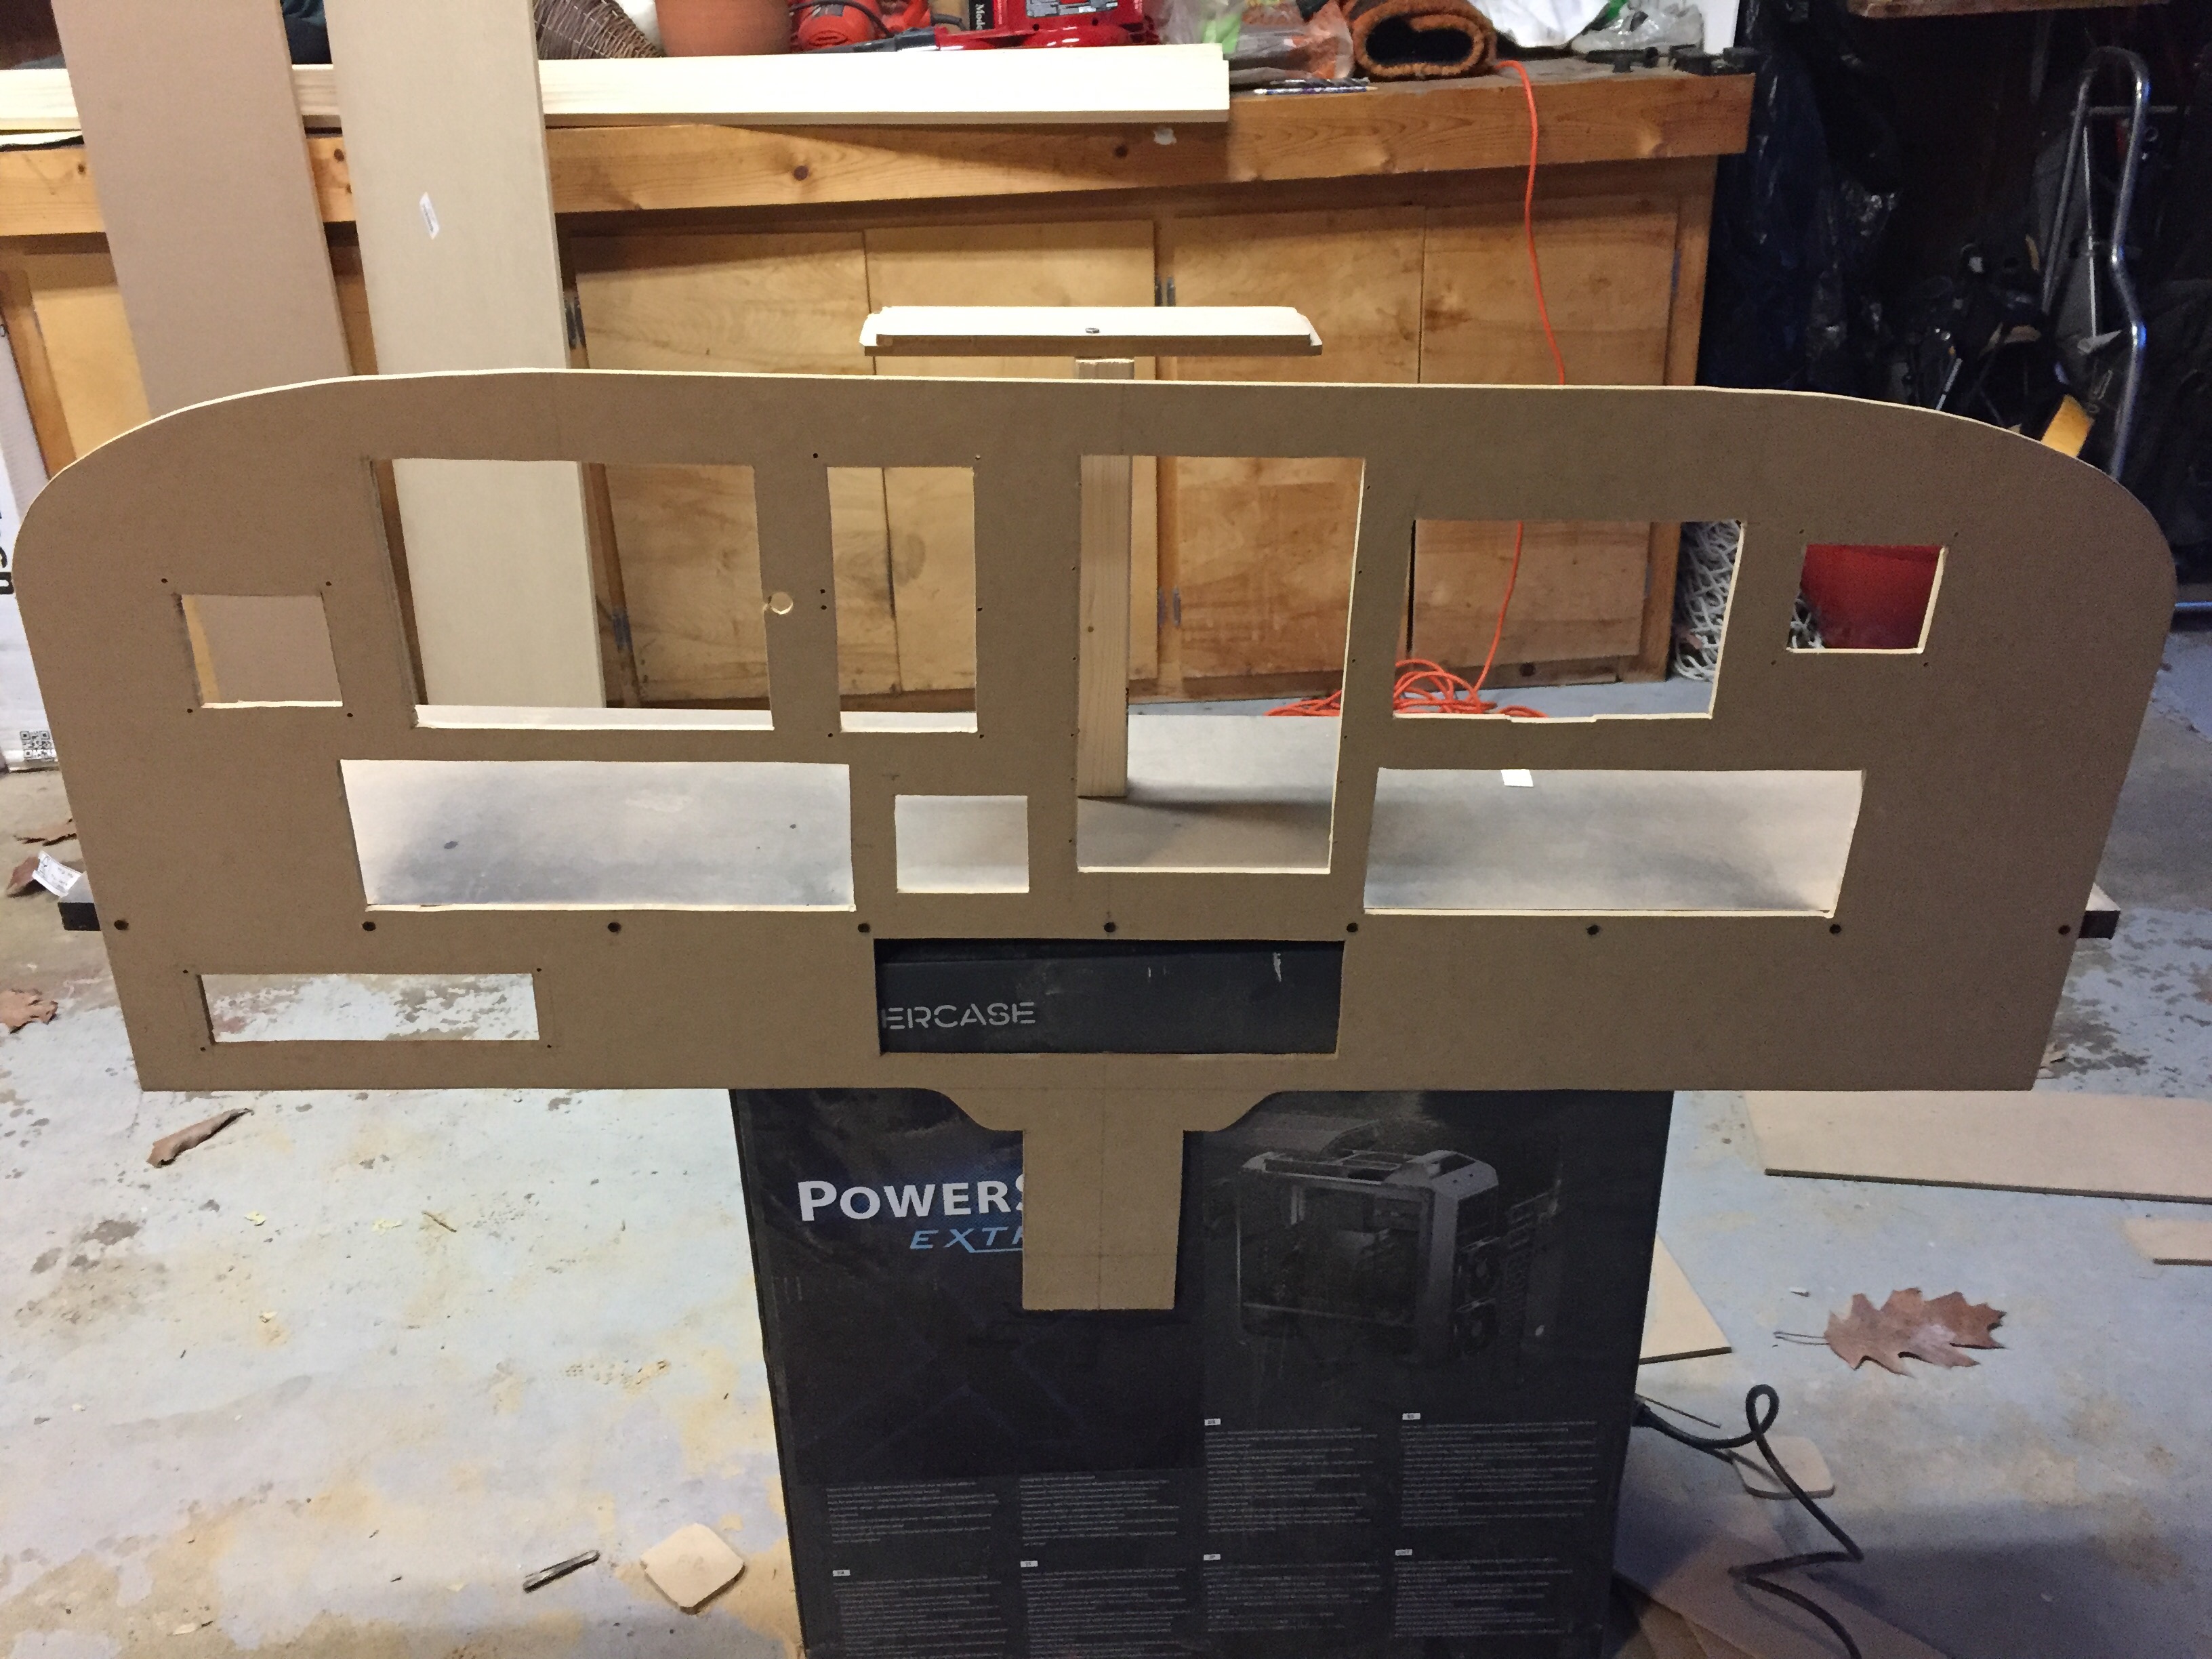
The new panel is done, at least for the most part. The placard stickers didn’t make it from the old one (the were tearing when I tried to remove them), but other than that it’s up and running, and there’s a short video below.
In other news the list of sim projects I have underway seems to keep growing, and right now the to-do list of work underway includes:
- Figuring out the final on / off switch config for the new radios (so they light up when I flip the avionics switch on the panel).
- Designing my first home-built airport for X-Plane (KOQN, my home patch).
- Building a center console for the sim that will hold the trim wheel, throttle quadrant, intercom, fuel switch (and perhaps a couple of cup holders) – and I hope to do this today.
- Lots and lots of “How To Simulate” flights and viewer request flights.
And of course, I’m still working on the still-lengthening guild to building a GA home cockpit. Yesterday was good for this, as it gave me fresh recall on a bunch of panel-related items, and gave me the chance to snap some photos that will help illustrate things in the book.
So it’s good the holiday season is here with some time off!
The Paint Is Drying
Coming Soon: My Guide To Building A Basement GA Flight Simulator
 I’ve been trying to post more and more information that can help folks build their own Basement Simulator, and have finally decided to take the plunge and write a guide on the topic. I do NOT want to offer something that goes into significant detail about the software, hardware, and PC side of things, as Sim Samurai’s Ultimate Guide To Advanced Flight Simulation achieves that with far greater detail than I’ll ever have to offer. (And if you’re planning to build a home sim and haven’t purchased the UGTAFS, I can say it was one of the first things I did when I got started, and it’s worth the price.) Rather, I want to offer something that describes in reasonable detail the design I’ve used, choices I’ve made, and lessons I’ve learned in building the Basement Sim — including plans, tools, and parts — so that others who wish to build a similar GA cockpit can more easily do so. My vision is something that will be enough of a detailed resource that someone could use it to build and start flying in a sim like mine.
I began producing the guide yesterday, and have 18 pages written so far, including side, front, top and back plan elevations. I hope to complete it sometime next week. Because of the time and energy invested, I do plan to offer the guide for sale, and expect to do so for somewhere around $30 with a full money-back guarantee if people who buy the guide aren’t satisfied with it. I figure the experience I’ve put into it is probably worth that, but we’ll see.
For those who are curious, here’s the current table of contents, and I presume each of these sections will make it into the final draft:
- INTRODUCTION
- OVERALL DESIGN
- TOOLS & PARTS
- Tools
- Parts
- COMPUTING EQUIPMENT
- TVS & PROJECTORS
- On Resolution
- The Projector
- Projector Or TV Front View?
- The TVs
- INSTRUMENTS, CONTROLS, AND AVIONICS
- Instruments
- The Wonderful FIP Gauges By Tom Tsui
- GPS
- Controls
- The Importance Of USB Hubs And Proper Power
- Final Thoughts On Avionics And Controls
- BUILDING THE FRAME
- Basic Frame Plans
- Side Elevation
- Top Elevation
- Front Elevation
- Back Elevation
- The Panel
- SIDE PANELING
- UPHOLSTERY & CARPET
- THE GLARE SHIELD
- TRIM
- Placards & Stickers
- Real-World Parts
- LIGHTING
- INTERCOM & HEADSETS
- SEATS
- OTHER TOPICS
- FSX, P3D, or X-Plane?
- Rumblers
- GoPro and Video
So stay tuned! I hope it will be a valuable resource for others looking to pursue the hobby as I have.
The Long Awaited Basement Sim Schematics
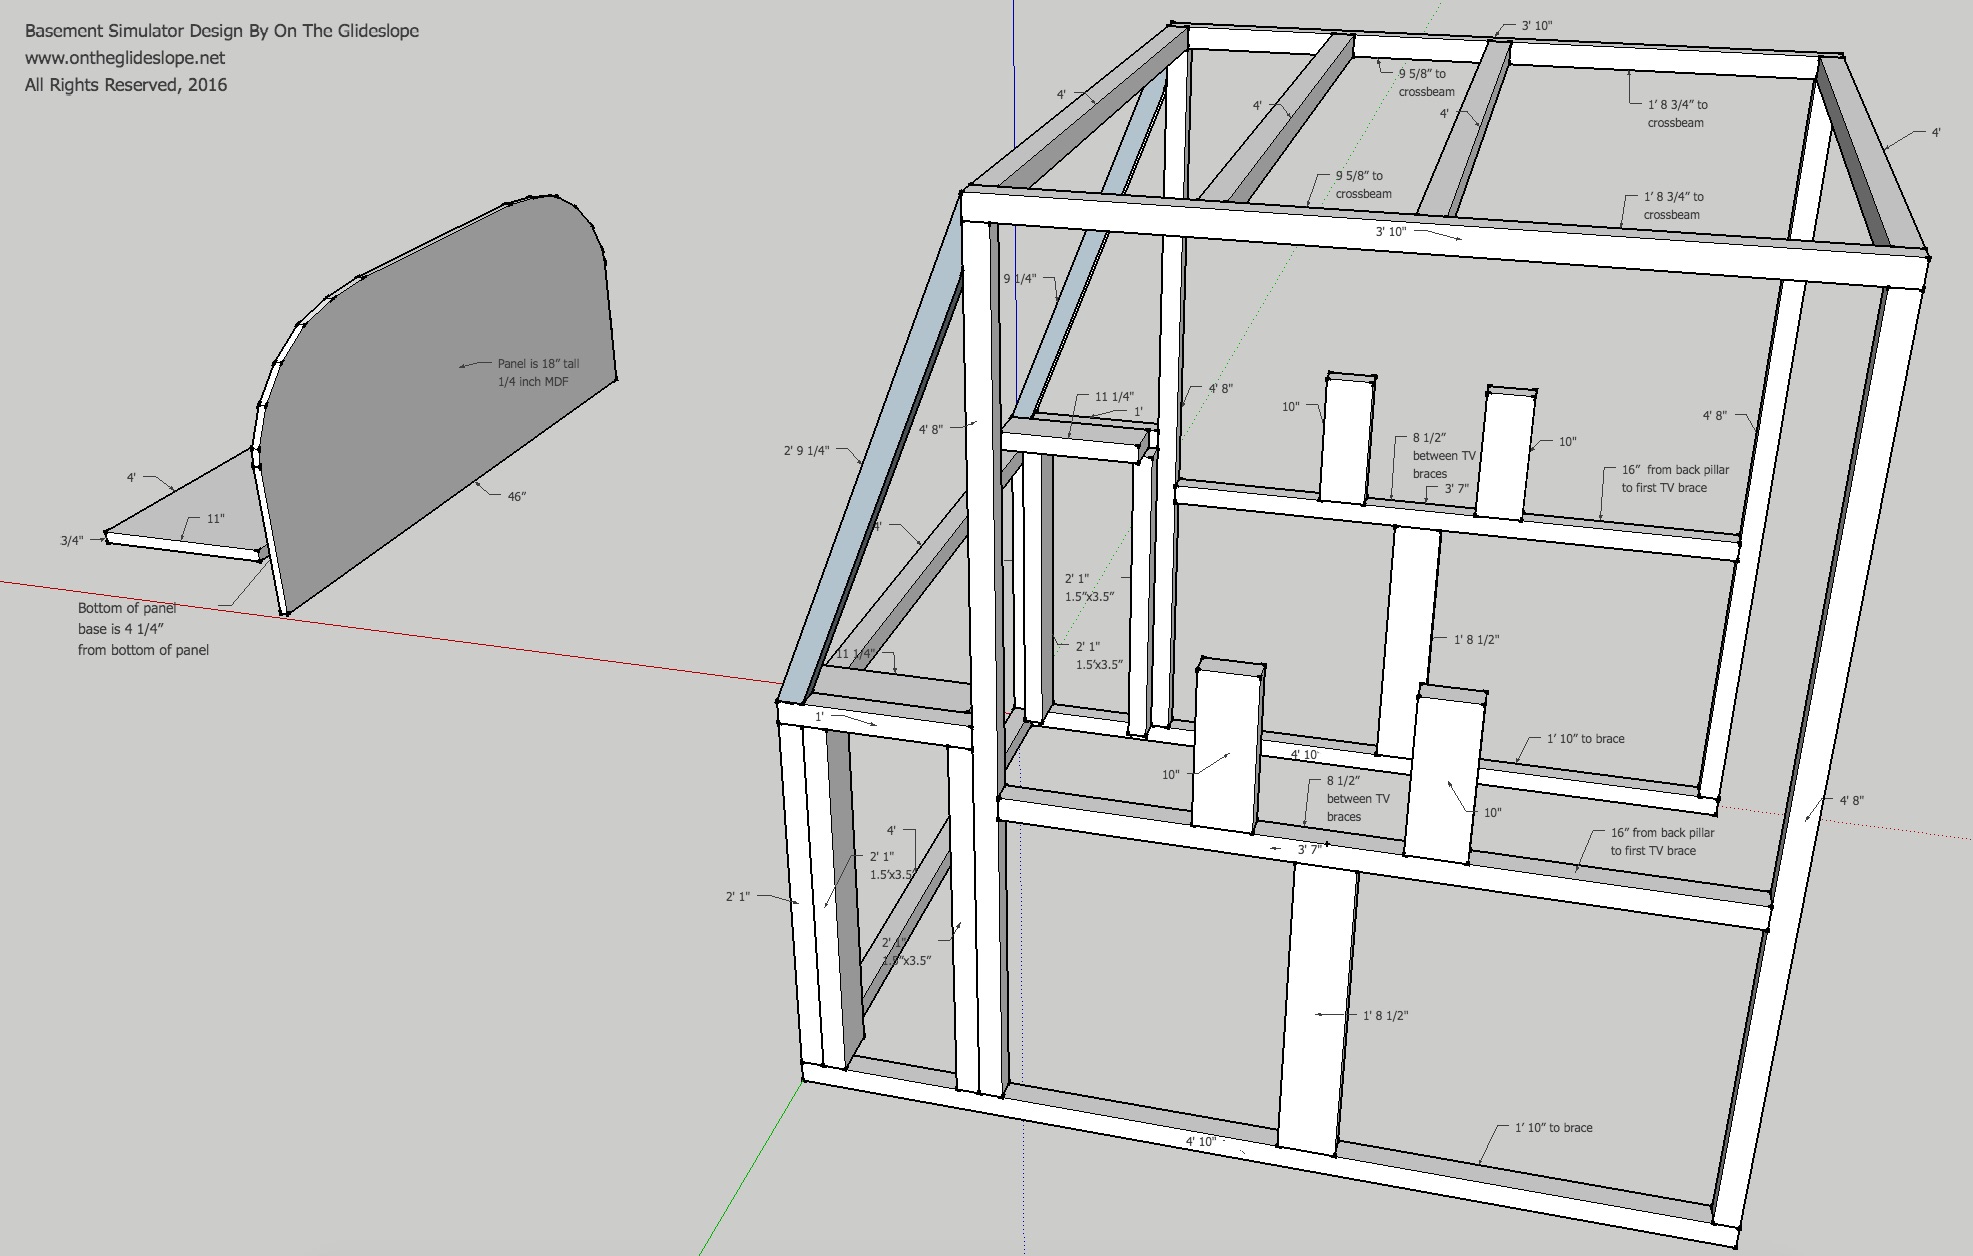
Readers have been asking for my plans since I put the site online, but my early Google SketchUp files were rough and I made some changes during construction, so I haven’t posted them. Today I took the time to get them in order, and here they are. I will put together a more detailed set that includes the basic supplies I used as well, but in the meantime I figure this will help those looking to build their own basement simulators. I’ve been really flattered by the number of simulations enthusiasts who have started building their own based on what they’ve seen here, so if this can help them and others on their journey, I happy to offer it.
First, the lumber (and remember to measure twice, cut once!) …
Cut from 1 1/2″ x 1 1/2″ studs:
- Six 4′ cuts
- Two 3′ 10″ cuts
- Four 4′ 8″ cuts
- Two 3′ 7″ cuts
- Two 4′ 10″ cuts
- Two 2′ 1″ cuts
- Two 1′ cuts
- Two 2′ 9 1/4″ cuts
Cut from 1 1/2″ x 3 1/2″ studs:
- Four 10″ cuts
- Two 11 1/4″ cuts
- Two 1′ 8 1/2″ cuts
- Four 2′ 1″ cuts
1 piece 3/4″ x 11′ x 48″ MDF for the panel base
1 piece 1/4″ x 18″ x 46″ MDF for the panel itself
In terms of other supplies, I used long wood screws to connect the frame pieces together, and metal L-brackets to brace the corners (screwed in with 1/2 inch wood screws). Note that I DID NOT attached the panel base to the cockpit frame with screws. It simply sits on top, which makes it easy to adjust and take in and out.
And here are the basic plans: a .JPG here and a .PDF here. The panel template (which is a life-sized C172 panel schematic as a PDF) is here. Note that the panel PDF is 42″ across, and that I cut the template in half so I could make it 46″ wide. I hope it helps, and good luck!
I’ve been saving for this and finally pulled the trigger. Here’s a quick look at the Basement Sim’s new avionics from FlightIllusion (http://www.flightillusion.com). I can’t wait to start flying with them! Thanks for watching.
Why Do I Use A Projector And Not A Front-View TV?
I get this question quite a bit here and on YouTube, and recently answered in the question thread for a post here, so I thought I’d add the answer here as well. This is slightly amended from the original.
The reason is field of view. While the front window of the cabin is about 46″ in diagonal, from the seats in the cockpit the actual field of view is much wider, especially if you want both the left and right chair to have an immersive view without seeing the edges of a screen. The projection screen hangs just two inches in front of the front edge of the cabin. It’s a 100-inch screen, and even with a screen of that size if I lean forward too much over the glare shield I can see the edge of the screen. One option would be to tilt-mount a big display to the cabin’s front-slanted lumber, but that would probably not look immersive as the viewing angle would be at a significant down-facing degree. I would love to have a TV for the front view just to have similar view quality all way around, but 100-inch TVs are a bit out of the price range right now (NEC makes one for $33,000 – the price of a nice used Cessna 172l; Sharp makes a 90 inch for six grand). So I go with the projector. I use an ultra-short throw because with the height of my ceiling and the height of the cabin, a projector mounted too far back casts a shadow over the screen as the beam hits the top of the cabin. So the projector needs to be really close to the screen (in my case, just about 24 inches). Finally, I also like the projection screen because I can look around the edge of the window a bit to find the field on final approach, just like in the real world.
