The creator of this great Saitek driver replacement utility has posted a good getting started video on YouTube. Recommended.
The creator of this great Saitek driver replacement utility has posted a good getting started video on YouTube. Recommended.
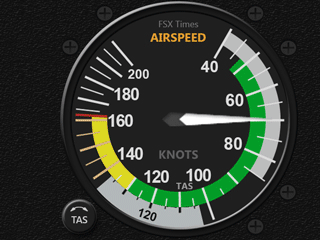
The remarkable Tom Tsui at FSX Times has updated his C 172 gauges for the Saitek FIPs. Can’t wait to install them this weekend.
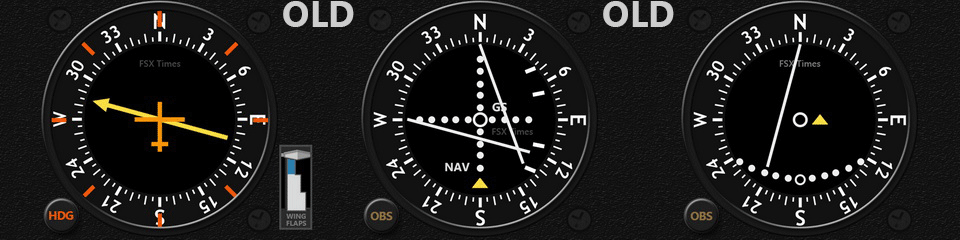
If you use Saitek Flight Information Panels, you really can’t beat Tom’s rapidly growing collection of instruments, and his service is excellent. I’m a huge fan. Thanks for your work, Tom!
I love A2A’s aircraft, and have three: the Cessna 172 Skyhawk trainer, the Cessna 182 Skylane, and the Piper 180 Cherokee. Of these, the 182 is my favorite and aircraft of choice. The A2A simulation, especially with its Accu-Sim component, makes this aircraft as realistic as I can imagine it could be for a simulator. This includes knowing how to start the sucker, which can be a challenge unless you’re into flooding the engine, fouling the plugs, and possibly running down the battery. (But this is why we have checklists, and if you follow the real one for the 182, you’ll be just fine.) The sound of the engine, the flight mechanics (today I was flying and noticed a constant bank to the right, and sure enough that fuel tank was about twice as full as the other), the sound of the brakes and the creaks of the airplane … everything about the A2A aircraft is first rate and terribly realistic.
But I haven’t flown them much over the past month or two, instead sticking with the very nice Carenado 182T. Now don’t get me wrong — the Carenado is a great simulation aircraft. Compared to everything else out there, it’s first rate. But it’s not the same as the A2A. The A2A just feels and flies and sounds terribly real compared to anything else. It’s absolutely about the texture and immersion of the sim, and the A2A wins that hands down. But I’ve foregone it for one reason: it hasn’t played well with the myriad Saitek panels and avionics I have running in the sim.

This problem is well-documented. Still, I haven’t found a good solution, and it’s boiled down to three things: getting the master battery and alternator switches to work correctly, getting the fuel and engine gauges on Tom Tsui’s great integrated fuel gauge to read correctly, and getting the RPM also on Tom’s RPM gauge to read correctly. There’s a fix for the battery / alternator issue, and at times the engine gauges would mostly reflect what the A2A would show on the virtual cockpit panel, but the RPM gauge as always very far off from reality (also well-documented).
Well, today I finally found the fix. It was a roundabout way of getting there, but get there I did. And now the A2A is absolutely perfect, and I can’t wait to fly these aircraft for many years to come. Here’s what worked: First, I deleted all Saitek software and drivers, including the folders in Programs and Programs 86, and only installed the Flight Information Panel drivers (NOT the FIP software) consistent with the guidance near the end of this thread. Then I installed the registered version of SPAD.neXt, activated its LVAR option, and activated SPAD’s A2A 182 profile. Then I changed this line in the .XML file of Tom’s 172 RPM gauge:
< Value Minimum=”0″ Maximum=”35″>(A:General eng1 rpm,RPM) 100 /</Value>
… to this line:
< Value Minimum=”0″ Maximum=”35″>(L:ENG1_RPM,RPM) 100 /</Value>
(Thanks, Tom, for that fix!) After that I played with the A2A 182 profile in SPAD.neXt a bit. I had to change the fuel pump switch snippet to just be a simple fuel pump on/off command. I programmed the BIP panel. And I still run some things via FUSIPC, like controlling the transponder Ident and Alt-C settings with the buttons on the throttle quadrant. But the rest of the setup was straightforward. The swtiches and controls did as they should, and the FIPs ran great … and most important the engine and RPM gauges were accurate. After you get through its (somewhat steep) learning curve, SPAD.neXt really is a great tool, and I’m looking forward to getting the most out of it in the coming weeks.
Now, into the (virtual) air in the A2A 182!
The USB hub, that is.
If you have Saitek panels that don’t seem to be working correctly, don’t download new drivers. Make sure there’s enough power to the hub. If you have Saitek FIPs that aren’t loading, don’t mess with SPAD or SPAD.neXt. Make sure they’re not all plugged into the same hub. If you have a Saitek yoke that’s not registering, make sure it’s in a USB 2.0 hub. If you have a Saitek radio panel that’s dropped out for some reason, run turn the power management off on the USB hub.
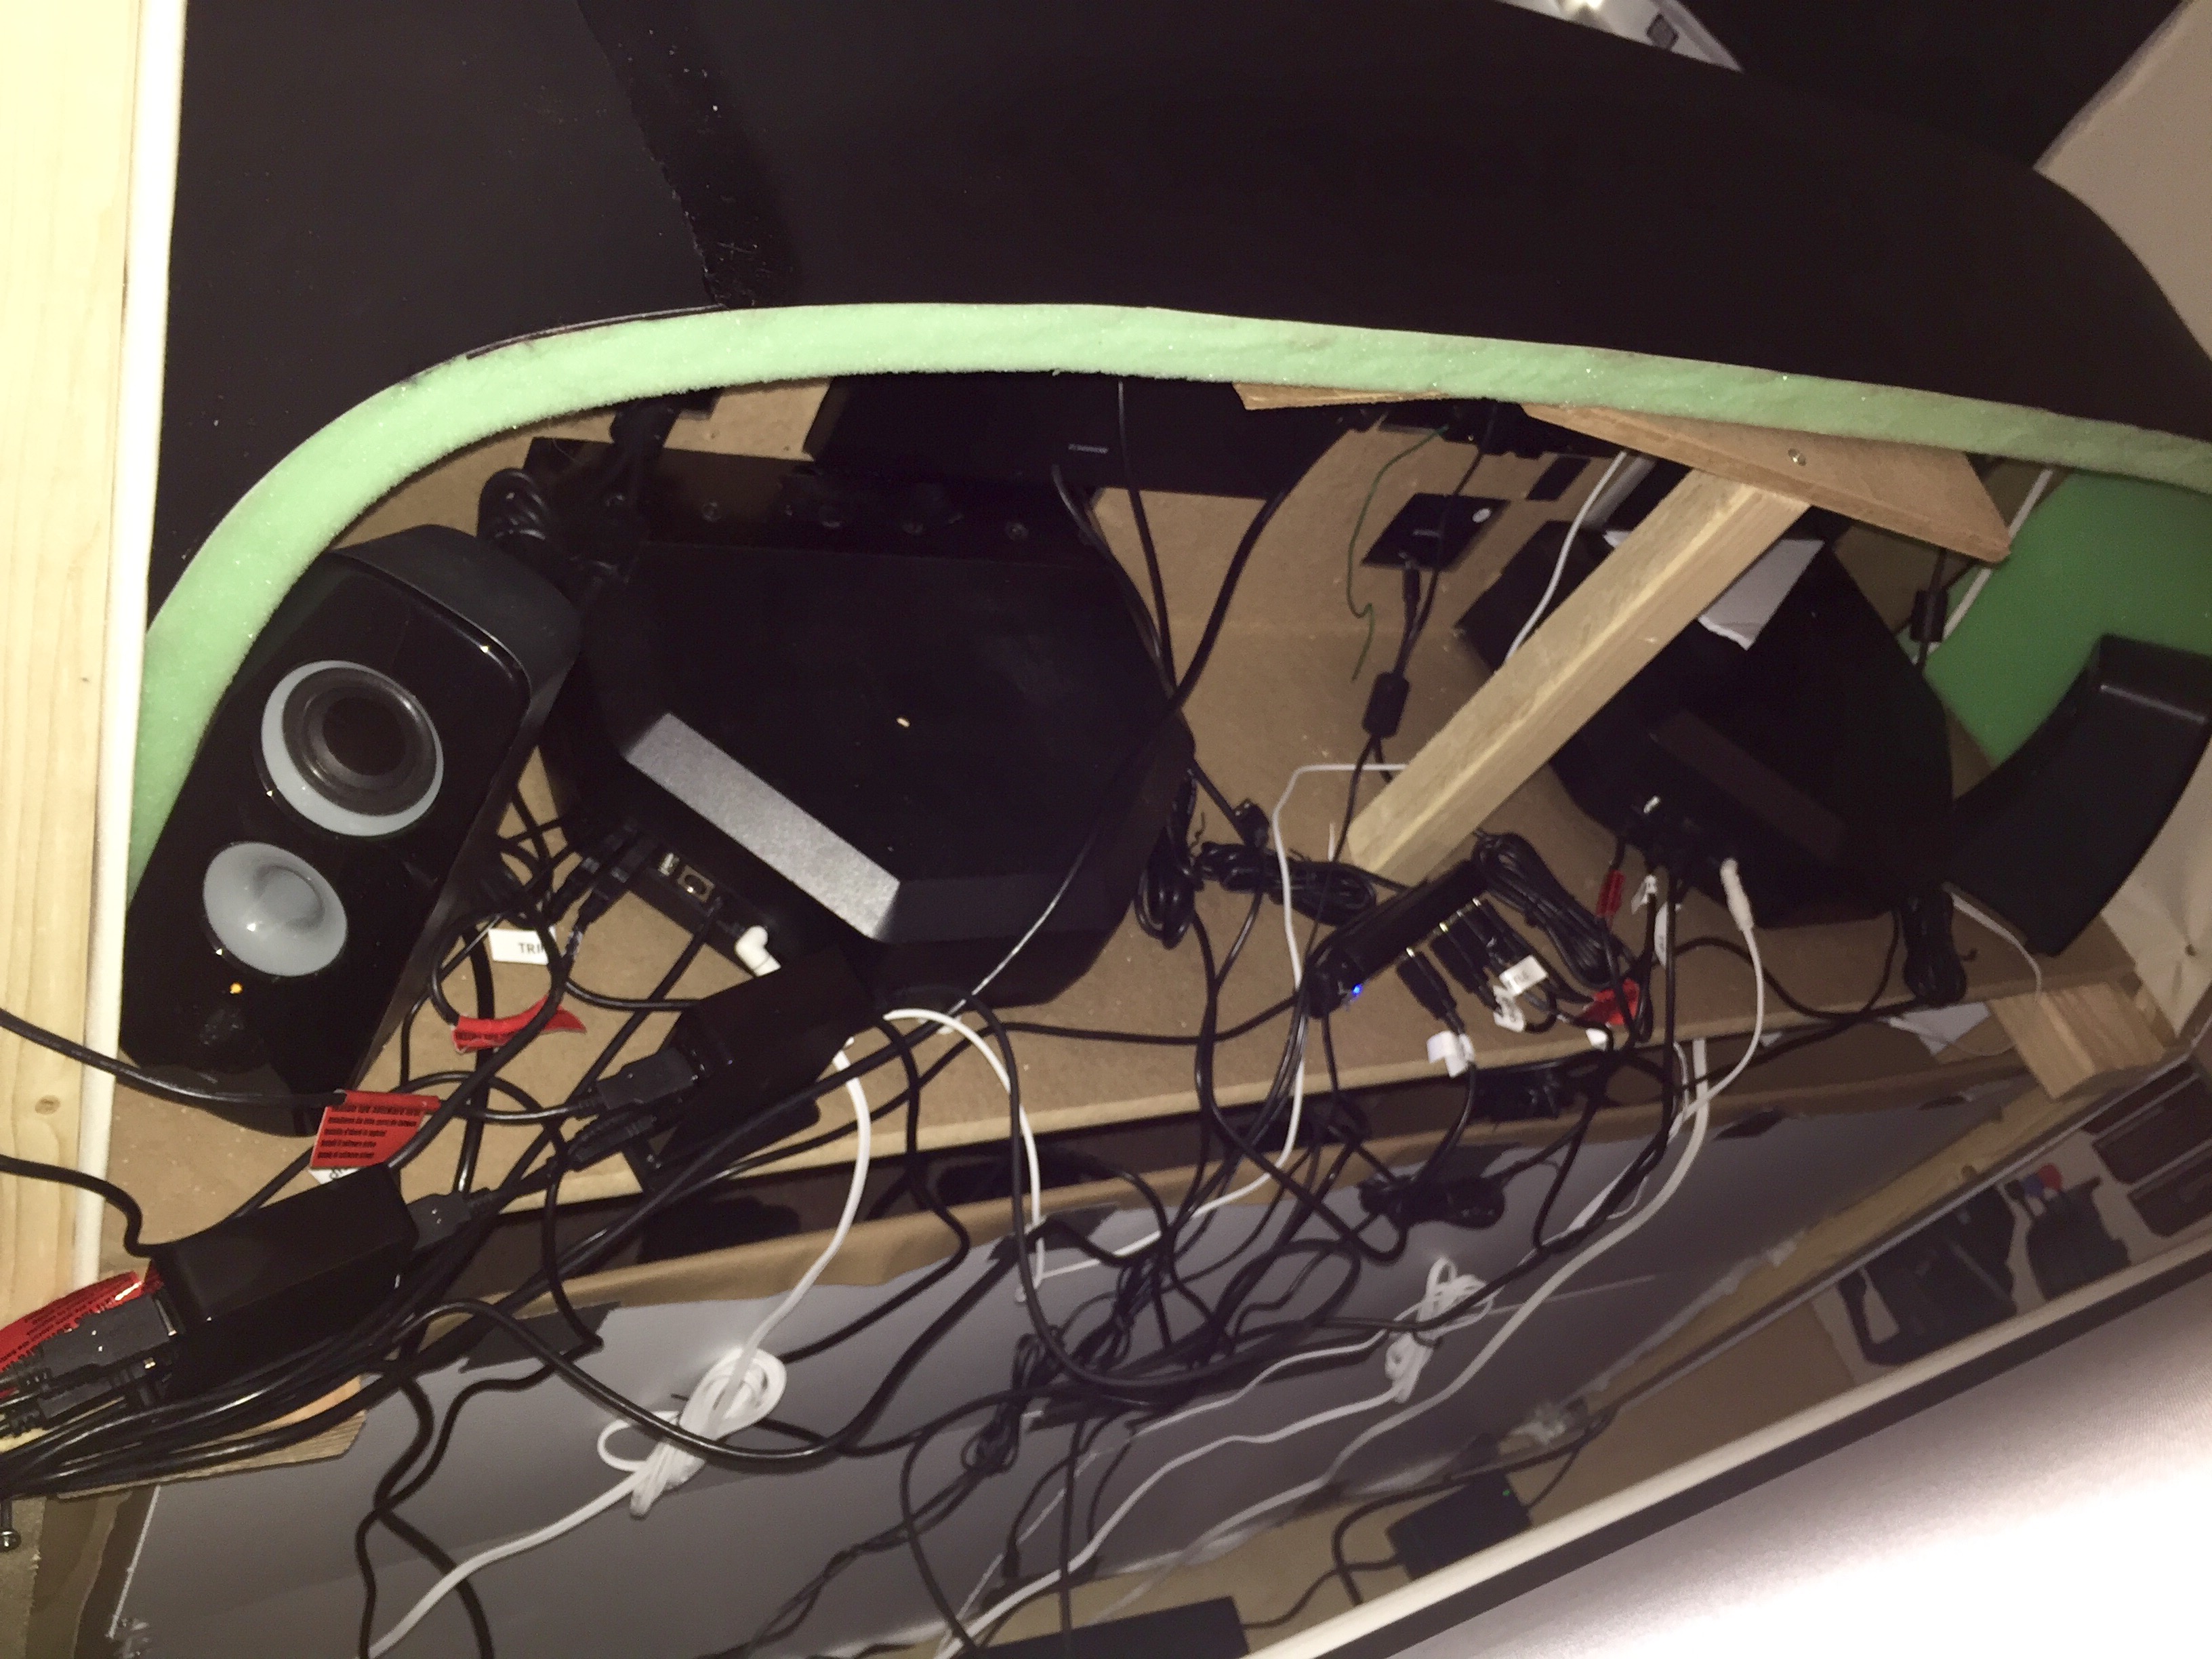
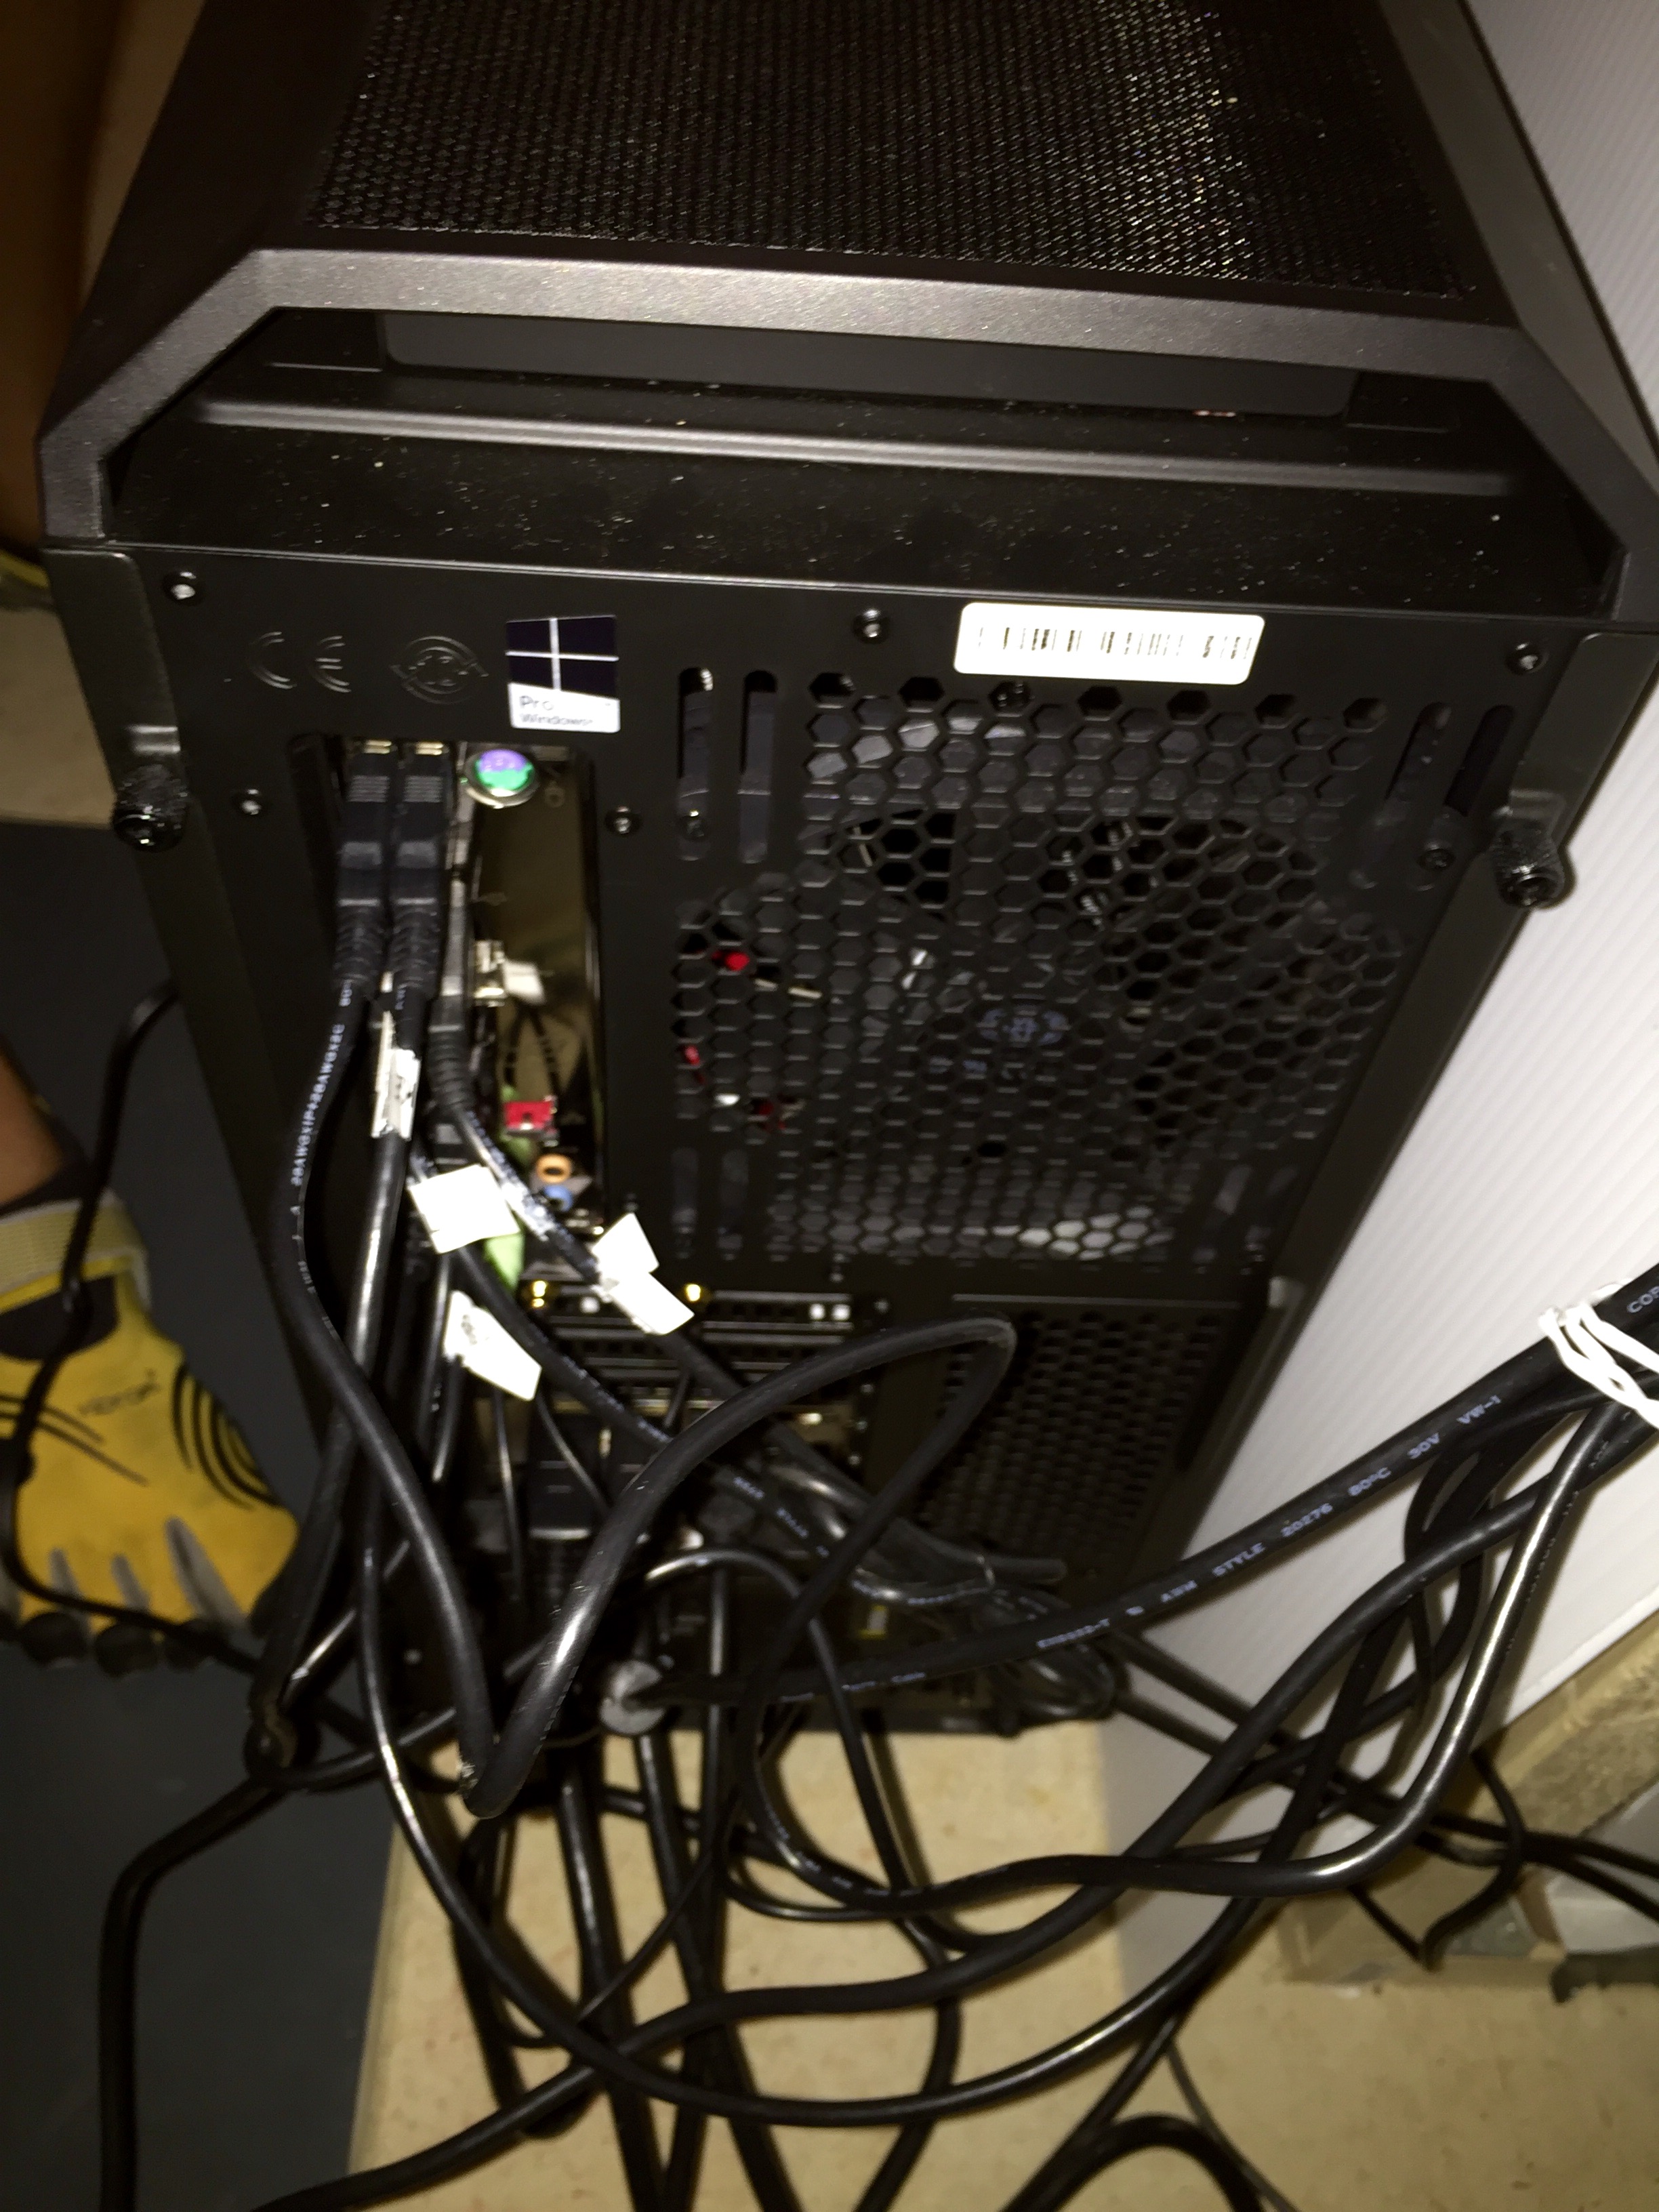
Basically, if your Saitek stuff isn’t working right, the first stop should be checking the hub. I was reminded of this last weekend when, for no apparent reason, my Saitek gear stopped working reliably. This included, interestingly, repeated crashing of the Direct Output .dll file while running the sim. I turned off power management. I loaded SPAD. I unloaded SPAD. I reinstalled all the Saitek drivers. I plugged everything into different ports on the hubs. I pulled my hair out.
Then I remembered that I had unplugged all the USB devices and hubs from the PC when I had updated the BIOS the day before. One of those powered hubs I had plugged back into the one USB 3.1 port on the PC. They didn’t like each other. I plugged that powered hub back into a 3.0 port, and everything worked fine.
I currently have 17 USB devices running on the sim PC. These are finicky devices, and they require a lot of power. They also are a bit dated, and not all were designed with USB 3.0 (and definitely 3.1) in mind. So if you are using Saitek gear, here are my guidelines for them running as seamlessly as possible from a USB perspective. Each lesson was learned the hard way:
When I troubleshoot Saitek gear, I now go in this order:
But first, check those USB hubs. That’s where the problem probably sits.
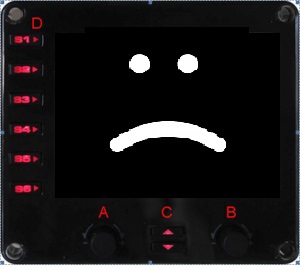
For the past several months I’ve had some weird behavior on one of my Saitek Flight Information Panels: it would display an instrument gauge, but the gauge would be off-center, either shifted to the left (or right), or even up or down, from center. This would create weird scenarios where half the gauge would be on the right side of the display, with the other half “wrapped” over on the left side. The colors would also be off, with greens being red, reds being blue, etc. And if I pressed the button to switch gauges, the off-centering and coloring would change. This happened regardless of which USB hub into which I plugged it the FIP.
For a while I thought it was about the hub, or how much power the FIP was getting from the hub, because the symptoms could go away for a time after I would change these things around. But lately it’s been persistent, and I finally said “screw it” and found a new FIP on Ebay for a great price. I plugged it in today, and everything was great. So it wasn’t the hub, it was the panel. A lesson learned in case you’re having a similar symptom.
At least it did mine. After the auto-install of the latest Windows 10 comprehensive update two things happened. First, and for the first time, my Saitek panels and FIPs showed up correctly (with little icons and everything) in Windows Device Manager. That’s good. But the FIPs also weren’t loading any gauges. That’s bad.
A quick re-installation of the most recent Saitek drivers had everything quickly ship-shape. I also had to re-run Alexy’s FIP Customizer (well worth the download and found via Tom Tsui) to return the nice, solid black background that I prefer to the dormant FIPs.
My favorite aircraft in P3D is A2A’s truly remarkable Accu-Sim Cessna 182 Skylane. It looks, flies, feels, and works as close to the real thing as I can imagine a simulated aircraft can look, fly, feel, and work. But it does not seem to communicate well with the Saitek Pro Flight Switch Panels or Flight Information Panels. In matters that have been better documented here and here, the Switch Panel doesn’t play nice with all the appropriate 182 switches (the alternator and battery switches in particular for many people, and the avionics switch for me as well), and the FIP’s tend to report incorrect readings on the RPM gauge and several of the engine / fuel gauges. While none of this is Earth shattering stuff, these issues can be an annoyance in the least, and sort of a problem if you’re trying to learn and follow actual startup / shutdown procedures or if you’re flying a realistic sim where RPM and mixture matter for procedures and performance (which I am in both cases).
You can kludge and configure your away around the switch problem (although I wasn’t able to get this to work for me), and I’ve simply saved my default “cold and dark” P3D scenario with the battery and alternator switches already on, and assigned the avionics switch to a toggle on the throttle quadrant. But there seems to be no workaround for the FIP gauges. Tom Tsui at FSX Times has been working to get these things to play nice with each other, and he finally tossed in the towel and asked for his money back. Me, I’ve been torn between flying the A2A with these concessions, or the Carenado 182, which works great but honestly (and with respect as it’s a great piece of software) just doesn’t feel as realistic to me as an airframe. When I fly it I find myself missing the A2A.
I have noticed one odd thing, though, and it’s that the RPM gauge seems to work for me some of the time. I’ve had some flights where it seems to be reporting the correct data, and then I’ll have a flight where it doesn’t get over 1,500 RPMs. I don’t know if that’s true or just my impression, but it seems to be happening, and I don’t know why that would be other than something interfering with the communication between the panel and P3D.
It looks like Tom and the creator of the SPAD.neXt alternate Saitek drivers have been working on a fix for all of this. I hope they are, that it works, and that it’s available soon. In the meantime, it is what it is.