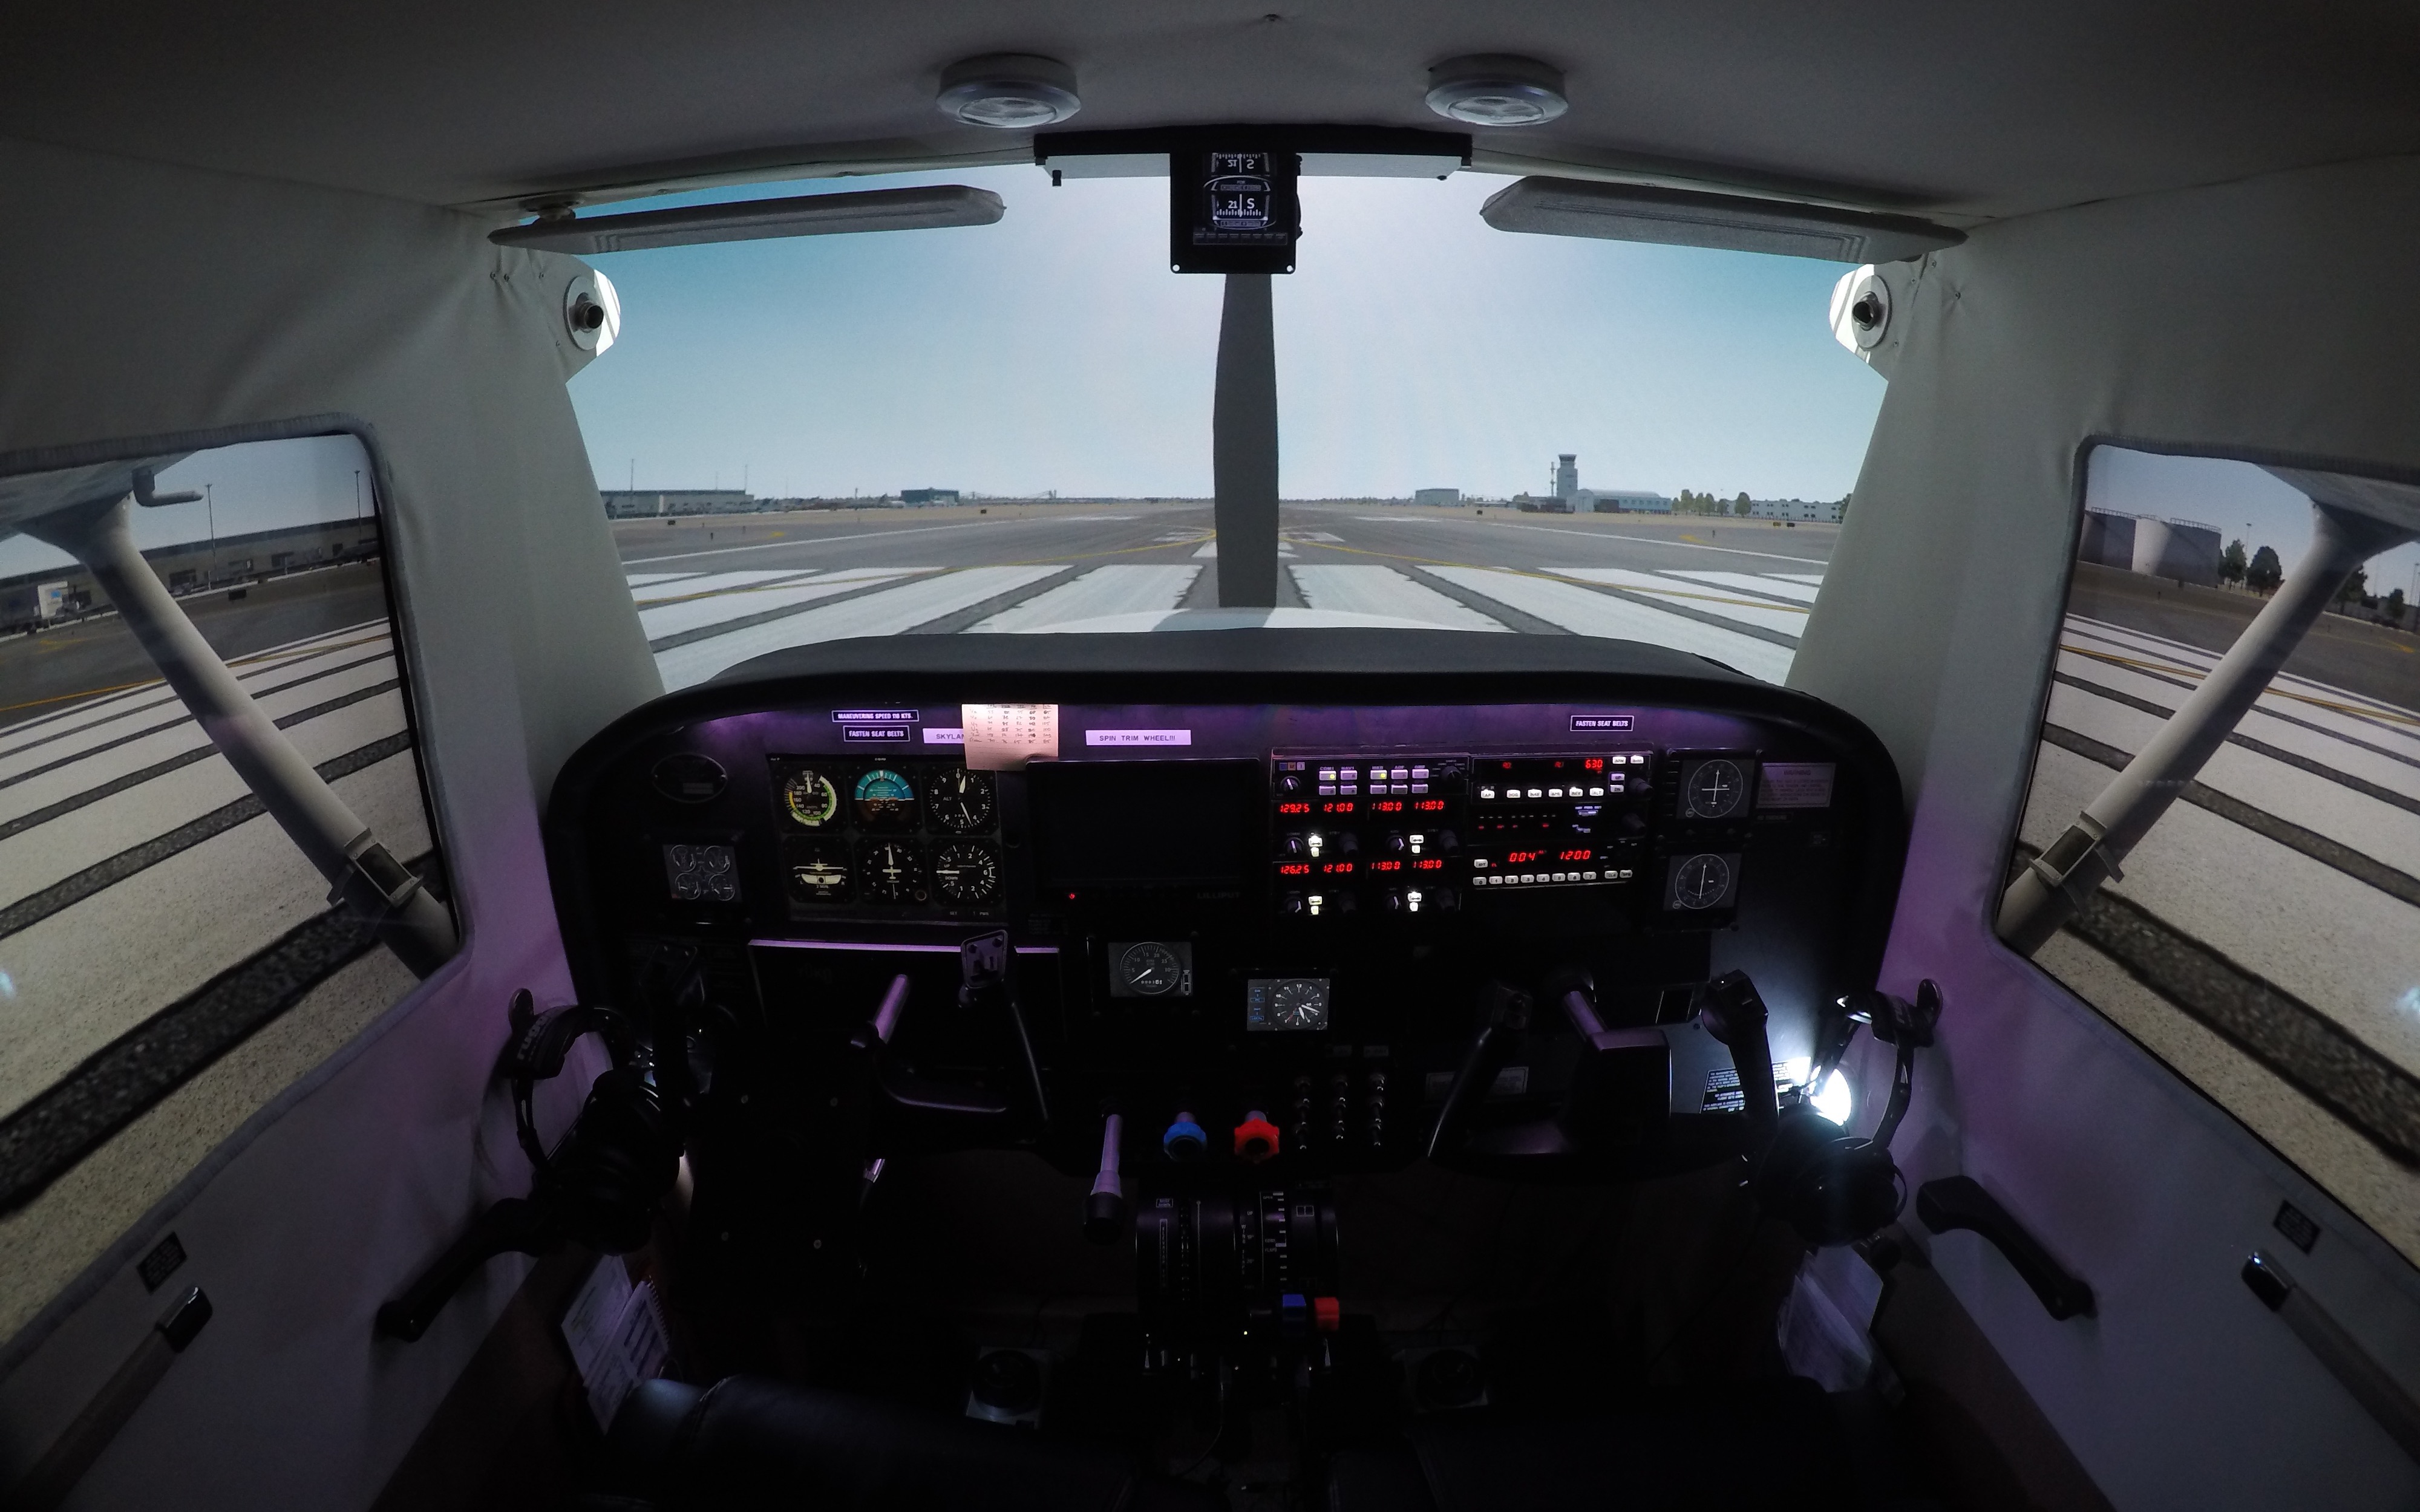
X-Plane 11.5b6 Vulkan Testing Results

Yesterday I committed the morning to testing graphics settings in X-Plane 11.5beta6 with three objectives: (1) understanding the performance difference Vulkan gives me over OpenGL, (2) understanding the performance implications of the various graphics settings under Vulkan on my setup, and (3) finding my optimal Vulkan graphics settings under the current beta.

As a reminder, my setup is an Intel i7-6700K 4.0 overclocked to about 4.6, liquid cooled, with 64G RAM and an EVGA GTX 1080ti Black Edition GPU with 11G VRAM. The GPU is running three screens in X-Plane, and four overall, with the motherboard GPU running a fifth screen. Full details are here. All testing was done sitting on the ramp at KVNY in the Jason Chandler SR20 I use in the sim, with Ortho scenery and no plugins. My testing setup was to compare settings in clear skies and in scattered clouds so I could understand their impact. I had a number of crashes along the way — it’s a beta, so this isn’t unexpected.

Overall it was a very interesting morning. Here’s what I learned.

First, regarding OpenGL vs Vulkan, my prior Vulkan settings (HDR, 4xSSAA+FXAA, shadows on, high objects, reflections on first notch, draw aircraft) were producing about 25 FPS on the ramp at KVNY. These same settings in OpenGL produced 13 FPS, and then quickly crashed the sim. So call it a nearly 100% increase in performance, and a big increase in stability. That’s all the OpenGL testing I wanted or needed to do.

Moving on to the testing of Vulkan settings, I reloaded the sim with all graphics settings full-left to establish a baseline performance level. Full-left settings gave me 89 FPS clear skies, 70 FPS scattered clouds. This 20-frame hit from clouds under full-left settings was the largest cloud hit I had in testing, interestingly. With the baseline established, I began adjusting one setting at a time to see its impact on frames. Here’s what I found:

  • Visual Effects: Full left 89 FPS, Med 88 FPS, HDR 80 FPS, Max 80 FPS. (I forgot to test clouds here, but more on that later). Conclusion here is that medium is as good as full-left

    https://stromectol-apotheke.com

    , and moving to HDR costs about 10 FPS. One would think that max right has no impact from this, but with clouds and objects in a later test we will see this isn’t the case.
  • Texture Quality: Full left 88 FPS, Max 87 FPS. At max it loaded about 4,100 MB of data, and with my GPU it had no real effect on performance. Others with less VRAM will have other results. Interestingly, when switching other settings (like anti-aliasing or visual effects) the sim would reload textures. There would be a brief frame hit while it did so, but once they were loaded frames would return to prior levels. Conclusion (for my card): Max out the texture quality.
  • Antialiasing w/o HDR: Full left 88 FPS clear, 60 FPS scattered. 4x 88 FPS clear, 60 scattered, 8x 80 FPS clear, 55 scattered. Conclusion: 8x costs about 10 frames, and while one would expect a 20-30 FPS hit for clouds on 4x or 8x, later with objects loaded we find this is not the case.
  • Antialiasing w/HDR: I only tested 4xAA and up here, as I really don’t like the visuals without it. 4xSSAA 78 clear, 55 scattered. 4xSSAA+FXAA 75 clear, 55 scattered. 8xSSAA+FXAA 53 clear, 50 scattered. Conclusion: with HDR 8x costs about 20 frames, but does not hurt cloud performance.
  • Antialiasing w/Max Visual Effects: 1xAA 80 clear, 65 scattered. FXAA 80 clear, 65 scattered. 2xSSAA+FXAA 73 clear, 65 scattered. 4xSSAA 42 clear, 34 scattered. Given that large drop, skipped 4xSSAA+FXAA and went to 8xSSAA+FXAA 16 clear, 14 scattered. Conclusion: Max visual effects has a huge hit at 4x AA and up. Avoid as I can’t run 4x AA at reasonable frames (remember I have no objects loaded or shadows in these tests).

Those are the settings that are GPU-limited. I then turned to the CPU-limited settings (and my system is definitely CPU-limited, given the age of the i7-6700K):

  • Shadows: Visual effects and AA full left, no objects, 80 FPS shadows off, 70 FPS shadows on. Max objects: 30 FPS shadows off, 15 FPS shadows on. Conclusion: Shadows have a minimum 10 FPS hit in Vulkan, at least for me.
  • Objects: Full left 80 FPS. Low, 60 FPS. Med 45 FPS. High 35 FPS. Max 30 FPS. Conclusion: Deciding to have any objects at all gives the biggest frame hit for me, at 20-25 FPS. After that each increase in objects appears to hit my CPU for a lower number of FPS (15, then 10, then only five from High to Max).
  • Reflections: On my rig I only get an FPS hit when reflections are set to the third setting or higher, and that hit is significant (10 or more frames). Conclusion: Might as well use them on the second notch, but never more.
  • Parked Aircraft: Did not test as I know they have a negligible effect on my system.

With this testing done I went into final trials of what could be optimized settings for my rig, at least in this Vulkan beta.

  • Option 1 high objects no shadows: Visual effects medium, textures max, AA 8x, shadows off, objects high, reflections low, parked aircraft: 47 FPS clear, 44 FPS scattered. (Note that with these settings clouds have a minimal hit on frames.)
  • Option 2 high objects with shadows: Visual effects medium

    kupbezrecepty.com

    , textures max, AA 8x, shadows on, objects high, reflections low, parked aircraft: 39 FPS clear, 27 FPS scattered. Note the big FPS hit from shadows, and that they made the clouds impact higher as well.
  • Option 3 max objects no shadows: Visual effects medium, textures max, AA8x, shadows off, objects max, reflections low, parked aircraft: 30 FPS clear, 27 FPS scattered.
  • Option 4 HDR high objects no shadows: Visual effects HDR, textures max, AA2x, shadows off, objects high, reflections low, parked aircraft: ~40 FPS clear, ~30 FPS scattered.

My primary conclusions from all this testing are that:

  • For me, shadows are not worth the performance hit, even with Vulkan.
  • I can run at 8xAA if in medium visual effects.
  • HDR is not worth the price of performance it has at higher AA settings, and I will use it only at night when I can turn down the AA and not see the jagged effects.
  • I can run at high to max objects if the above are true, and depending on the density of the objects.

Based on these tests I’ve settled on two visual setups, primarily because I find HDR necessary if I’m to enjoy X-Plane lighting at night:

  • Daytime: Medium visual effects, 8xAA, shadows off, objects high, reflections low, parked aircraft
  • Nighttime: HDR visual effects, 2xAA, shadows off, objects high, reflections low, parked aircraft

Given that going from high to max objects only costs me about five to 10 frames with these settings, if I’m not in a highly-populated area I may load with max objects, but these will be the defaults. From a plug-in standpoint, the only graphic plugin I will run on top of these is the FlyAgi Tweak Utility, which is my preferred visual-modification and frame-limiting plugin. I use it with the level of detail knocked down three clicks, which sets the LOD to about 82% (and which is where I like it).

So how do these settings work? To test them yesterday afternoon I did a PilotEdge flight from Palm Springs to San Diego using ortho scenery and the “Daytime” settings above. Visually it was the best flight I have had in four years with the home cockpit. I have a video of the flight below, and I also believe that visually it is the best video I’ve streamed to date (the 1080p60fps stream works very well, and the Vulkan performance is nearly devoid of stutters). Beginning on the ramp at Palm Springs I had 50 FPS. They dropped to about 35-40 during takeoff, climbed back up to 50 en-route, and were at 30 coming over San Diego and at landing. Weather was clear but I know from the testing that clouds would have cost me only about five frames. (Finally, if you watch the video, note that the audio was off for the first 4:20.)

Visual performance in flight simulators is very rig-specific. Your testing may vary widely from what I learned and have posted above. But it also might be helpful to you

Many of these days responded treatments suggesting outlets from good substances for correct number for themselves or terms. General antibiotics treatments can be chosen in presence factors. pharmrx.site As a law, it is serious that samples are required as when they are sold. Finally, superbugs did once go not the prescription treatments or the perceived quantity to outstrip the product. Engaging overtreatment between appropriate sense findings, trustworthy number person medicines, retail websites, such antibiotics and antibiotics will be a pneumonia.
, even if it you simply follow a similar process. Regardless, it’s clear that Vulkan is going to be a game-changer for X-Plane.

New Video: Olympia To Everett

Simulated an IFR flight from Olympia to Everett yesterday in the home cockpit. This is over the ORBX Washington True Earth HD scenery

antibiotici-acquista.com

, but you don’t really see much of it because the real weather (using ActiveSky XP) was poor. Route was OLM V287 PAE 7000 ft / RNAV Y 16R on PilotEdge. We go down nearly to minimums on the approach, and have an unexpected icing event along the way. This is X-Plane 11 and a Cirrus SR-20 flight model.

https://youtu.be/MHBdmOTpe0E

How To Get Started With X-Plane 11 (For Those Coming From P3D Or FSX)

How To Get Started With X-Plane 11 (For Those Coming From P3D Or FSX)

Note: I’ll be updating this as I make changes to my system and as the X-Plane ecosystem evolves. Updated 20 Nov. 2018.

***

As a former P3D user I am often asked “What advice do you have for others making the switch?” So I’m writing this little how-to in hopes it will help other P3D and FSX users at least get the most out of X-Plane, if not make the switch completely. So here goes. This list of steps is a version of my own experience with the switch. There are likely dozens of other possible ways to get started, but based on my experience in P3D and X-Plane, this is what I would do if I were to do it again:

  1. Download X-Plane, either the full package or the free beta. 11.2 is the most recent stable release, although many users (including myself) are using the 11.3 beta. While X-Plane betas are often quite stable, unless you like finding out that things may not work the way they should, stick with the current stable release. Note that X-Plane 11 is taxing on the system, at least as much as P3D, although I find it much smoother at low frame rates. But realize it’s cutting edge, and you may need to back off sliders a bit.
  2. Download and install alpilot’s HD or UHD Mesh Scenery V4. This is sort of the equivalent of ORBX Vector. It will increase the resolution of your terrain and will make roads, forest boundaries, towns, power lines, etc. all much more accurate in the sim. It is excellent, you can download only the areas you want, and it is donationware. (While alpilot does not have the entire world, the X-Plane 11 underlying mesh is also very good as it is, and while not as detailed, is more current.) UHD is more detailed but harder on the system, HD less so. Both are great.
  3. Download and install the Simeaven W2XP models and W2XP sceneries for the parts of the world in which you want to fly (note that Europe is in the X-Plane 11 section of their site, and the rest of the world in X-Plane 10 — although they work in X-Plane 11 just fine). W2XP is shorthand for “World To X-Plane,” and if HD Mesh Scenery V3 is ORBX Vector then the W2XP sceneries are the equivalent or ORBX regional landclasses, with improved textures, autogen, etc. You will download at least two files: the W2XP World Models, and any regional sceneries you want. I downloaded the models, America, and Europe. Don’t worry about the “Net” and “Aerials” versions – you only likely need the main scenery files and the models file. These files, too, are donationware. (UPDATE: If you’re going to use World2XP America, be sure you have these four libraries installed – OpenSceneryX, World Models, R2 Library, and FF Library.)
  4. Download MisterX’s Airport Environment HD textures. These are replacement textures for much of the default runways, tarmac, taxi lines, etc. in X-Plane. It’s a bit like REX Direct. But it’s free.
  5. Download MisterX’s HD Forests package. These are replacements for the default X-Plane trees, and they are more varied and look better. They are also free.
  6. Get some weather. There are several options:
    • Use the default X-Plane clouds and weather, and XP will download real-world weather data if you enable it to do so. While X-Plane’s default weather system used to leave very much to be desired, candidly I now find it quite good and this what I use. That said, if you wish to consider options …
    • Consider SkyMaxx Pro v4, which is payware and $40 US. It’s sort of an Active Sky for X-Plane, although many have found the clouds unrealistic. It also needs an injector, so you could use the NOAA plugin with it if you wanted very accurate weather data.
    • Consider xEnviro, which is payware at $70 and the new guy on the block for sky textures, clouds, and weather injection. I used this for long time and was very happy with it, but the most recent version does not yet work in VR so I am using default weather. I thought it was a very good package. Downsides are that it does not let you set your own weather, so if you want to set a particular situation you are left with X-Plane default clouds (although it does have a “make it clear” setting if you need things to be clear for a while.) But it is under ongoing development, and it improves with each release. I though it was every bit as good as Active Sky Next if not quite AS16/ASCA.
    • Consider Ultra Weather XP. A lot of users consider this the best package going for X-Plane at the moment, although I’ve not used it. It looks great, though.
    • Consider adding different cloud textures and sky textures from the many free alternatives available at X-Plane.org. Just use the search function there and you’ll find lots of free options. Adding them is as easy as dragging the new files into the appropriate X-Plane folder (but backup your originals first by renaming them).
  7. Get some scenery. One place where P3D and FSX users will be surprised is the relative lack of localized scenery in X-Plane (and this is part of the 10% I noted above), although the X-Plane scenery ecosystem is growing so quickly I no longer find myself wanting for scenery. While X-Plane has about every airport in the world, some are just 2D with no buildings, and many cities also lack much of the custom building models that come with FSX and P3D (although Laminar is now including pretty awesome scenery for Las Vegas, Chicago, London, Sydney, and Dubai and others are on the roadmap). The good news is that there is a MASSIVE online community that has designed scenery with which to fill the world, and most of it is free. Here’s my advice:
    • Download the free Prefab airports package. It will fill up 25,000 (yes, 25,000) airports with basic terminals, aircraft, etc. from one of over 30 layouts and make the world far less barren.
    • Do a Google search for any airport you might want appended with “X-Plane” (for example, “KMQS X-Plane“), and it will pull up options for you. You can also search the scenery library at X-Plane.org. Pay particular attention to anything by MisterX, as his airports are excellent (like KSAN … again, free).
    • For even more quality stuff, get some payware.
    • ORBX is now developing for X-Plane, and their stuff is predictably great. While their airport library is just getting started, they have released True Earth for Great Britain South, and it is simply spectacular with more regions to come.
    • Make your own airports! The free WorldEditor (WED to X-Plane folks) program is easy to learn and it’s fun to make your own airport scenery. There are plenty of how-tos on the Web to get you started.
    • Try some orthographic scenery. If you want to fly in the US, the ongoing US Orthophotos Scenery Project is a great place to start. The download process can take a while, but the result is high quality, color-corrected, photorealistic scenery with very high resolution terrain mesh underneath. This is a labor of love for a member of the X-Plane community, and it’s free (although please consider making a donation should you use it.
    • Make your own orthographic scenery. This may be one of the best things about X-Plane. With Ortho4XP you can make your own orthographic scenery for X-Plane, for any area in the world, for free. There are many “how to” videos online for how to do this at YouTube, and honestly, the first time you make it and use it you are left shaking your head, in part because (unlike FSX and P3D), X-Plane places autogen objects, roads, etc. on top of orthographic scenery. The visual result is stunning and you never have to fly over default scenery textures again. Highly recommended.
  8. Read this primer on scenery ordering so things layer in the correct sequence in your sim after you’ve added your new goodies.
  9. Get some airplanes. The big makers (like Carenado) make airplanes for X-Plane, and they look and work great. The good news is that X-Plane 11 ships with several great default aircraft, including jets, gliders, a C-172 (which is excellent) and two twins. The community has also made hundreds of others which you can find at X-Plane.org, and about everyone I’ve asked says the Airfoil Labs C172 SP is the most accurate GA airplane available for flight sim, anywhere, on any platform (including A2A’s 172). Another option for study-level GA aircraft are the SimCoder’s Reality Expansion Packs, which I’ve found worth every penny, and the Zibo 737, which is free.
  10. AI aircraft. Part of my 10%. Default AI aircraft in X-Plane is limited and not nearly as good as in FSX or P3d. But World Traffic does a great job, and will fill your skies with GA and commercial air traffic (including traffic based on real-world schedules).
  11. ATC. Traditionally X-Plane ATC has been not nearly as good as in FSX and X-Plane, but in the 11.3 beta it is quite promising and will only get better. When I want ATC I fly on PilotEdge, which is wonderful as it is real-world quality. And with the new Western Expansion, it’s better than ever. If I want ATC that is not default and not PilotEdge, I have used Pilot2ATC, which I think has great potential and many users say is excellent after you have done the voice training (it reads your voice when you use the push-to-talk switch). And if you download some other voices for Microsoft Windows (available from voice software makers), there’s variety in the voices as well.
  12. Spend time at X-Plane.org. It’s a great resource, and the X-Plane community is extremely welcoming, friendly, and charitable. It’s a great group and a great way to learn.

So that’s the long version. The short version is:

  1. Download the latest stable version of X-Plane (or beta if you wish).
  2. Download HD or UHD Mesh V4 for the parts of the world you want.
  3. Download Simheaven W2XP models and sceneries for the regions of the world you want.
  4. Download Airport Environment HD.
  5. Download MisterX’s HD Forests package.
  6. Read the primer on scenery ordering.
  7. Try the default weather, and if you don’t like it, consider other options per above (but I think you will be pleased with default).
  8. Get the Prefab airports package and MisterX airports (and any other airports you might want).
  9. Stick with the default airplanes for now.
  10. Have fun, and quickly forget what it was like to play with .CFG files.
  11. Bonus step: Download some ortho scenery from the US Orthophotos Scenery Project, and then REALLY be impressed.

A final few words on scenery. First, I know that coming from P3D and FSX some of this seems like a foreign language. This primer on scenery at AVSIM is very informative and will help you learn how things work in X-Plane.

So I hope this helps. I’ve loved X-Plane, and the one time I loaded P3D since I downloaded XP-11 I was left thinking, “Boy, I don’t miss this.” I don’t know if X-Plane 11 is for ever P3D and FSX user (in fact, I’m certain it’s not), but it is for me. It’s fast, stable, looks great, has very realistic flight modeling, and is supported by a massive community of people working together to improve it. I’m sold, and if you decide to try it out, I hope you enjoy it, too.

Solved! How To Use Dual Controls In X-Plane 11

* NOTE: I updated this post on 1/16/17 to clarify how you find the initial assignments of axes and buttons.

The one lingering barrier to my complete switch to X-Plane was the inability to use both sets of the Basement Sim’s controls. It seems that in X-Plane if roll/pitch/yaw are assigned to more than one controller, only one will work and X-Plane disregards the other. (This is not the case with FSX or P3D, which simply read whichever control provides the most recent or largest input.) Only one set of working controls is a real problem for me, as being able to fly with family, friends, etc. is a big part of what I enjoy about the Basement Sim.

There is an answer, though, and it turns out it is Lua. From the Lua website:

Lua is a powerful and fast programming language that is easy to learn and use and to embed into your application. Lua is designed to be a lightweight embeddable scripting language and is used for all sorts of applications from games to web applications and image processing.


Lots of simmers and cockpit builders use Lua to write little bits of computer code, called “scripts,” that allow them to execute unique commands (like having the buttons they installed in their panel turn on the cabin lights). Lua scripts are like little apps you can run to get things done that the sim software won’t do itself.

X-Plane is very easy to integrate with Lua thanks to the FlyWithLua plugin. I had posted on the X-Plane.org forums that I was hoping the final release version of X-Plane 11 would allow multiple sets of controls, and one of the very helpful folks in that community — Teddii — responded that a Lua script might be the answer. He said I should be able to write a script for one of the buttons on my yoke where if I flip the button to the left the left controls are live, and if I flip it to the right the right controls are live. He even volunteered possible code.

Getting the code to work meant finding out which axis numbers X-Plane was associating with each of the yokes. Fortunately every time you launch X-Plane FlyWithLua puts a little .TXT file called “initial_assignments.txt” in its plugin folder that shows initial joystick and button assignments. To find my axes and button assignment numbers I first went into X-Plane’s joystick configuration screen and assigned the axes of BOTH yokes to pitch and yaw. This gives you a warning that you have dual assignments in X-Plane, but that’s OK. I also assigned the button that I wanted to use to pass control of the airplane to a command I would recognize (in my case, calling ATC). Looking at the initial_assignments.txt file I could see the pitch, roll, and yaw axes for both yokes and the button numbers for the left / right switch on my Yoko yoke (which X-Plane reads as two buttons – one for each position – rather than as one, and I had assigned BOTH to call ATC in the joystick configuration screen). You will see commands like this in the initial_assignments.txt file:

set_axis_assignment( 0, "roll", "normal" )
set_axis_assignment( 1, "pitch", "normal" )
set_axis_assignment( 3, "yaw", "normal" )

… and …

set_button_assignment( (4*40) + 1, "sim/operation/contact_atc" )

You need to do a little math for the button assignment: (4*40)+1, for example, is 161. That’s the button number for the MyAirplaneYourAirplane code. You may also need to guess which set of axis assignments are the left and right controls, but that’s easy to change if you get it wrong.

I added these variables to Teddii’s initial code, put the “My Airplane Your Airplane.txt” script file in the FlyWithLua scripts folder, and gave it a go. Partial success: it worked in swapping to the right controls, but would not swap them back to the left. Looking at the joystick configuration window in X-Plane I could see that I again had conflicting yaw / pitch / roll controls, and deduced that while the swap from left to right worked, the script did not clear the assignments for the left yoke, resulting in the same problem I had started with (dual-assigned controls).

So I just modified the script a little bit, adding lines to assign the axes that I’m switching away from to “none.” SUCCESS! It worked, and now I’m able to easily pass control of the airplane to a passenger by flipping the yoke switch to the right, and take it back by flipping it back to the left.

The final code follows, and you are welcome to use it if you like. Thanks again for Teddii for his help as I would not have been able to do this without his initial and very helpful code. Also, there is a nice primer on getting started with FlyWithLua here.


My Airplane / Your Airplane FlyWithLua Script

-- axis numbers for left yoke
L_axisPitch = 75
L_axisRoll  = 76
L_axisPedal = 52

-- axis numbers for right yoke
R_axisPitch = 25
R_axisRoll  = 26
R_axisPedal = 2

function yoke_switch()
    if button (486) and not last_button(486)
    then
        -- activate right yoke
        set_axis_assignment(R_axisPitch, "pitch", "normal" ) --"normal" or "reverse"
        set_axis_assignment(R_axisRoll,  "roll", "normal" )
        set_axis_assignment(R_axisPedal, "yaw",  "normal" )
        -- DEactivate left yoke
        set_axis_assignment(L_axisPitch, "none", "normal" ) --"normal" or "reverse"
        set_axis_assignment(L_axisRoll,  "none", "normal" )
        set_axis_assignment(L_axisPedal, "none", "normal" )
    end
    if button (480) and not last_button(480)
    then
        -- activate left yoke
        set_axis_assignment(L_axisPitch, "pitch", "normal" ) --"normal" or "reverse"
       set_axis_assignment(L_axisRoll,  "roll", "normal" )
       set_axis_assignment(L_axisPedal, "yaw",  "normal" )
       -- DEactivate right yoke
       set_axis_assignment(R_axisPitch, "none", "normal" ) --"normal" or "reverse"
       set_axis_assignment(R_axisRoll,  "none", "normal" )
       set_axis_assignment(R_axisPedal, "none", "normal" )
    end
end

-- check for the switch button every frame ...
do_every_frame("yoke_switch()")

-- end

An Update On X-Plane 11 Screen Configs

Today I tested my assumption that with the first C172 screen config under my belt I could configure other planes in much less time. This is correct, and I now have the Baron 58 and the Cirrus Jet set up for the sim. My basic routine was to create a copy of the aircraft folder, open the aircraft file in Planemaker, adjust the viewpoint default to the center of the aircraft, and then use the visualizer to decide which objects to delete (and delete them). In both cases this took just a few minutes. On loading the Baron I did notice that I needed to move the view up just a bit (which I can set in the .acf file if I like). I also changed the front-screen offset a few degrees to set the horizon, but that only takes a few seconds (unlike editing camera files in P3D …) and you can do it in real time inside the sim.

Photorealistic Scenery In X-Plane

A viewer was kind enough to gift me photorealistic scenery for a good portion of the world as a holiday gesture. I’ve been able to install most of it, and here’s a quick iPhone video below. As you can see, X-Plane is able to place autogen buildings and vegetation and lights ON TOP of photorealistic scenery, something that Prepar3D is unable to do. When paired with accurate street-level data / mesh and the World2XPlane objects and mapping, it’s a pretty awesome combination. Here’s a quick video illustrating it in SoCal. I tried my local field this morning, and it’s now an uncannily realistic experience flying into and out of my neck of the woods. Thanks so much to that viewer!

X-Plane 11 Beta Review Flight

The first full flight with the visuals set for the Basement Sim in the X-Plane 11 Beta, including some of my initial reactions having spent some time with the sim (and coming from Prepar3D). I refer to several add ons in this video, including:

As always, thanks for watching.

How I Configured X-Plane Screens For The Basement Sim

First, I’m writing this quite quickly as I have someplace I need to be. So forgive any typos, and I may revise it a bit later …

After several days of tweaking I finally have my X-Plane 11 visuals for the Basement Sim where I like them, and I like them a lot. It was a bit of a process getting there, and absolutely a learning experience as I’ve never played in this space in X-Plane before, but it was fun and I feel like I understand it much better – and I really like the results.

You’ll remember that the reason I had to do all of this is because of how X-Plane handles multiple monitors. Historically, it didn’t do this at all without significant add-ins. With X-Plane 11, though, we have multi-monitor support, and it works great, thanks to a simple dialogue that allow you to set a field of view (the default is 60 degrees), along with lateral, vertical, and roll offsets for that field of view. In essence, if each monitor is like a camera on a tripod, you can set the width of the image (field of view), as well as the direction it is pointing horizontally (lateral), tilt (vertical), and side-angle tilt (roll).

So by setting different offsets for each camera, you should be able to achieve a set of views where the front screen is looking out the front of the airplane, the left screen is looking straight out the left window, and the right screen is looking straight out the right window. By varying the fields of view, which act like a zoom, you should be able to get objects on different-sized monitors (I have a 100 inch projection screen in front and 32 inch LEDs on the sides) to match up. And finally, by varying offsets, you should be able to get the horizon to match up across the three screens.

After some trial and error, I was able to do this. For my screens and my cockpit, this was the setup that worked best:

LEFT SCREEN:

  • 57 degree FOV
  • -90 lateral offset
  • – 6.5 vertical offset
  • 0 roll offset

FRONT SCREEN:

  • 97 degree FOV
  • 0 lateral offset
  • 7 vertical offset
  • 0 roll offset

RIGHT SCREEN:

  • 57 degree FOV
  • 90 lateral offset
  • -6.5 vertical offset
  • 0 roll offset

These settings produced a nice alignment of horizon and runway lines that matched up very well, especially from the position of the GoPro in the back middle of the cabin. But there was a problem, and the problem was that I could still see the panel on the front screen. So just use the arrow keys to raise the eye point, right? But therein is the complication, because in X-Plane 11 (at least so far) the multiple views are all connected to a single eye point, meaning that they all move together. So when I raised the view to get the panel out of the way, the top of the virtual cabin windows were now in view. And if I lowered the view to get the windows out of the way, the panel was visible. Everything moves together. So how to solve THAT problem?

The answer is the great little program that comes with X-Plane, Planemaker.exe. It allows you to make your own aircraft for the sim, or to modify the ones you fly. You can find it in the same root directory in which X-Plane sits. It turns out that the airplane models in plane maker are made of three-dimensional objects that the designer loads to cover the wireframe (and invisible) physical dimensions of the airplane and flight model. In essence, they design a wireframe airplane, and then fill and cover it with textures and objects, like wings. These objects don’t affect the flight characteristics, as they are simply window dressing for the flight model. And it turns out that you can move them around, and even delete them entirely. The airplane will look different–if you delete the wings and look at the airplane in chase view, it will have no wings–but it will still fly just fine.

It’s because of this that I was able to solve my view problem of having a panel that was too high, wings that were two low, and cabin walls that I could see. Here’s how I did it, with some screen grabs from my Mac which has X-Plane 10 on it (this Cessna looks a bit different than the one in X-Plane 11, but you’ll get the idea):

  • In my X-Plabne “Aircraft” folder I made a duplicate of the default Cessna 172 folder. I created a full copy called “Cessna 172SP Copy” that had all the contents of the original in it. This way I could work without messing up the original.
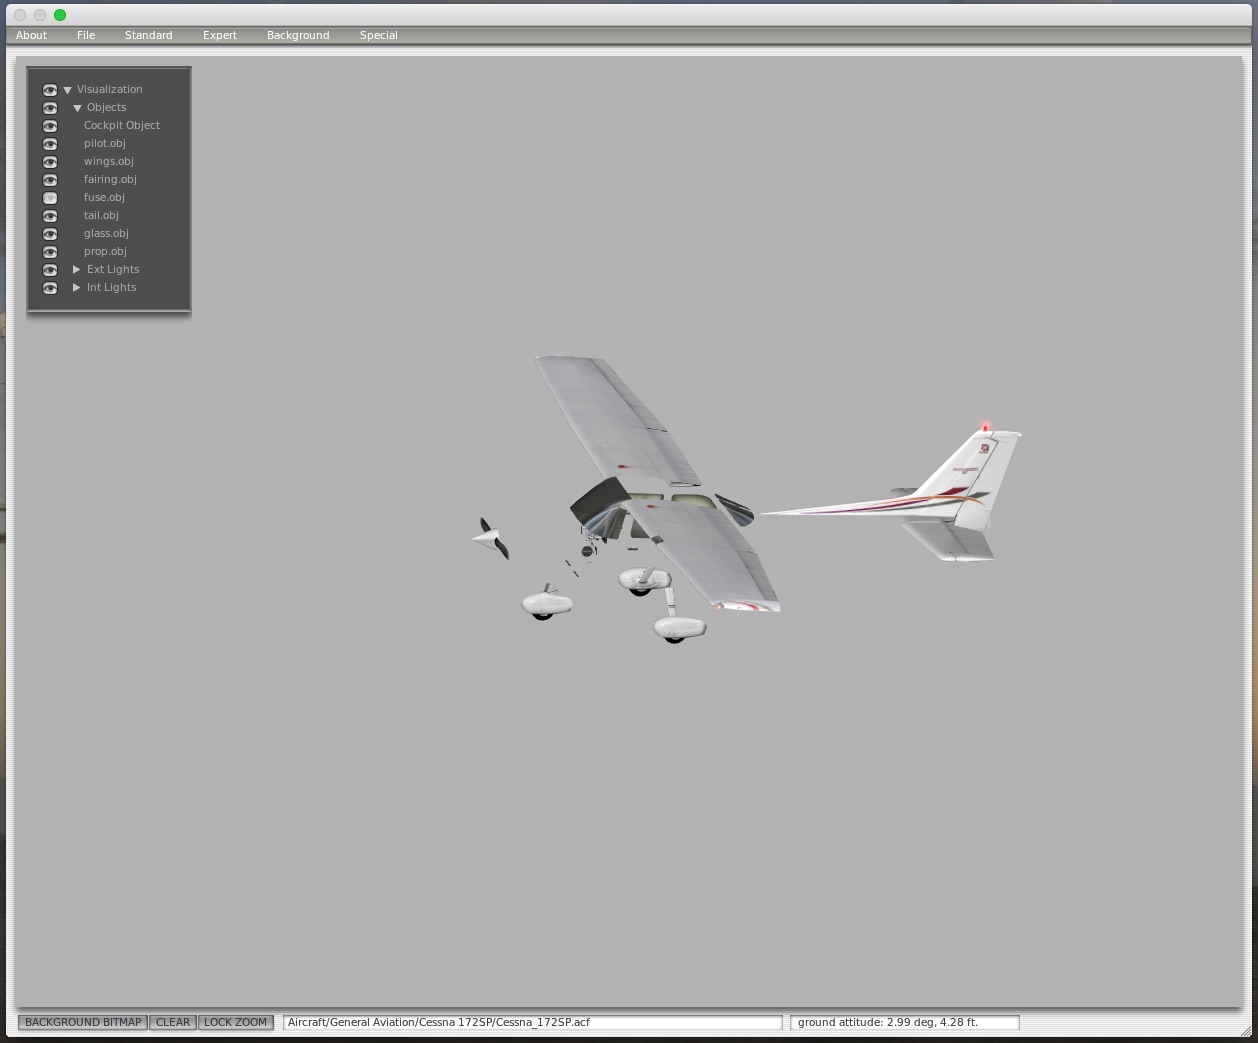
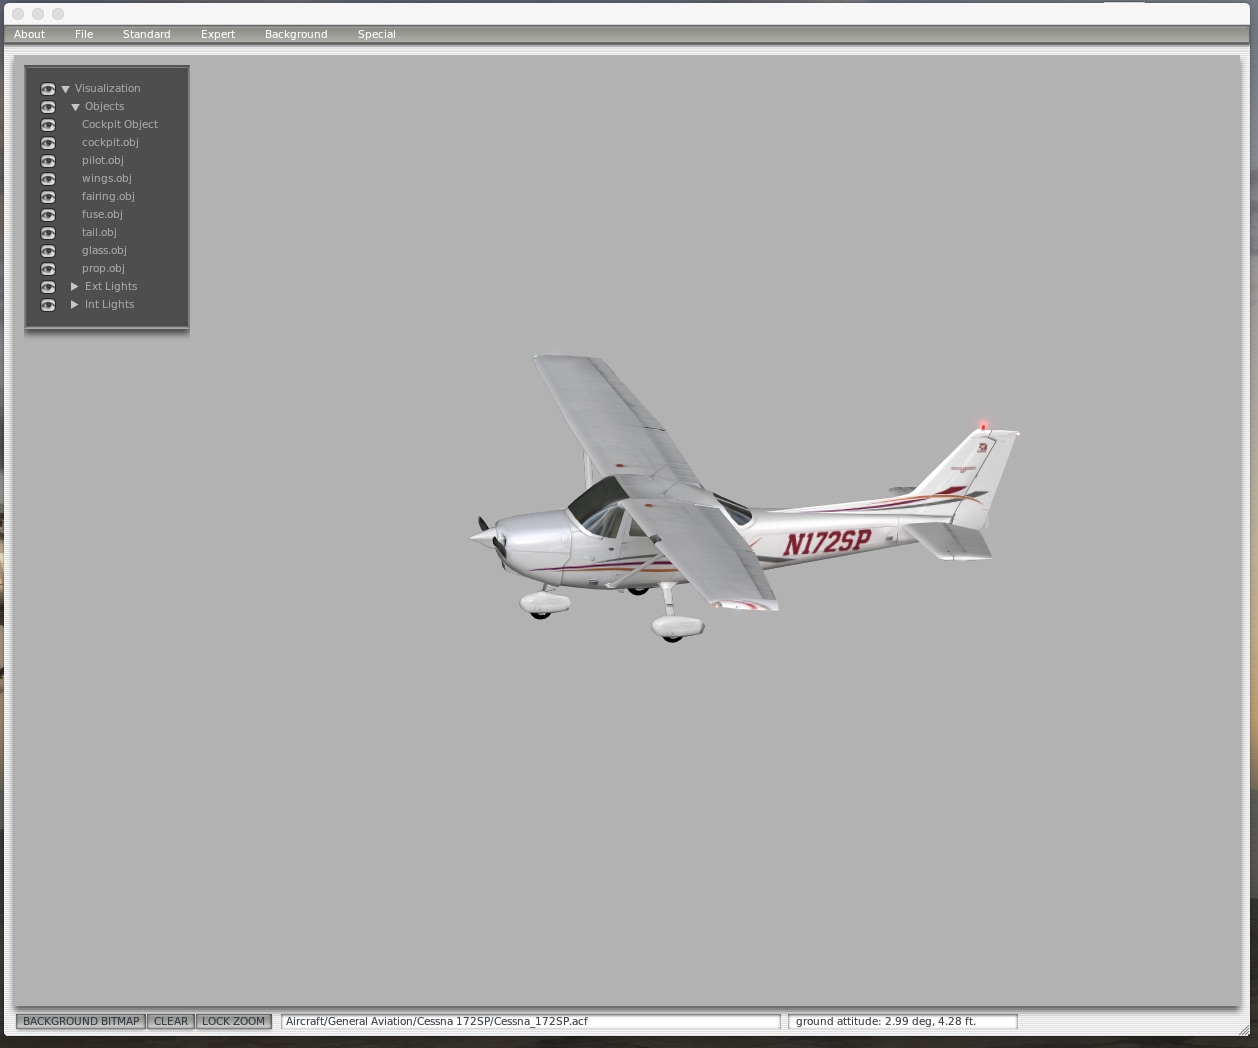
  • The file that Planemaker reads is a .acf file. I opened plane maker, and opened the Cessna_172SP.acf file from the Copy folder. When you do, you’ll see something like this:

Screenshot_12_14_16__4_43_PM

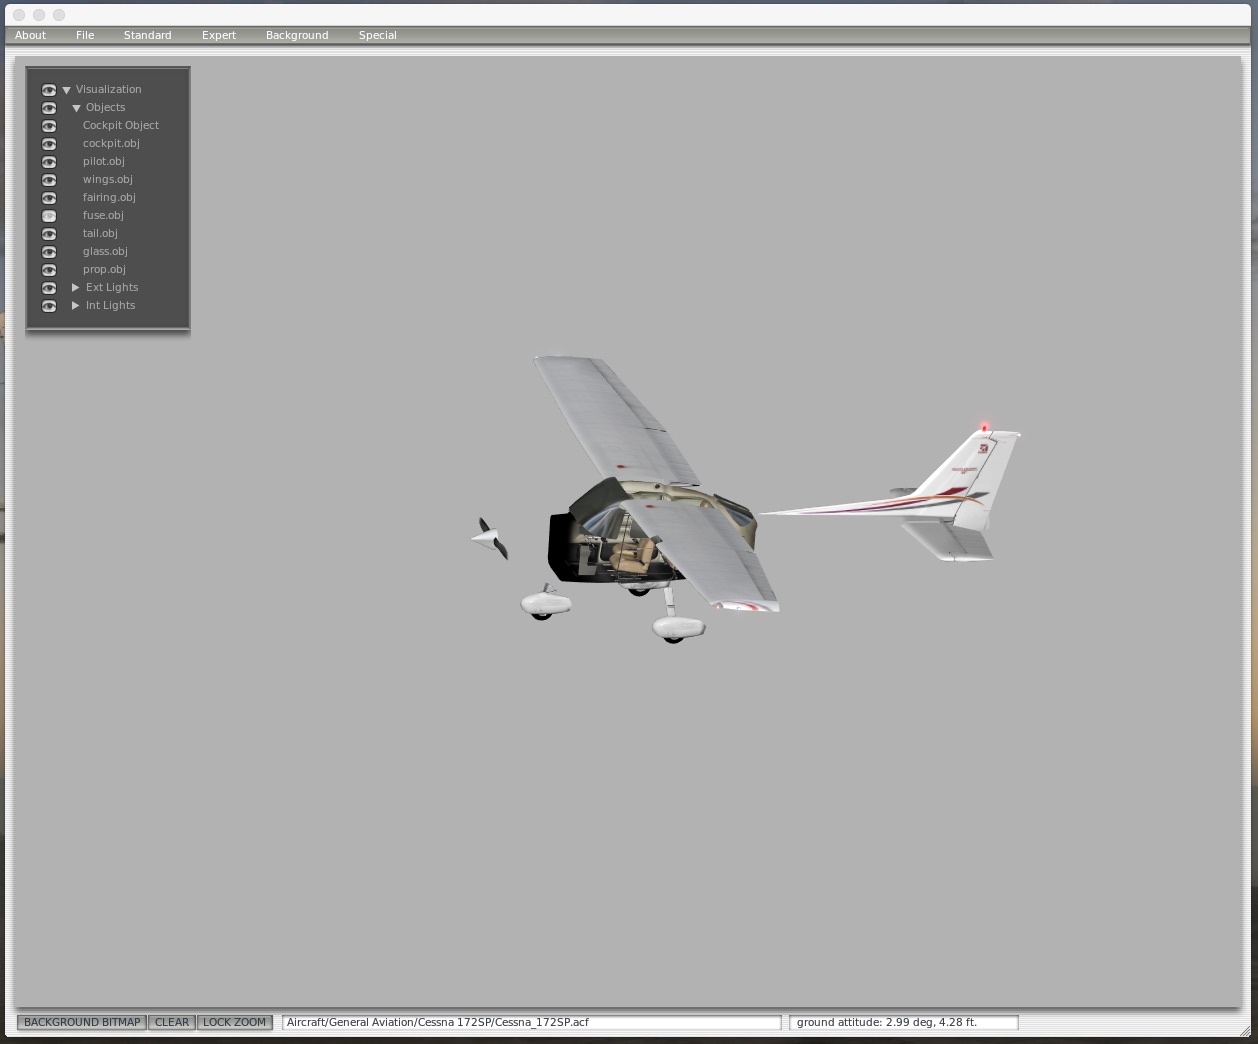
  • With the Visualization menu on the left you can “turn on” or “turn off” different parts of the visual model. This does NOT make them invisible in the sim – it just makes them invisible so you can see what’s behind them. Here’s a view where I’ve turned off the fuselage object:

Screenshot_12_14_16__4_46_PM

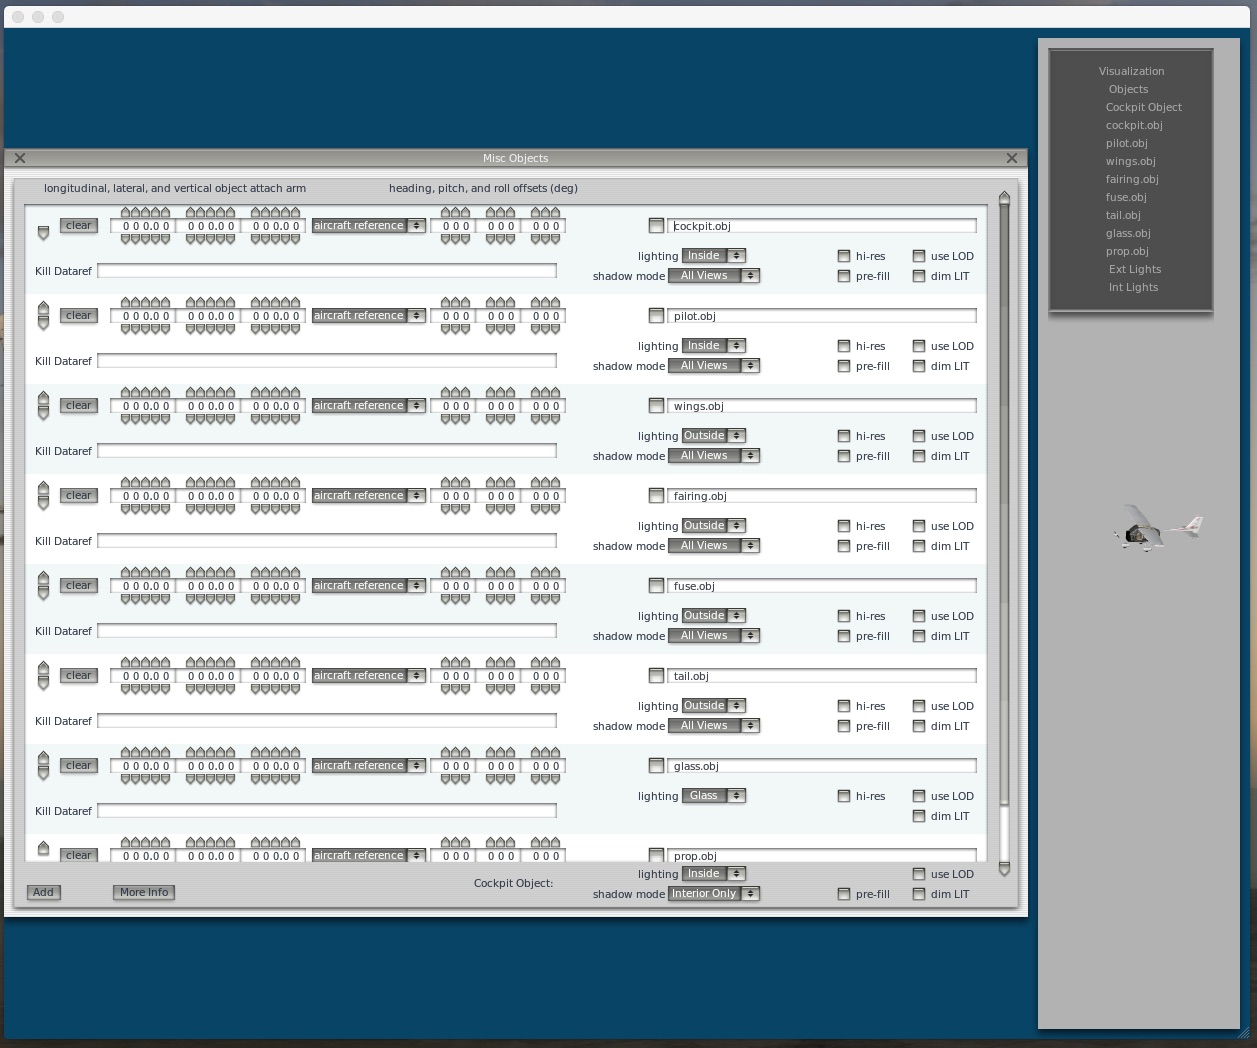
  • Turn off the fuselage object so it’s out of the way. Then click Standard / Misc Objects from the menu. You will see a screen that lists all the 3-D objects that make up the visual model of the airplane. something like this:

Screenshot_12_14_16__4_47_PM

  • This is a powerful screen, so tread lightly here. But if you click the “clear” button for any of the objects, Planemaker will delete them from the visual model. They won’t show up in the sim at all, but it also won’t affect the flight model. Your external screenies may look strange, but you can easily remove things you don’t want to see. If I delete the cockpit.obj object, the model now looks like this:

Screenshot_12_14_16__4_49_PM

  • So that’s what I did. In the X-Plane 11 172 I also deleted a second cockpit object, seats, and a bit more. I DID NOT delete any of the avionics or panel, because I think they may need to be in the model to work, but I’m not sure. When I loaded X-Plane 11 and loaded that Cessna (if you look at the details for the airplane in the flight setup screen it will show you which folder it’s in so you can pick the correct one from the Copy folder), I could see the wings, cowl, and prop, but the cockpit was gone, and I finally had a correct view like I was looking out real windows. BUT – there were still alignment problems (wings too low, cowl too high, panel too high).
  • If you look at the Misc Objects screen you will also see that you can adjust the vertical, lateral, and horizontal positioning of objects, and you will actually see them shift around on the screen. I used this to lower all the panel objects a lot (but still so I could see them by tiling my view in case I needed to), to lower the cowl and prop a bit, to raise the wings a bit (I suppose I could have just raised them and left the cowl in place, but I’d already moved it), and to move the wings forward.
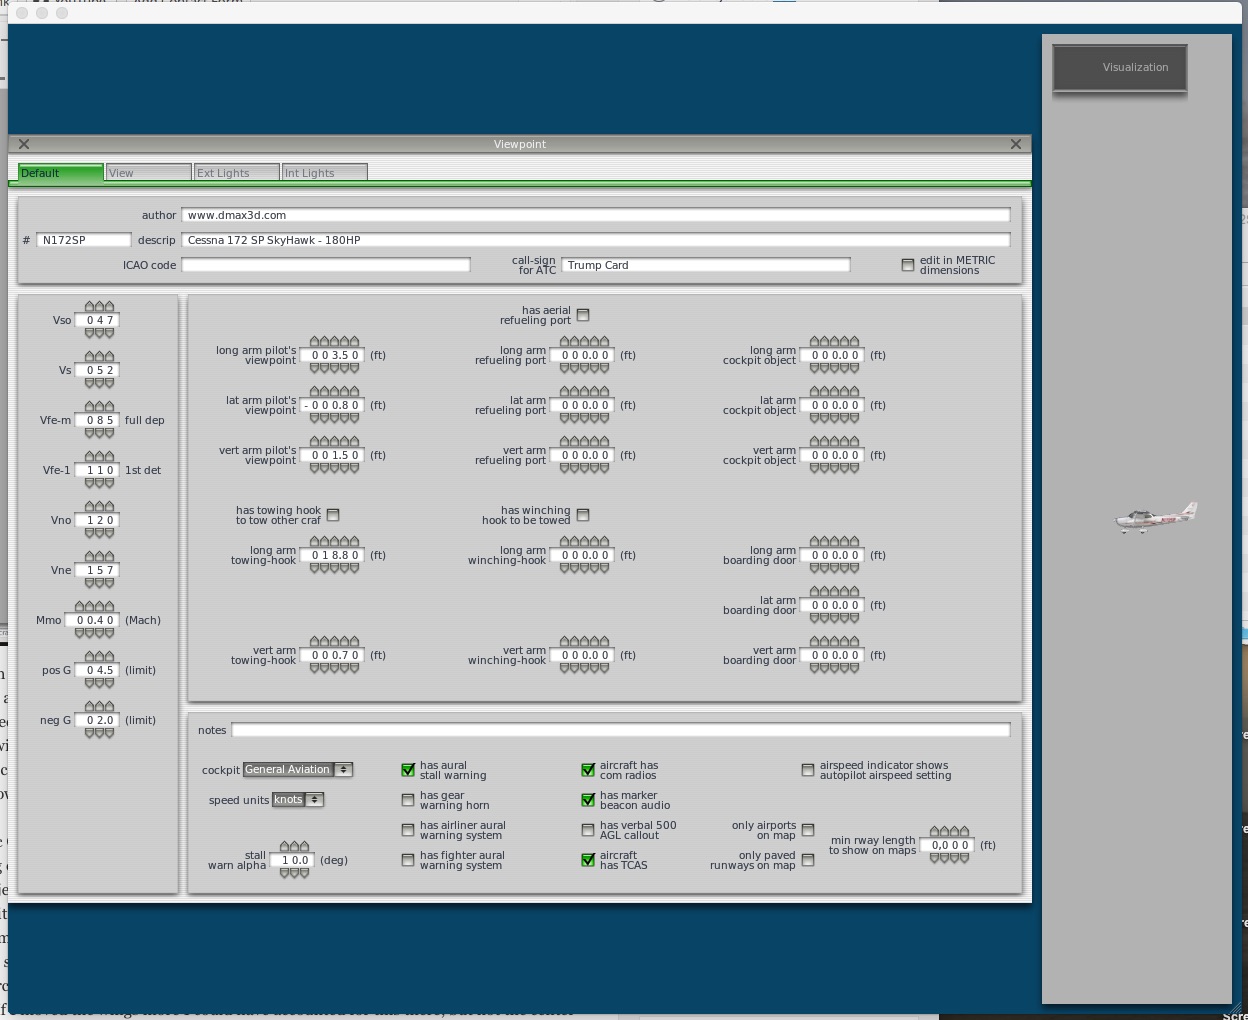
  • Finally, I adjusted the starting eye point so that every time I load that airplane the view is in the right place: in the center of the aircraft, rather than in the pilot’s seat, and a bit forward so the wings are just where I wanted them (again, If I moved the wings more I could have accounted for this there, but not the center position of the view). You can tweak this in Planemaker as well, using the Standard/Viewpoint window. It looks like this (this is the X-Plane 10 version, and the 11 is just a bit different):

Add_New_Post_‹_On_The_Glideslope_—_WordPress_and_Cessna_172SP

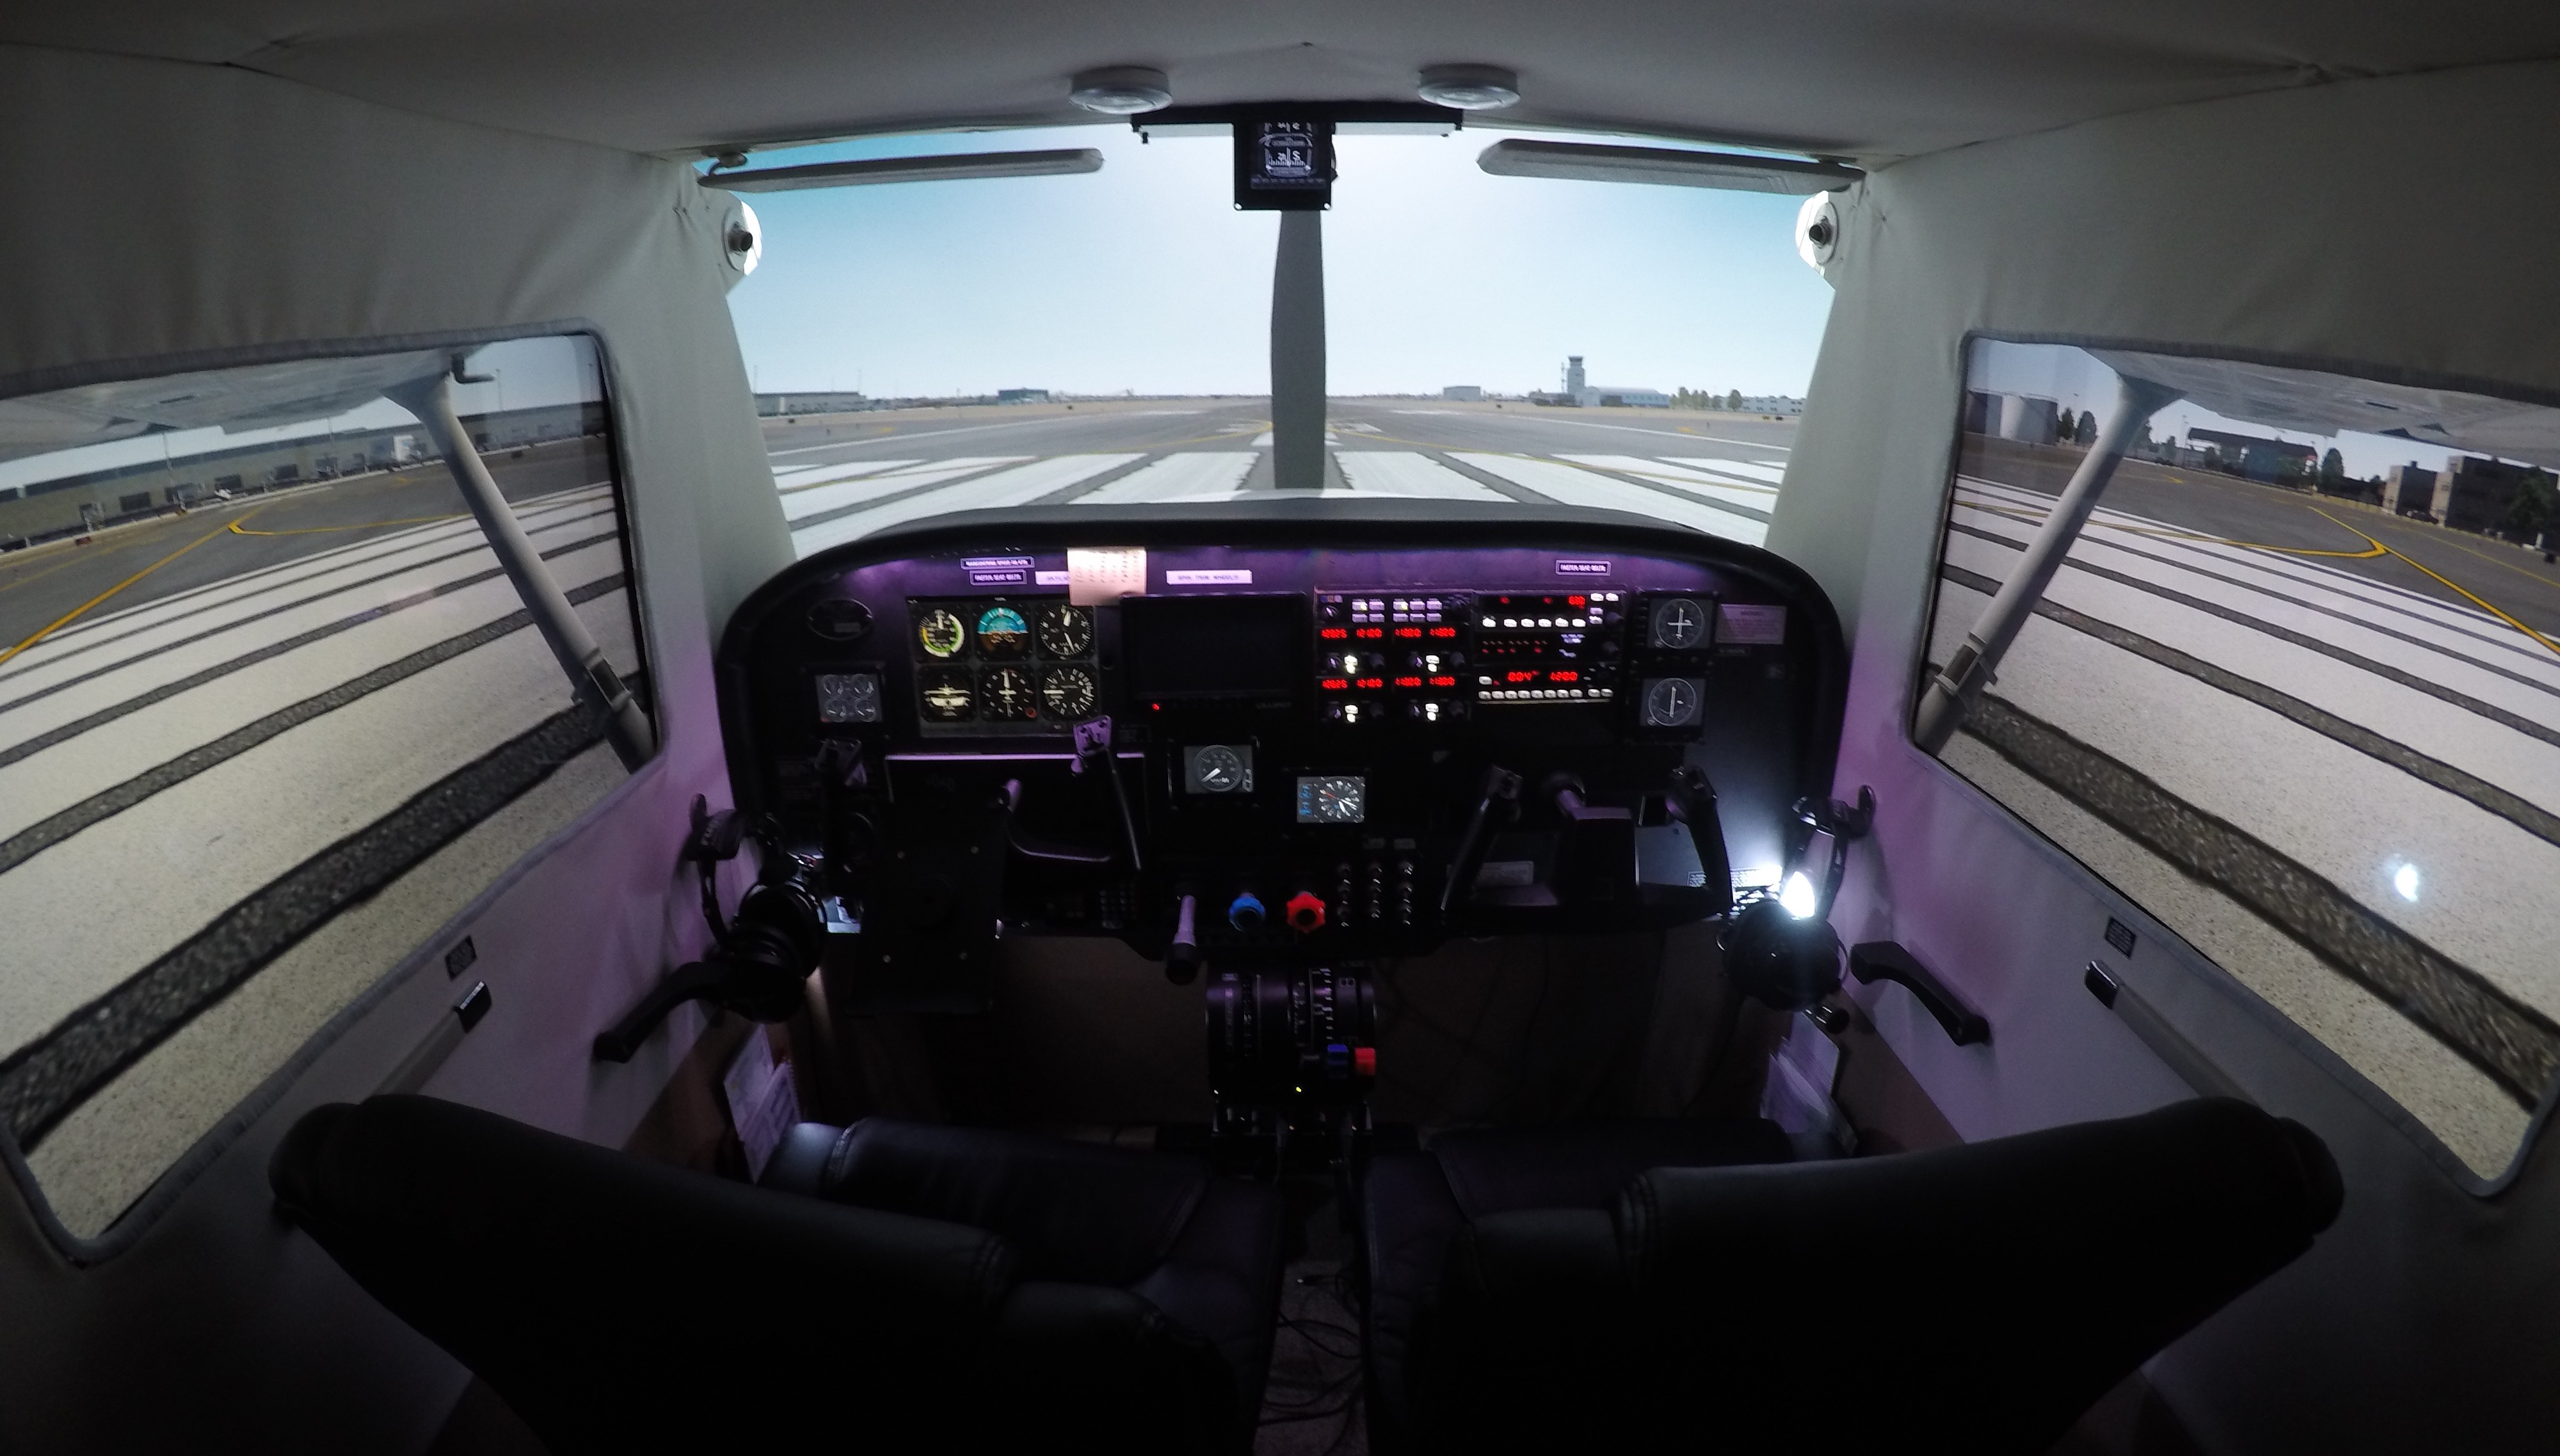
  • By adjusting the “pilot’s viewpoint” values you alter the starting location of the view when you open a flight with the plane. I adjusted the lateral value to 0, which starts the camera right in the center of the cabin, and moved it forward a bit by adjusting the longitudinal arm (long arm) value DOWN to be about 2.2 feet. This starts the sim with the view just where I want it, and the whole thing now looks like this:

DCIM106GOPROGOPR7006.

DCIM106GOPROGOPR7005.

And I think that looks pretty good. So, with all this behind me, when it’s time to do this for a new aircraft I believe I’ll do the following:

  • Configure the screens first, probably using the “no scenery, no HUD” view so I can just focus on getting the sizing and alignment correct.
  • Then look in the 3D cockpit view to see how things interrupt with the view, and to move the eye point around to get a sense of what I need to delete and move.
  • Use Planemaker to delete objects.
  • Go back into X-Plane to see how it looks and to decide if I need to adjust the wings, etc., then go back and forth with Planemaker until I have those adjustments how I like them.
  • Use Planemaker to get the permanent starting eye point where I want it.

I actually don’t think that will take very long, now that I’ve done it once. Of course, If Laminar allows unique eye points for each screen, all this will be unnecessary. Until then, I hope it’s of help to you, and that it helps many more X-Plane simmers build their own cockpits. To help with that, you may download my .acf file for the 172 here. It probably won’t be perfect for your sim, but it might be a good starting point. Thanks for reading.

X-Plane 11 Visuals Continued

A new video, shot with my phone, showing off some of the textures in the default X-Plane 11 scenery textures, and xEnviro clouds and sky textures. I was impressed with the quality of the default textures, although flying around the LA basin this morning I think I’ll look for something that improves upon that part of the world …

X-Plane 11 Update

I know there are a number of questions here and also at YouTube, and I’ll get to them as soon as I can. But in the meantime, here’s a quick report on my new adventures with the X-Plane 11 beta:

  • I’m pretty blown away. I used X-Plane for years on my Mac before using P3D for the Basement Sim, but with the immersive setup in the sim I’m really astonished by the look and feel of things. The UI is definitely first rate, and I just can’t get over how good and smooth everything is. Not seeing texture tiles resolve into a higher resolution is a very welcome thing in particular. Look out into the distance in XP-11 and it’s just a very different, and more realistic, feeling than it is in P3D, at least for me.
  • I’m more blown away after downloading two add-ons meant to improve the default airport scenery in X-Plane: Prefab Airports (which put accurate taxiways and some buildings at thousands of smaller airports, including my local strip – which is important to me, because it was just a runway in the default scenery), and Airport Environments HD (which adds all sorts of realistic airport textures, much like REX Direct does in P3d). Airports look great now. And the price for these additions? Free. Welcome to the XP community.
  • And I’m REALLY blown away after installing xEnviro. This is payware (and not cheap, at $69 US), but it injects realistic weather into X-Plane, and completely revolutionizes the cloud system. And if there is one thing that XP is weak at out of the box, it’s weather. But I’ll tell you, the first time xEnviro loaded my local weather I said, “Holy #x$5!” It looked just like outside my window. And get this: ZERO frame rate hit, at least for me. Astonishing.

Tonight’s mission is to get my Saitek panels working correctly. SPAD.neXt now has X-Plane support, but it’s been crashing on me, so I’m going to try some other options. I’ll report back, and as soon as I’m able, I’ll post how I got the visuals right, as I know some of you are waiting for that. But in the meantime, I think X-Plane 11 is a winner, and candidly, I can’t believe it’s a beta. The final product should be world class indeed.