My X-Plane 11 RC1 Graphics Settings

A few requests have come in for my graphics settings. This is what I’m using now, and note that it’s working very well for my rig. Your mileage may vary. Sorry I can’t post a screen shot at the moment …

  • Visual Effects: One notch in from the right.
  • Texture Quality: Full right.
  • Antialiasing: One notch in from the right, and if clouds tank the frames I go down to FXAA.
  • Draw Shadows: On if frames are above 20-25, off if below.
  • Number of World Objects: One notch in from the right. If frames are very high, full right. If in SoCal, two notches in from right.
  • Reflection Detail: Minimum – I don’t fly over a lot of water.
  • Draw Parked Aircraft: On.

And while it’s not on this screen, I nearly always fly with AI aircraft off. They can really hit the CPU.

Updated Monitor Alignment Settings (X-Plane)

I’ve spent some time today further tweaking my monitor alignments and have arrived at updated settings. In particular I tuned two sets of monitor settings, one for the GoPro perspective at the back of the cabin, and another for the perspective from the left seat.

For the GoPro / Back Eyepoint Perspective:

Left:

  • 57 FOV
  • -90 Lateral
  • -7.5 Vertical
  • 0 Roll

Center:

  • 109 FOV
  • 0 Lateral
  • 8 Vertical
  • 0 Roll

Right:

  • 57 FOV
  • 90 Lateral
  • -7.5 Vertical
  • 0 Roll

For the Left Seat / Pilot Eyepoint Perspective:

Left:

  • 65 FOV
  • -90 Lateral
  • -10.5 Vertical
  • -1 Roll

Center:

  • 109 FOV
  • 0 Lateral
  • 8 Vertical
  • 0 Roll

Right:

  • 52 FOV
  • 90 Lateral
  • -5.5 Vertical
  • -2 Roll

xOrganizer Is A Must Have X-Plane Utility

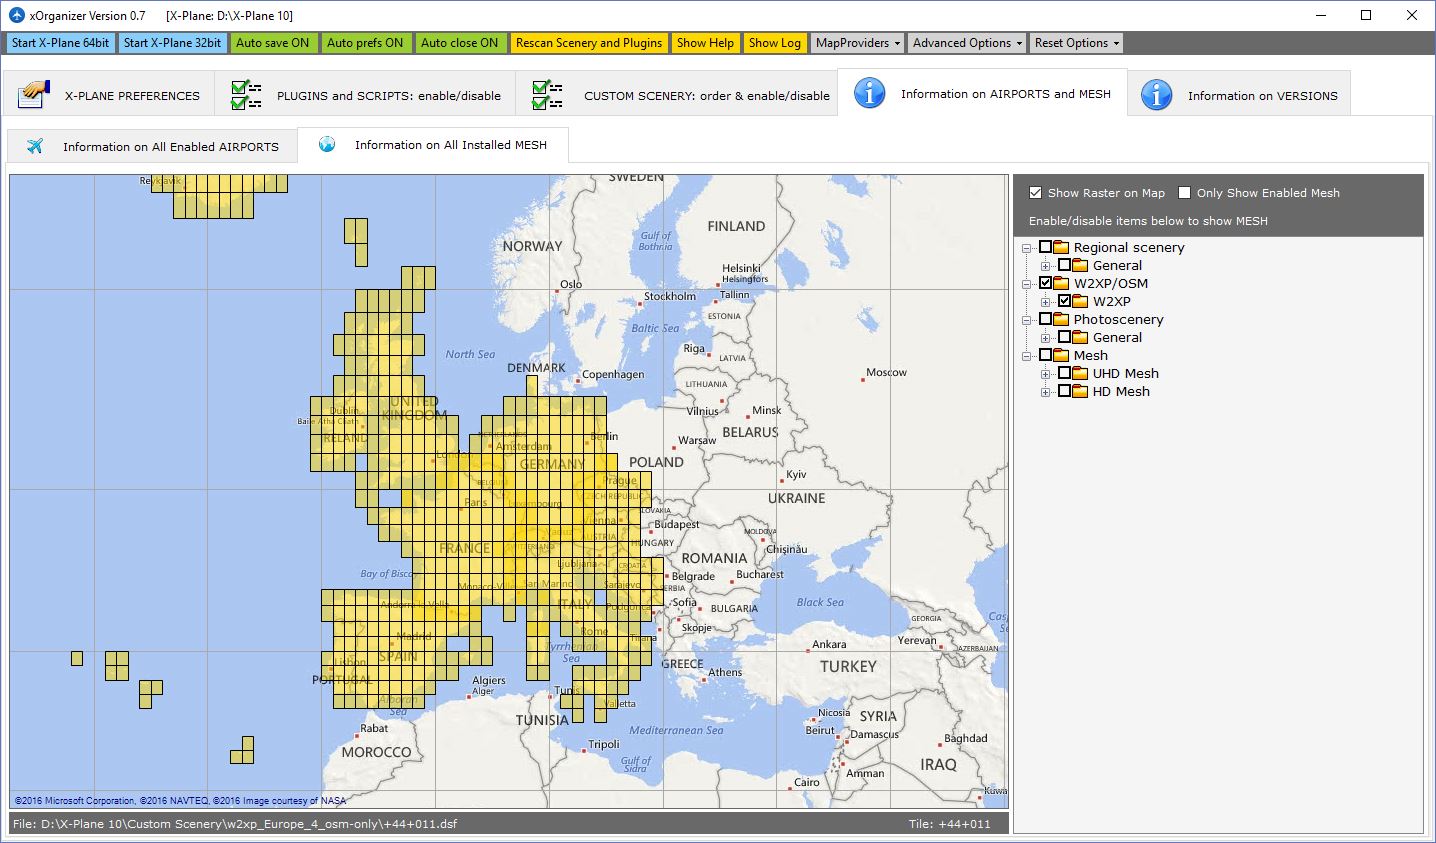
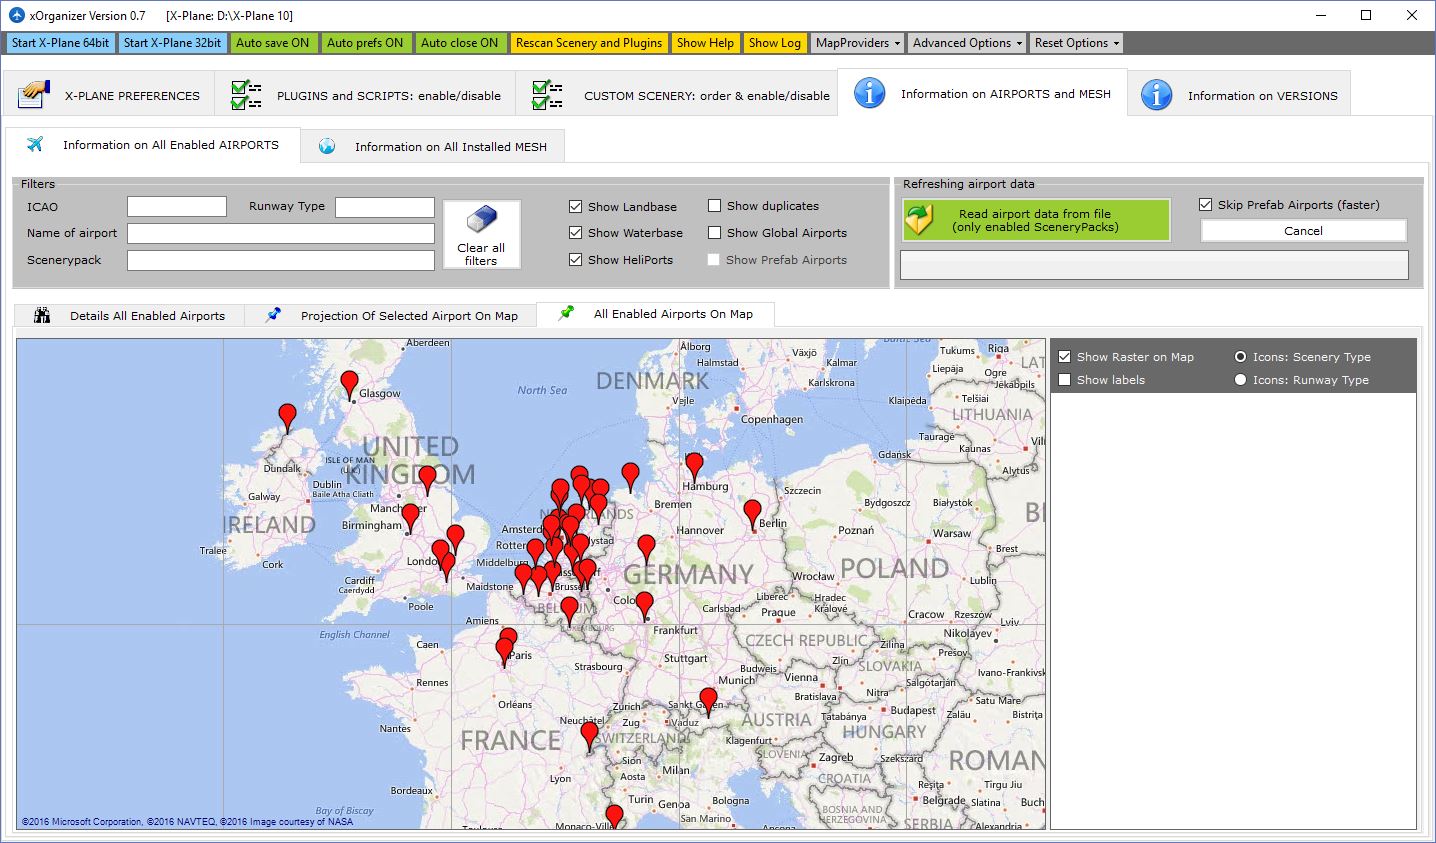
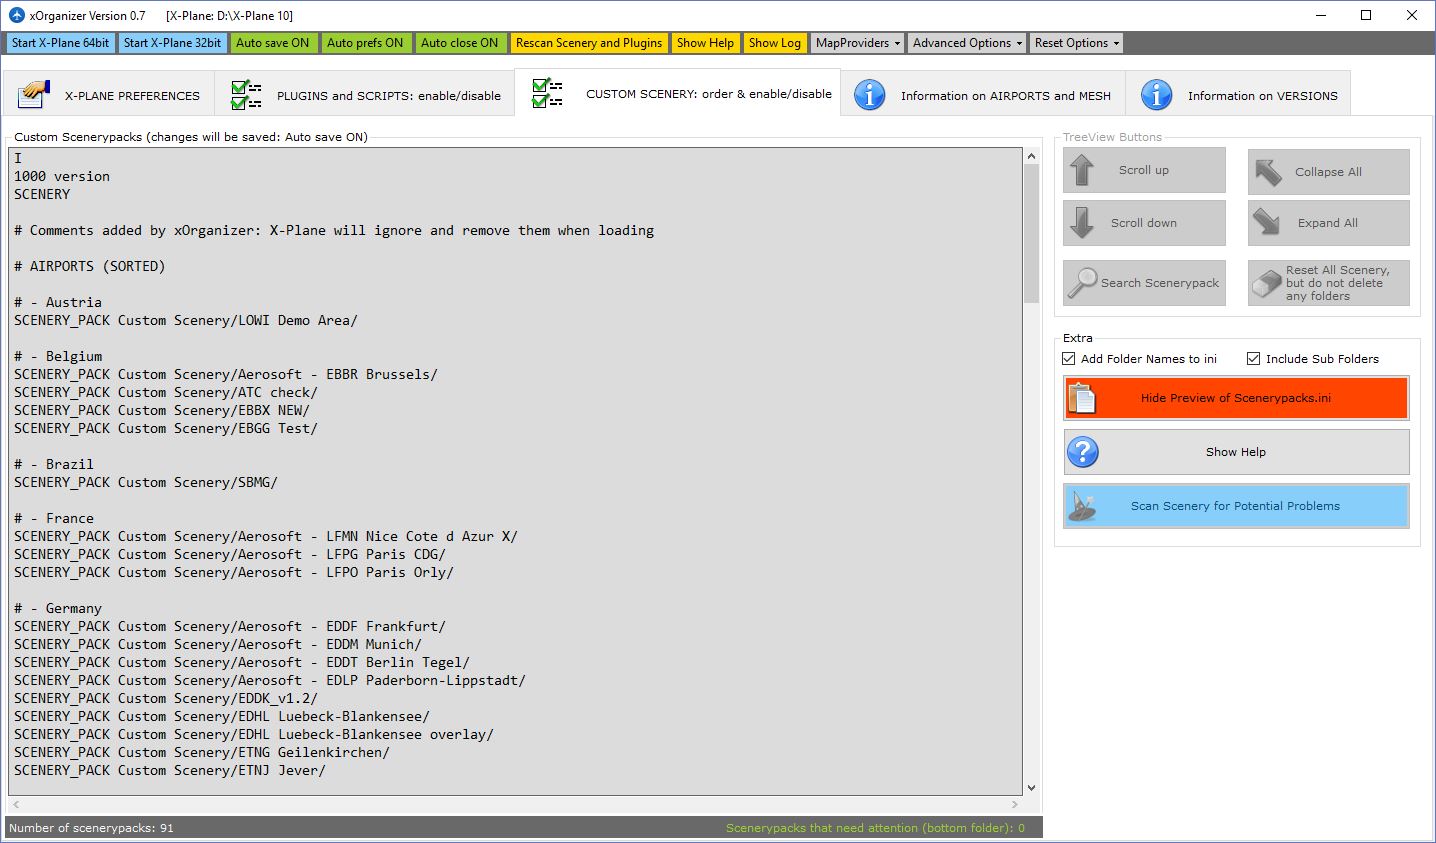
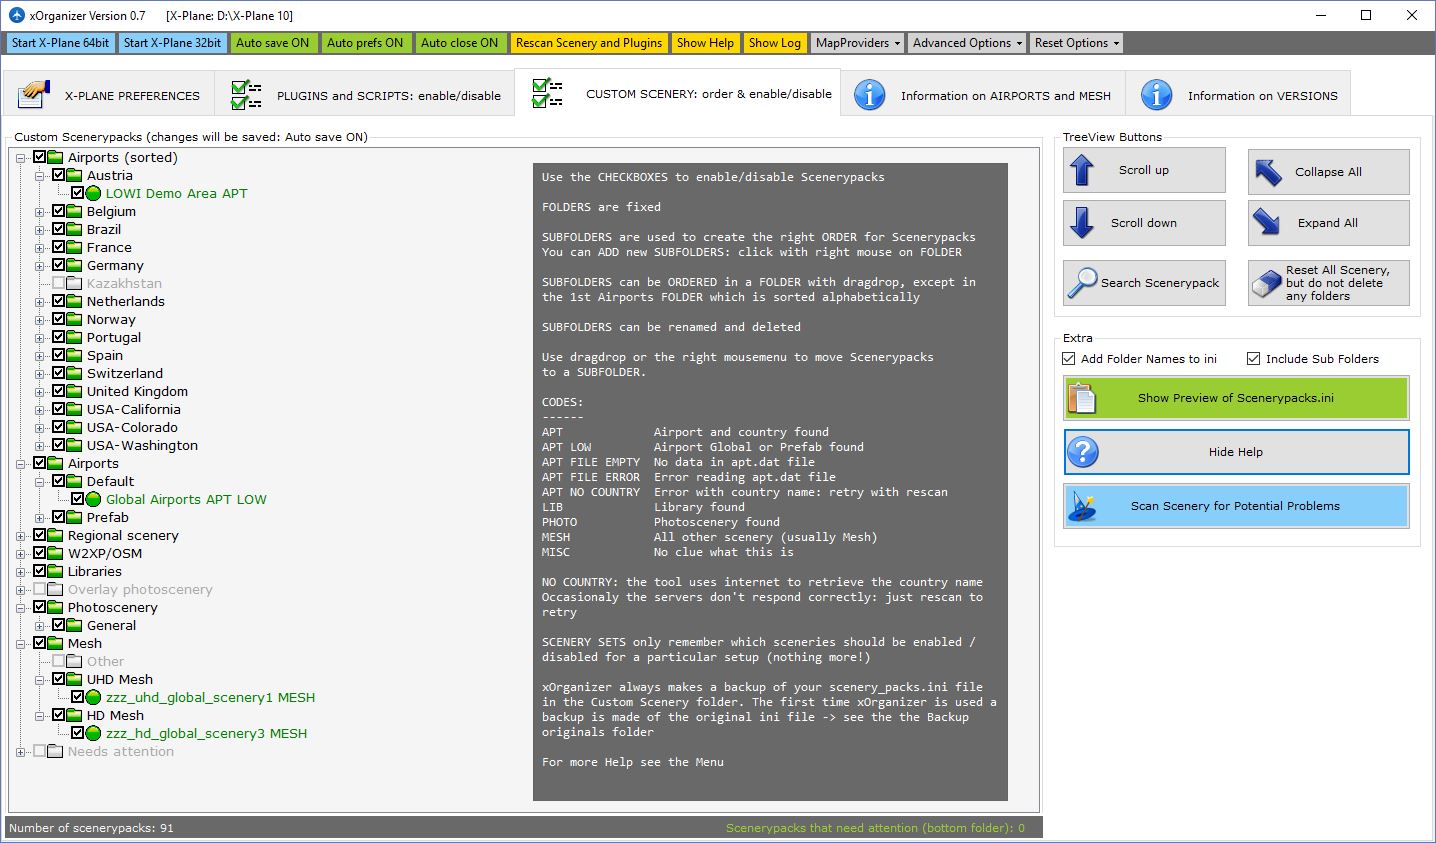
As I’ve been downloading more ortho scenery to my X-Plane library I started needing a map of what tiles I’d downloaded so I could focus on areas where I really want to fly and not duplicate efforts. I couldn’t find a simple solution to this, so I started making my own map, when I got a tip in the .Org forums to check out xOrganizer. It’s a Windows utility that tracks all your custom scenery, LUA plugins, mesh, libraries, overlays, ortho scenery, airports and more. It also shows your scenery on a map, scans for duplicates, allows you to activate or deactivate scenery and plugins with a click — and perhaps best of all — automatically organizes your scenery config file so the order is appropriate (and tidy). It’s a great utility, and like so much in the X-Plane world, it’s free. You can get it here.

SceneryPreview.JPG.bb3210d717c92d877d30f2f272b9ebf3

SceneryHelp.JPG.f252b0a5e6debabffc9d7a979660f2dd

Mesh.JPG.b1ed1183bf1cfe1e78b1971bd8a85c5f

Airports3.JPG.5bbc2f60856b9788e8d192add0dbcb7d

My X-Plane Scenery_Packs.ini File

Folks have been asking for it so I’ve pasted it in after the break. Someone who really understands X-Plane may look at it and point out things that aren’t optimal, but so far it’s working for me. Here’s a truncated version:

I
1000 Version
SCENERY
SCENERY_PACK Custom Scenery/KPDX - Portland International/
[OTHER CUSTOM AIRPORTS HERE]
SCENERY_PACK Custom Scenery/Aerosoft - EBBR Brussels/
[OTHER AEROSOFT AIRPORTS HERE]
SCENERY_PACK Custom Scenery/x_Prefab_Airports_1/
SCENERY_PACK Custom Scenery/Global Airports/
SCENERY_PACK Custom Scenery/LOWI Demo Area/
SCENERY_PACK Custom Scenery/KSEA Demo Area/
SCENERY_PACK Custom Scenery/w2xp_America/
SCENERY_PACK Custom Scenery/x_Prefab_Library/
[OTHER LIBRARIES HERE]
SCENERY_PACK Custom Scenery/yOrtho4XP_Overlays/
SCENERY_PACK Custom Scenery/zNW_+42-123_medfordOR_bg/
[OTHER PHOTOREALISTIC SCENERY HERE]
SCENERY_PACK Custom Scenery/zzz_hd_global_scenery3/
As you can see, the general order I’m using is:
  1. Custom Airports
  2. Aerosoft Airports
  3. Prefab Airport Package
  4. Global Airports
  5. X-Plane Demo Areas
  6. W2XP America
  7. Libraries
  8. Ortho Overlays
  9. Photorealistic Scenery
  10. HD Mesh
 Continue reading "My X-Plane Scenery_Packs.ini File" 

“Where Did You Get The Stickers?”

“Where Did You Get The Stickers?”

I get that question often, with people wondering where I came across the very real-world-looking placards and stickers that I have on the dash, the throttle quadrant, and elsewhere. The answer is Screaming Aero Graphics, which sells interior and exterior placard sticker kits for a large variety of aircraft. I purchased mine on eBay, but they have since opened a full-service website where they sell all sorts of aviation decals (including striping, registration numbers, and more).

I purchased the Cessna 182 kit, and it was easy to use. Just peel and stick, and where a sticker didn’t quite fit my panel (like the flap detents on the throttle quadrant) I just trimmed it. Easy. Service was quick and correct and pricing was fair. Check them out.

180

How To Play Audio Through Two Windows 10 Devices

I was looking for a way to send Windows 10 audio to to more than one sound device so I could have the Buttkicker picking up the low end from the subwoofer output while still having audio running through my headsets. Why? So I can keep the sim quiet for family, and so I can record GoPro audio when needed. I found a video with a method that works for me, and here it is:

How To Stop Dynamic Head Movement In Prepar3D

A question I get from time to time is how I manage to keep my virtual cockpit views from moving as the aircraft moves (for example, the virtual eye point moving back as the airplane accelerates, or to the side in a turn). Prepar3D (and I presume FSX) have a configuration setting called “Dynamic Head Movement” which creates the effect. To turn it off, open your Prepar3D.cfg file and edit the values of these lines so they appear as below, and it should fix it (you may need to reboot):

[DynamicHeadMovement]
LonAccelOnHeadLon=0.000000
LonAccelOnHeadPitch=0.000000
RollAccelOnHeadLat=0.000000
YawAccelOnHeadLat=0.000000
RollAccelOnHeadRoll=0.0000000
MaxHeadAngle=0.000000
MaxHeadOffset=0.000000
HeadMoveTimeConstant=0.000000

Reader Mail

I recently had this exchange with a reader and thought it might be worth posting.

I have a question regarding your setup.

I have upgraded my pc to exactly your specifications (6770k 4 gh -> overclocked to 4,6; 16GB DDR4 3000, NVidiaa GTX 980TI) with 3 monitors (all 3 with nvidia surround connected together to get 3x full hd).
The good thing: when I am at ORBX pacific NW scenery with normal airports (Concret Mun eg) i get 30 fps with a view configuration like yours (3 aditional views one left, one right and one main). When I go to KSEA (san francisco) i only get 11 FPS.

Could you please send me your settings (Graphics, NVIDIA?, any tewaks?)? And do you use hyperthreadeing?

I have changed Afinity Mask to 14 (have swiched off HT but it males no change)

Thank You!

***

Hi [name],

My settings are pretty standard. I use no real tweaks in the config file after corresponding with Rob Ainscough who said he uses none and believes P3D is best when it self configs. I do use HT, but have alternated over the past year from using it to not using it. I use AM 116, and then I use the Project Lasso app to assign all the add-ons to the other cores (0-1, 5-7) so that P3D can run on a few cores by itself. I think that helps with FPS. I also overclock the 980ti a bit (+50). All that said, in Orbx SoCal with Orbx vector my FPS can be very low. I turn the scenery way down when I’m down there. The bottom line is that three or four open windows is a test, even with our powerful gear. But 11 FPS would be very low for me.

I would send my graphic settings but I change them a lot based on when I’m flying (for example, SoCal – very few AI aircraft, normal scenery settings, vs out in the mountains where I max everything out). I also use a different graphic setting at night than in the day (lower resolution for everything including terrain because you can’t see it).

I did an informal analysis of the FPS impact of different settings on my rig a few weeks back, which I’ve not yet published, but it showed that by far the biggest FPS hits for me were (in set order):

– Airline, GA, and Road Traffic
– Casting Shadows (with clouds being the big hit, more so than scenery and vegetation)

For what that’s worth.

Let me know how the rumble keeps working out!

BFG


AVSIM Prepar3d Guide Now Online

Rob Ainscough, P3D beta tester and AVSIM moderator, has put online at AVSIM a user guide for Prepar3d. It’s already getting great reviews, and it’s free. Get it here, and here’s the description.



thumb-82fdc290dcfb168b64c903c90aeb34e3-avsim-logo1This AVSIM Prepar3D Guide will cover the following topics to help users get the most of Lockheed Martin’s Prepar3D platform.  Some of the information in this guide is applicable to prior versions of Prepar3D (V2.x and V1.x), however the primary focus of this guide will be for Prepar3D V3.x onwards:

  •           Installation and purchase
  •           Updating to a more recent Version 
  •           Configuring Graphics Settings
  •           Working with Configuration Files
  •           Configuring 3rd Party Add-Ons
  •           SimConnect
  •           Troubleshooting
  •           Hardware, Overclocking, Performance
  •           Input Control Devices (TrackIR, Yokes, Throttles)

The basic flow of this guide will take you thru; basic purchase and installation process, how to update your Prepar3D installation when new versions are released, configuring your graphics settings, exposing what settings increase process loads, adjusting you 3rd party products configuration settings to improve performance, some Prepar3D configuration settings (often called “tweaks”), setup of SimConnect (used by many 3rd party products), working thru compatibility with older FSX products, a quick guide to basic overclocking, and finally setting up input control devices (controllers).

This document will assume limited computer experience, but it will cover both easy and advanced topics.  Parts of this document will expect users to understand how to use a text editor (like Notepad) to edit/modify content in text files.

Hopefully there is some information to be gain in this document for the new user and the experienced user.
My Custom Camera Configurations

One of the most common questions I get about the basement sim is how I’ve aligned the cameras across the side LEDs and the front projection screen. I wrote a post about the process here, but a few folks have still asked for the config files themselves. I’ve actually written the camera settings into the individual configuration files for each aircraft I fly, but I do keep a reference file that has the settings. I’ve pasted it below the “continue reading” break below.

But please remember: these settings are based on the aircraft in the sim, the width of my cabin, the size of my screens, and the distance and height of my projector. Your mileage may vary considerably. Also, note that the first several camera settings below are in the format you need to add a custom camera to a scenario file, and the final one (for the Piper 180) is in the format you need to add a camera view to an aircraft config file. Hope this all helps.

Continue reading “My Custom Camera Configurations”