On The Glideslope

  • How To
    • How I Configure For VR In X-Plane
    • How To Have Dual Controls In X-Plane
    • How To Configure X-Plane 11 For Multiple Screens
    • How To Create Custom Cameras In P3D
    • How To Get Started With X-Plane 11
  • Resources
    • Schematics
    • Center Console Plans
    • Basement Sim Video Tour
    • Screen Configurations
    • A2A LVAR List PDFs
    • How To Talk ATC
    • Cessna 172 Cabin Dimensions
    • USB u0026 Saitek
  • Reviews
  • What’s In The Sim
  • About OTG
    • About OTG
    • The Construction Journey
  • How I Configured X-Plane Screens For The Basement Sim

    2016-12-14

    |

    How Tos, Screen Configs, X-Plane 11

    First, I’m writing this quite quickly as I have someplace I need to be. So forgive any typos, and I may revise it a bit later …

    After several days of tweaking I finally have my X-Plane 11 visuals for the Basement Sim where I like them, and I like them a lot. It was a bit of a process getting there, and absolutely a learning experience as I’ve never played in this space in X-Plane before, but it was fun and I feel like I understand it much better – and I really like the results.

    You’ll remember that the reason I had to do all of this is because of how X-Plane handles multiple monitors. Historically, it didn’t do this at all without significant add-ins. With X-Plane 11, though, we have multi-monitor support, and it works great, thanks to a simple dialogue that allow you to set a field of view (the default is 60 degrees), along with lateral, vertical, and roll offsets for that field of view. In essence, if each monitor is like a camera on a tripod, you can set the width of the image (field of view), as well as the direction it is pointing horizontally (lateral), tilt (vertical), and side-angle tilt (roll).

    So by setting different offsets for each camera, you should be able to achieve a set of views where the front screen is looking out the front of the airplane, the left screen is looking straight out the left window, and the right screen is looking straight out the right window. By varying the fields of view, which act like a zoom, you should be able to get objects on different-sized monitors (I have a 100 inch projection screen in front and 32 inch LEDs on the sides) to match up. And finally, by varying offsets, you should be able to get the horizon to match up across the three screens.

    After some trial and error, I was able to do this. For my screens and my cockpit, this was the setup that worked best:

    LEFT SCREEN:

    • 57 degree FOV
    • -90 lateral offset
    • – 6.5 vertical offset
    • 0 roll offset

    FRONT SCREEN:

    • 97 degree FOV
    • 0 lateral offset
    • 7 vertical offset
    • 0 roll offset

    RIGHT SCREEN:

    • 57 degree FOV
    • 90 lateral offset
    • -6.5 vertical offset
    • 0 roll offset

    These settings produced a nice alignment of horizon and runway lines that matched up very well, especially from the position of the GoPro in the back middle of the cabin. But there was a problem, and the problem was that I could still see the panel on the front screen. So just use the arrow keys to raise the eye point, right? But therein is the complication, because in X-Plane 11 (at least so far) the multiple views are all connected to a single eye point, meaning that they all move together. So when I raised the view to get the panel out of the way, the top of the virtual cabin windows were now in view. And if I lowered the view to get the windows out of the way, the panel was visible. Everything moves together. So how to solve THAT problem?

    The answer is the great little program that comes with X-Plane, Planemaker.exe. It allows you to make your own aircraft for the sim, or to modify the ones you fly. You can find it in the same root directory in which X-Plane sits. It turns out that the airplane models in plane maker are made of three-dimensional objects that the designer loads to cover the wireframe (and invisible) physical dimensions of the airplane and flight model. In essence, they design a wireframe airplane, and then fill and cover it with textures and objects, like wings. These objects don’t affect the flight characteristics, as they are simply window dressing for the flight model. And it turns out that you can move them around, and even delete them entirely. The airplane will look different–if you delete the wings and look at the airplane in chase view, it will have no wings–but it will still fly just fine.

    It’s because of this that I was able to solve my view problem of having a panel that was too high, wings that were two low, and cabin walls that I could see. Here’s how I did it, with some screen grabs from my Mac which has X-Plane 10 on it (this Cessna looks a bit different than the one in X-Plane 11, but you’ll get the idea):

    • In my X-Plabne “Aircraft” folder I made a duplicate of the default Cessna 172 folder. I created a full copy called “Cessna 172SP Copy” that had all the contents of the original in it. This way I could work without messing up the original.
    • The file that Planemaker reads is a .acf file. I opened plane maker, and opened the Cessna_172SP.acf file from the Copy folder. When you do, you’ll see something like this:
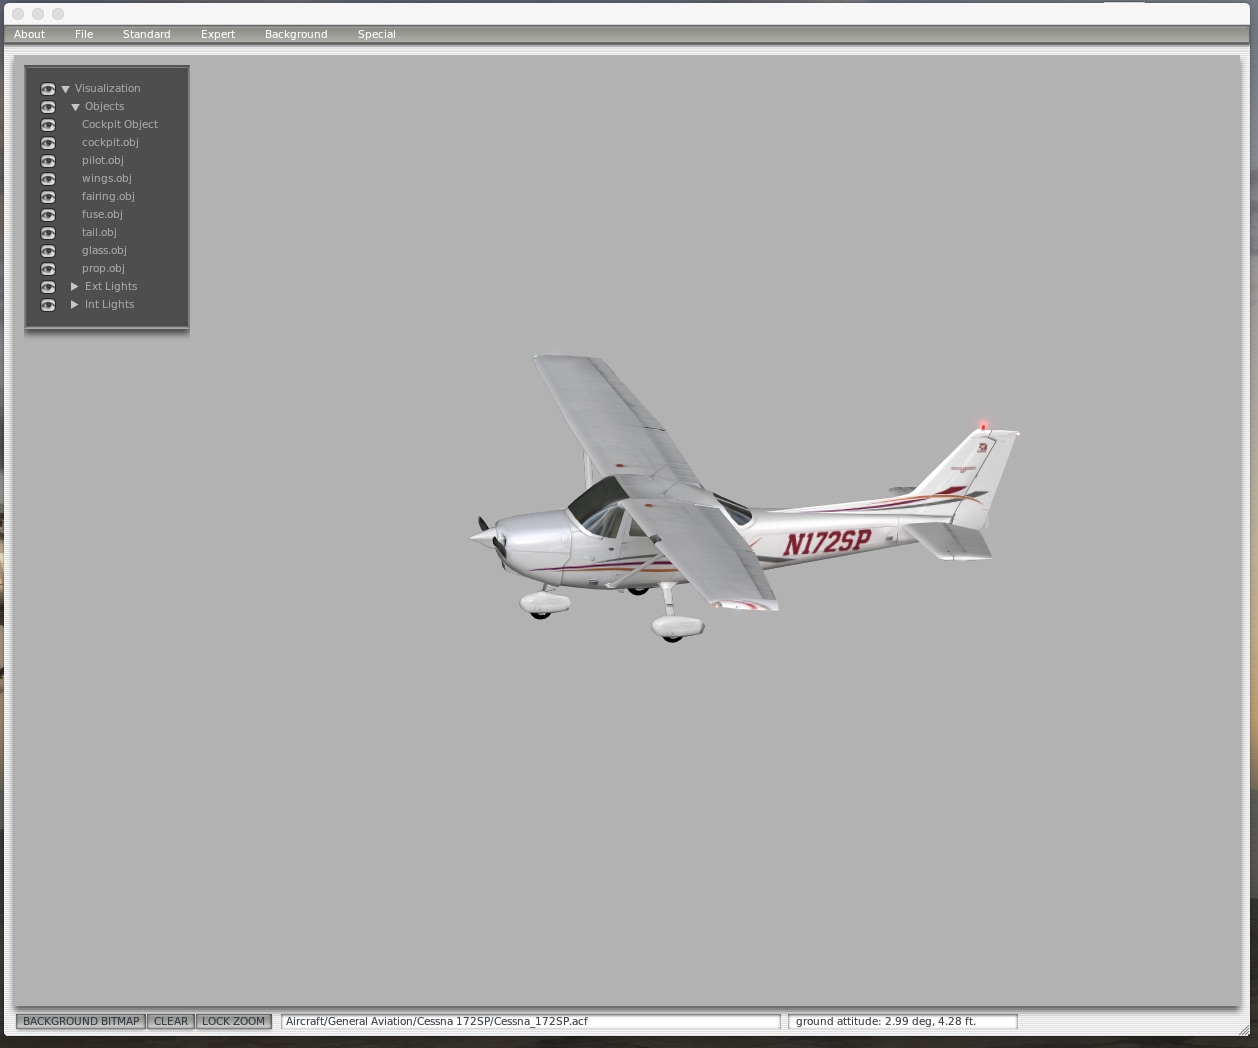
    Screenshot_12_14_16__4_43_PM

    • With the Visualization menu on the left you can “turn on” or “turn off” different parts of the visual model. This does NOT make them invisible in the sim – it just makes them invisible so you can see what’s behind them. Here’s a view where I’ve turned off the fuselage object:
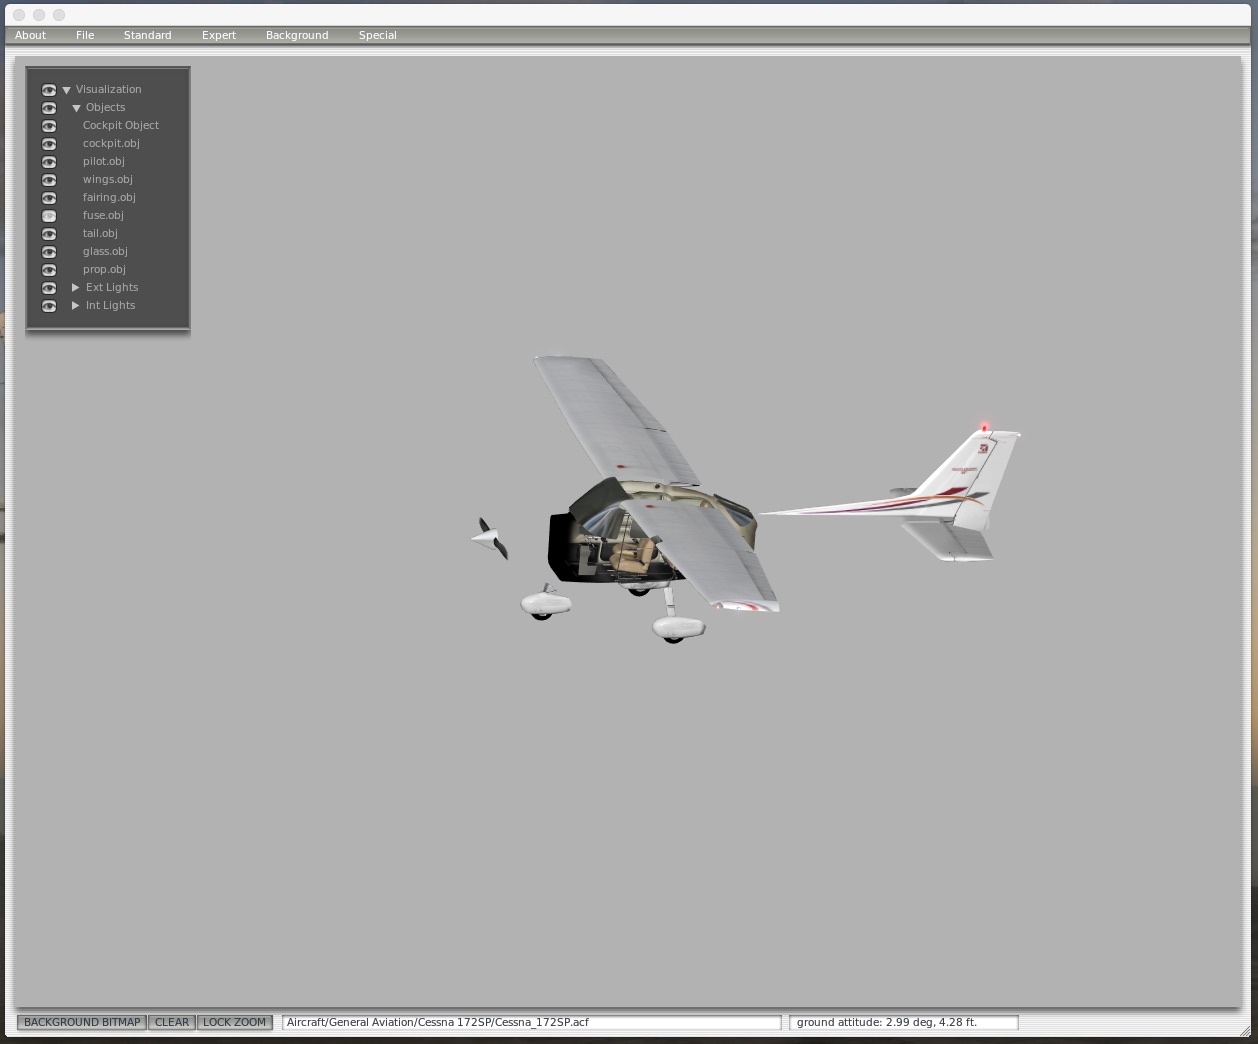
    Screenshot_12_14_16__4_46_PM

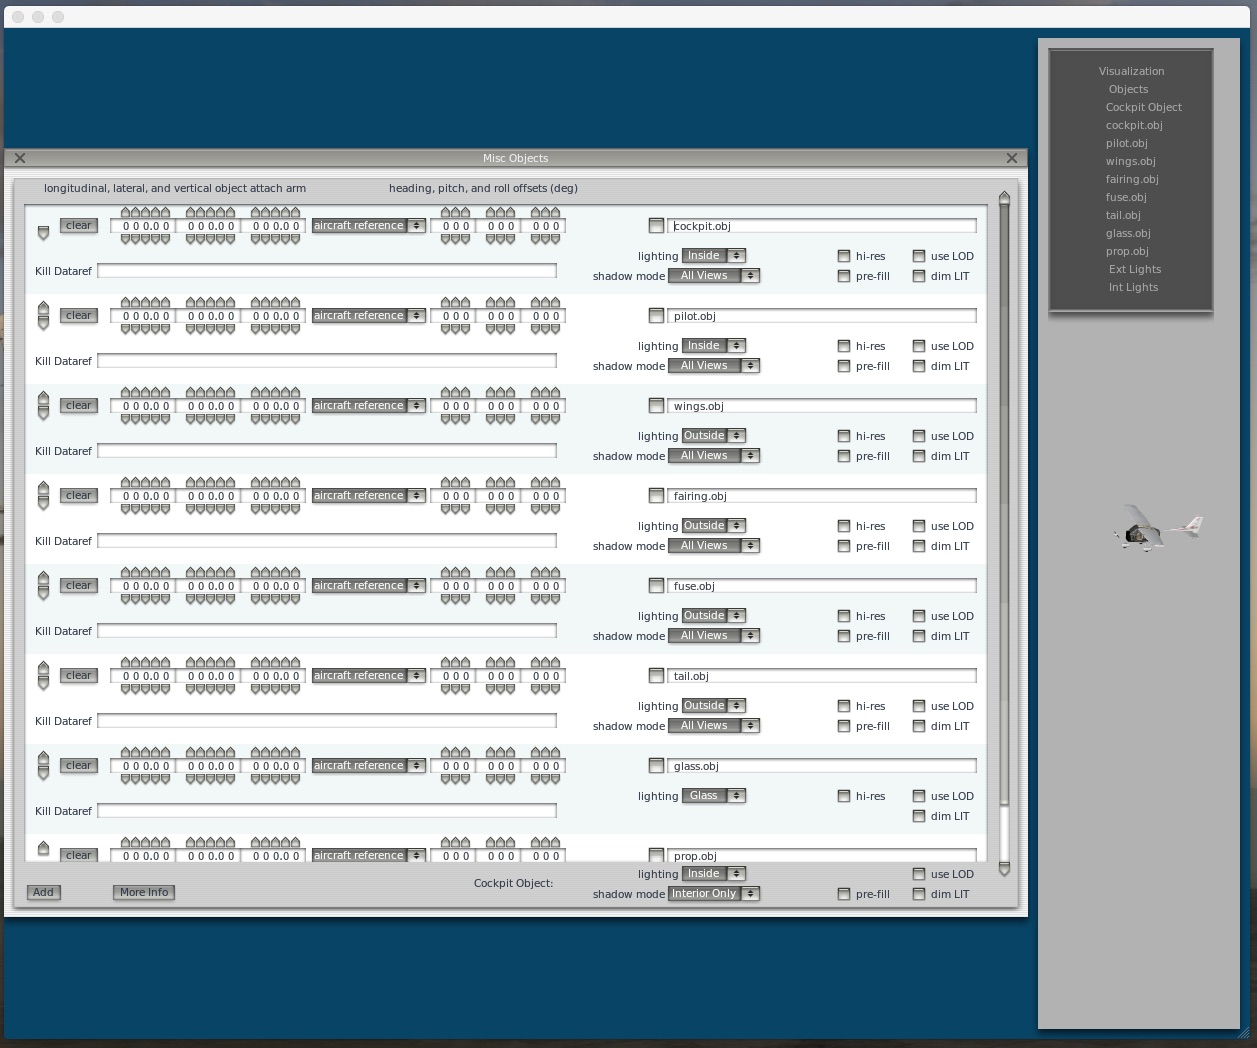
    • Turn off the fuselage object so it’s out of the way. Then click Standard / Misc Objects from the menu. You will see a screen that lists all the 3-D objects that make up the visual model of the airplane. something like this:
    Screenshot_12_14_16__4_47_PM

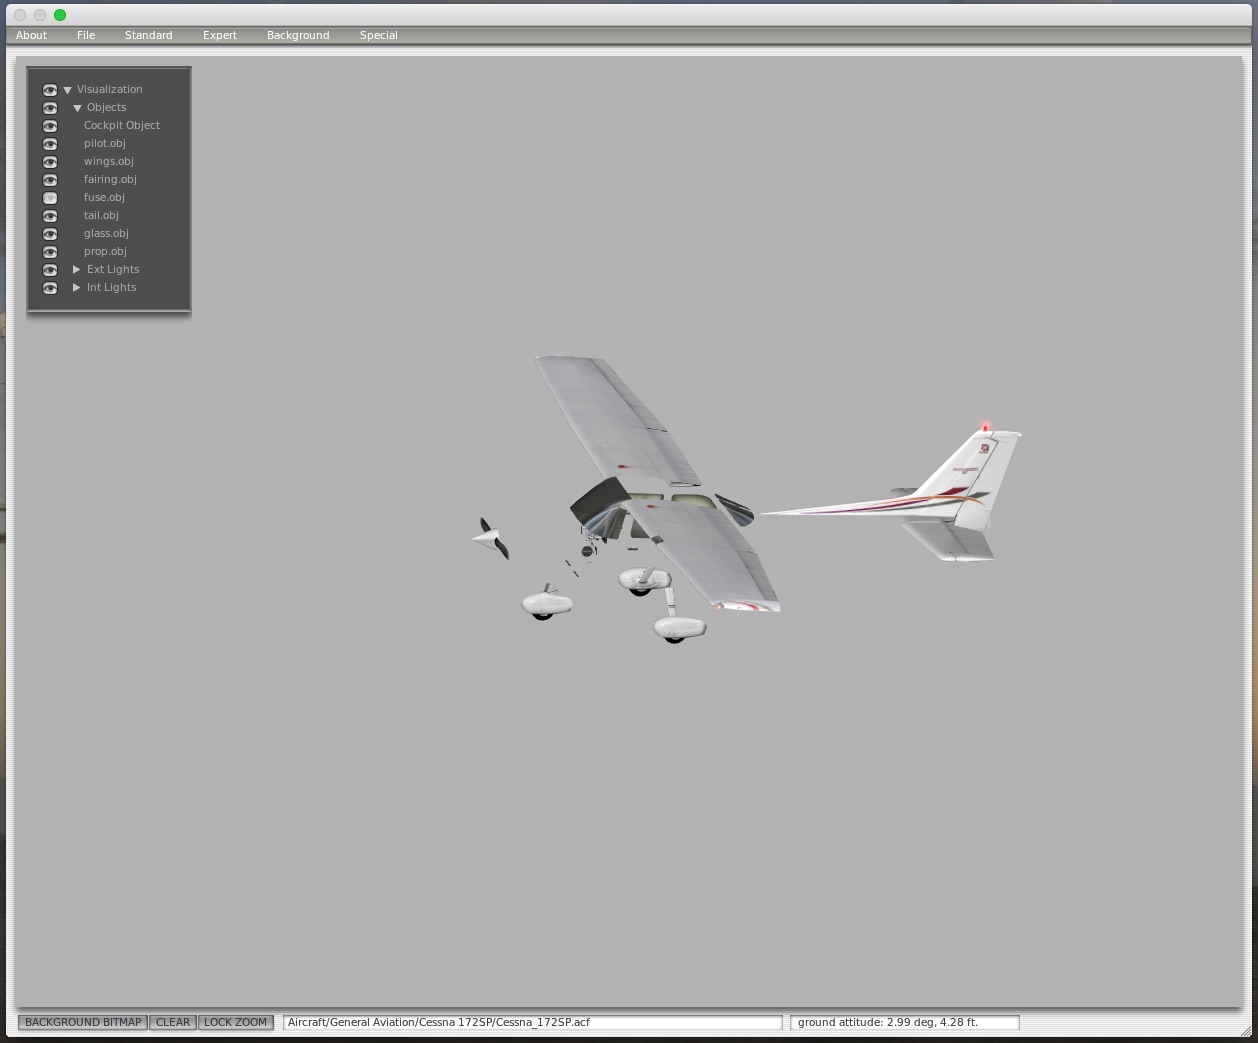
    • This is a powerful screen, so tread lightly here. But if you click the “clear” button for any of the objects, Planemaker will delete them from the visual model. They won’t show up in the sim at all, but it also won’t affect the flight model. Your external screenies may look strange, but you can easily remove things you don’t want to see. If I delete the cockpit.obj object, the model now looks like this:
    Screenshot_12_14_16__4_49_PM

    • So that’s what I did. In the X-Plane 11 172 I also deleted a second cockpit object, seats, and a bit more. I DID NOT delete any of the avionics or panel, because I think they may need to be in the model to work, but I’m not sure. When I loaded X-Plane 11 and loaded that Cessna (if you look at the details for the airplane in the flight setup screen it will show you which folder it’s in so you can pick the correct one from the Copy folder), I could see the wings, cowl, and prop, but the cockpit was gone, and I finally had a correct view like I was looking out real windows. BUT – there were still alignment problems (wings too low, cowl too high, panel too high).
    • If you look at the Misc Objects screen you will also see that you can adjust the vertical, lateral, and horizontal positioning of objects, and you will actually see them shift around on the screen. I used this to lower all the panel objects a lot (but still so I could see them by tiling my view in case I needed to), to lower the cowl and prop a bit, to raise the wings a bit (I suppose I could have just raised them and left the cowl in place, but I’d already moved it), and to move the wings forward.
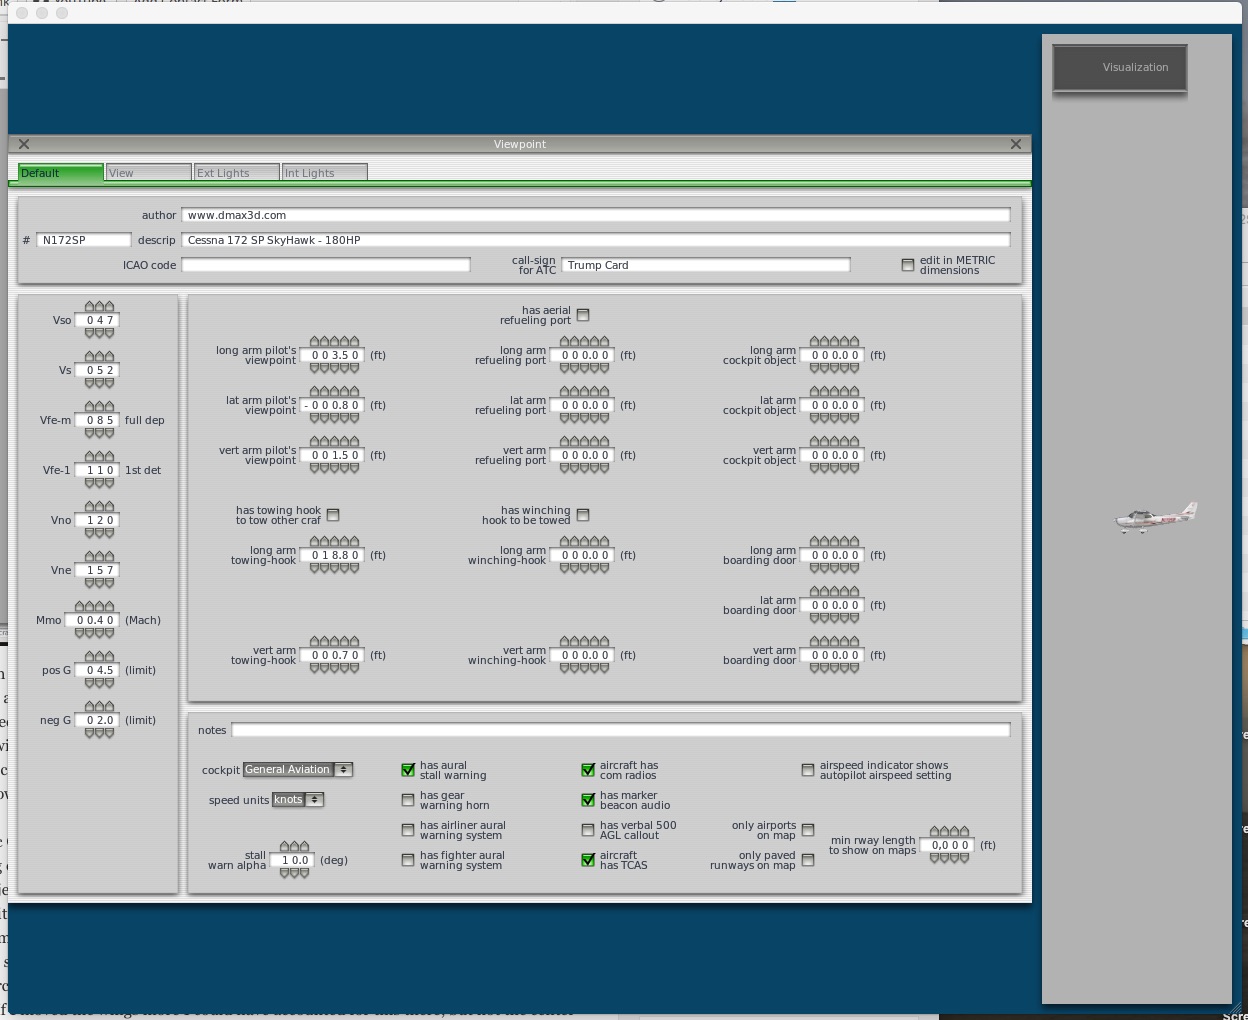
    • Finally, I adjusted the starting eye point so that every time I load that airplane the view is in the right place: in the center of the aircraft, rather than in the pilot’s seat, and a bit forward so the wings are just where I wanted them (again, If I moved the wings more I could have accounted for this there, but not the center position of the view). You can tweak this in Planemaker as well, using the Standard/Viewpoint window. It looks like this (this is the X-Plane 10 version, and the 11 is just a bit different):
    Add_New_Post_‹_On_The_Glideslope_—_WordPress_and_Cessna_172SP

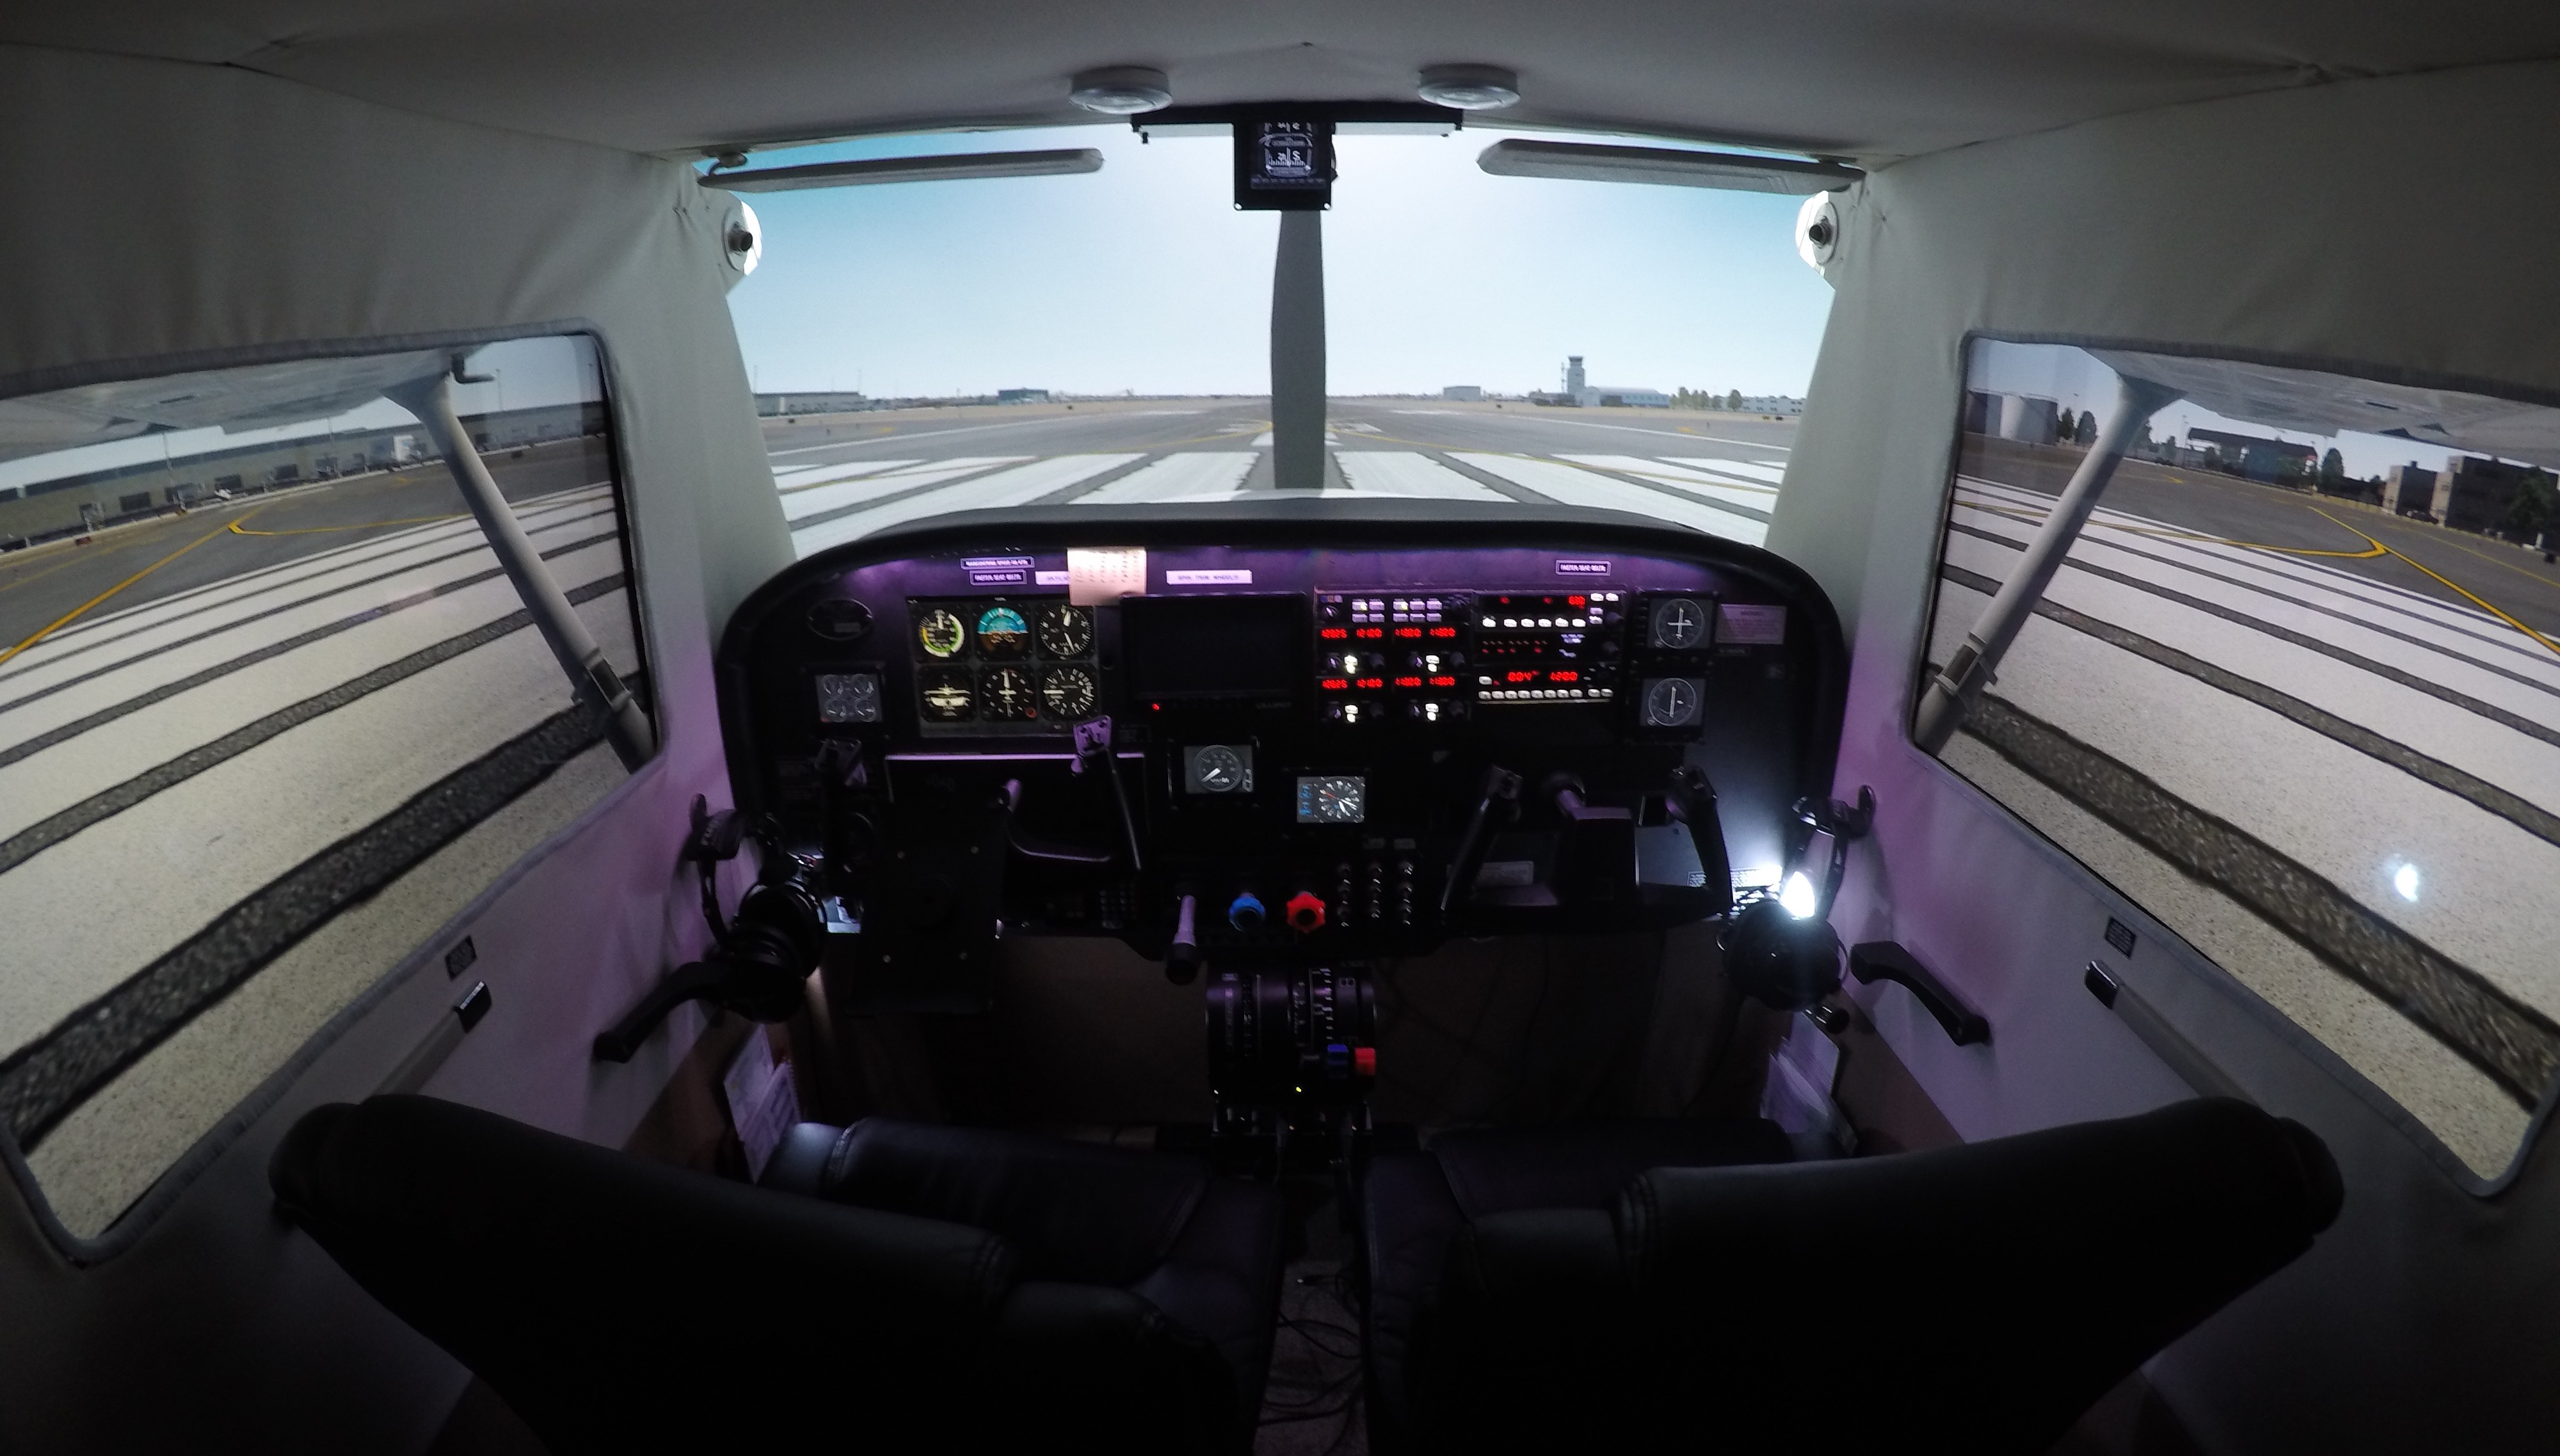
    • By adjusting the “pilot’s viewpoint” values you alter the starting location of the view when you open a flight with the plane. I adjusted the lateral value to 0, which starts the camera right in the center of the cabin, and moved it forward a bit by adjusting the longitudinal arm (long arm) value DOWN to be about 2.2 feet. This starts the sim with the view just where I want it, and the whole thing now looks like this:
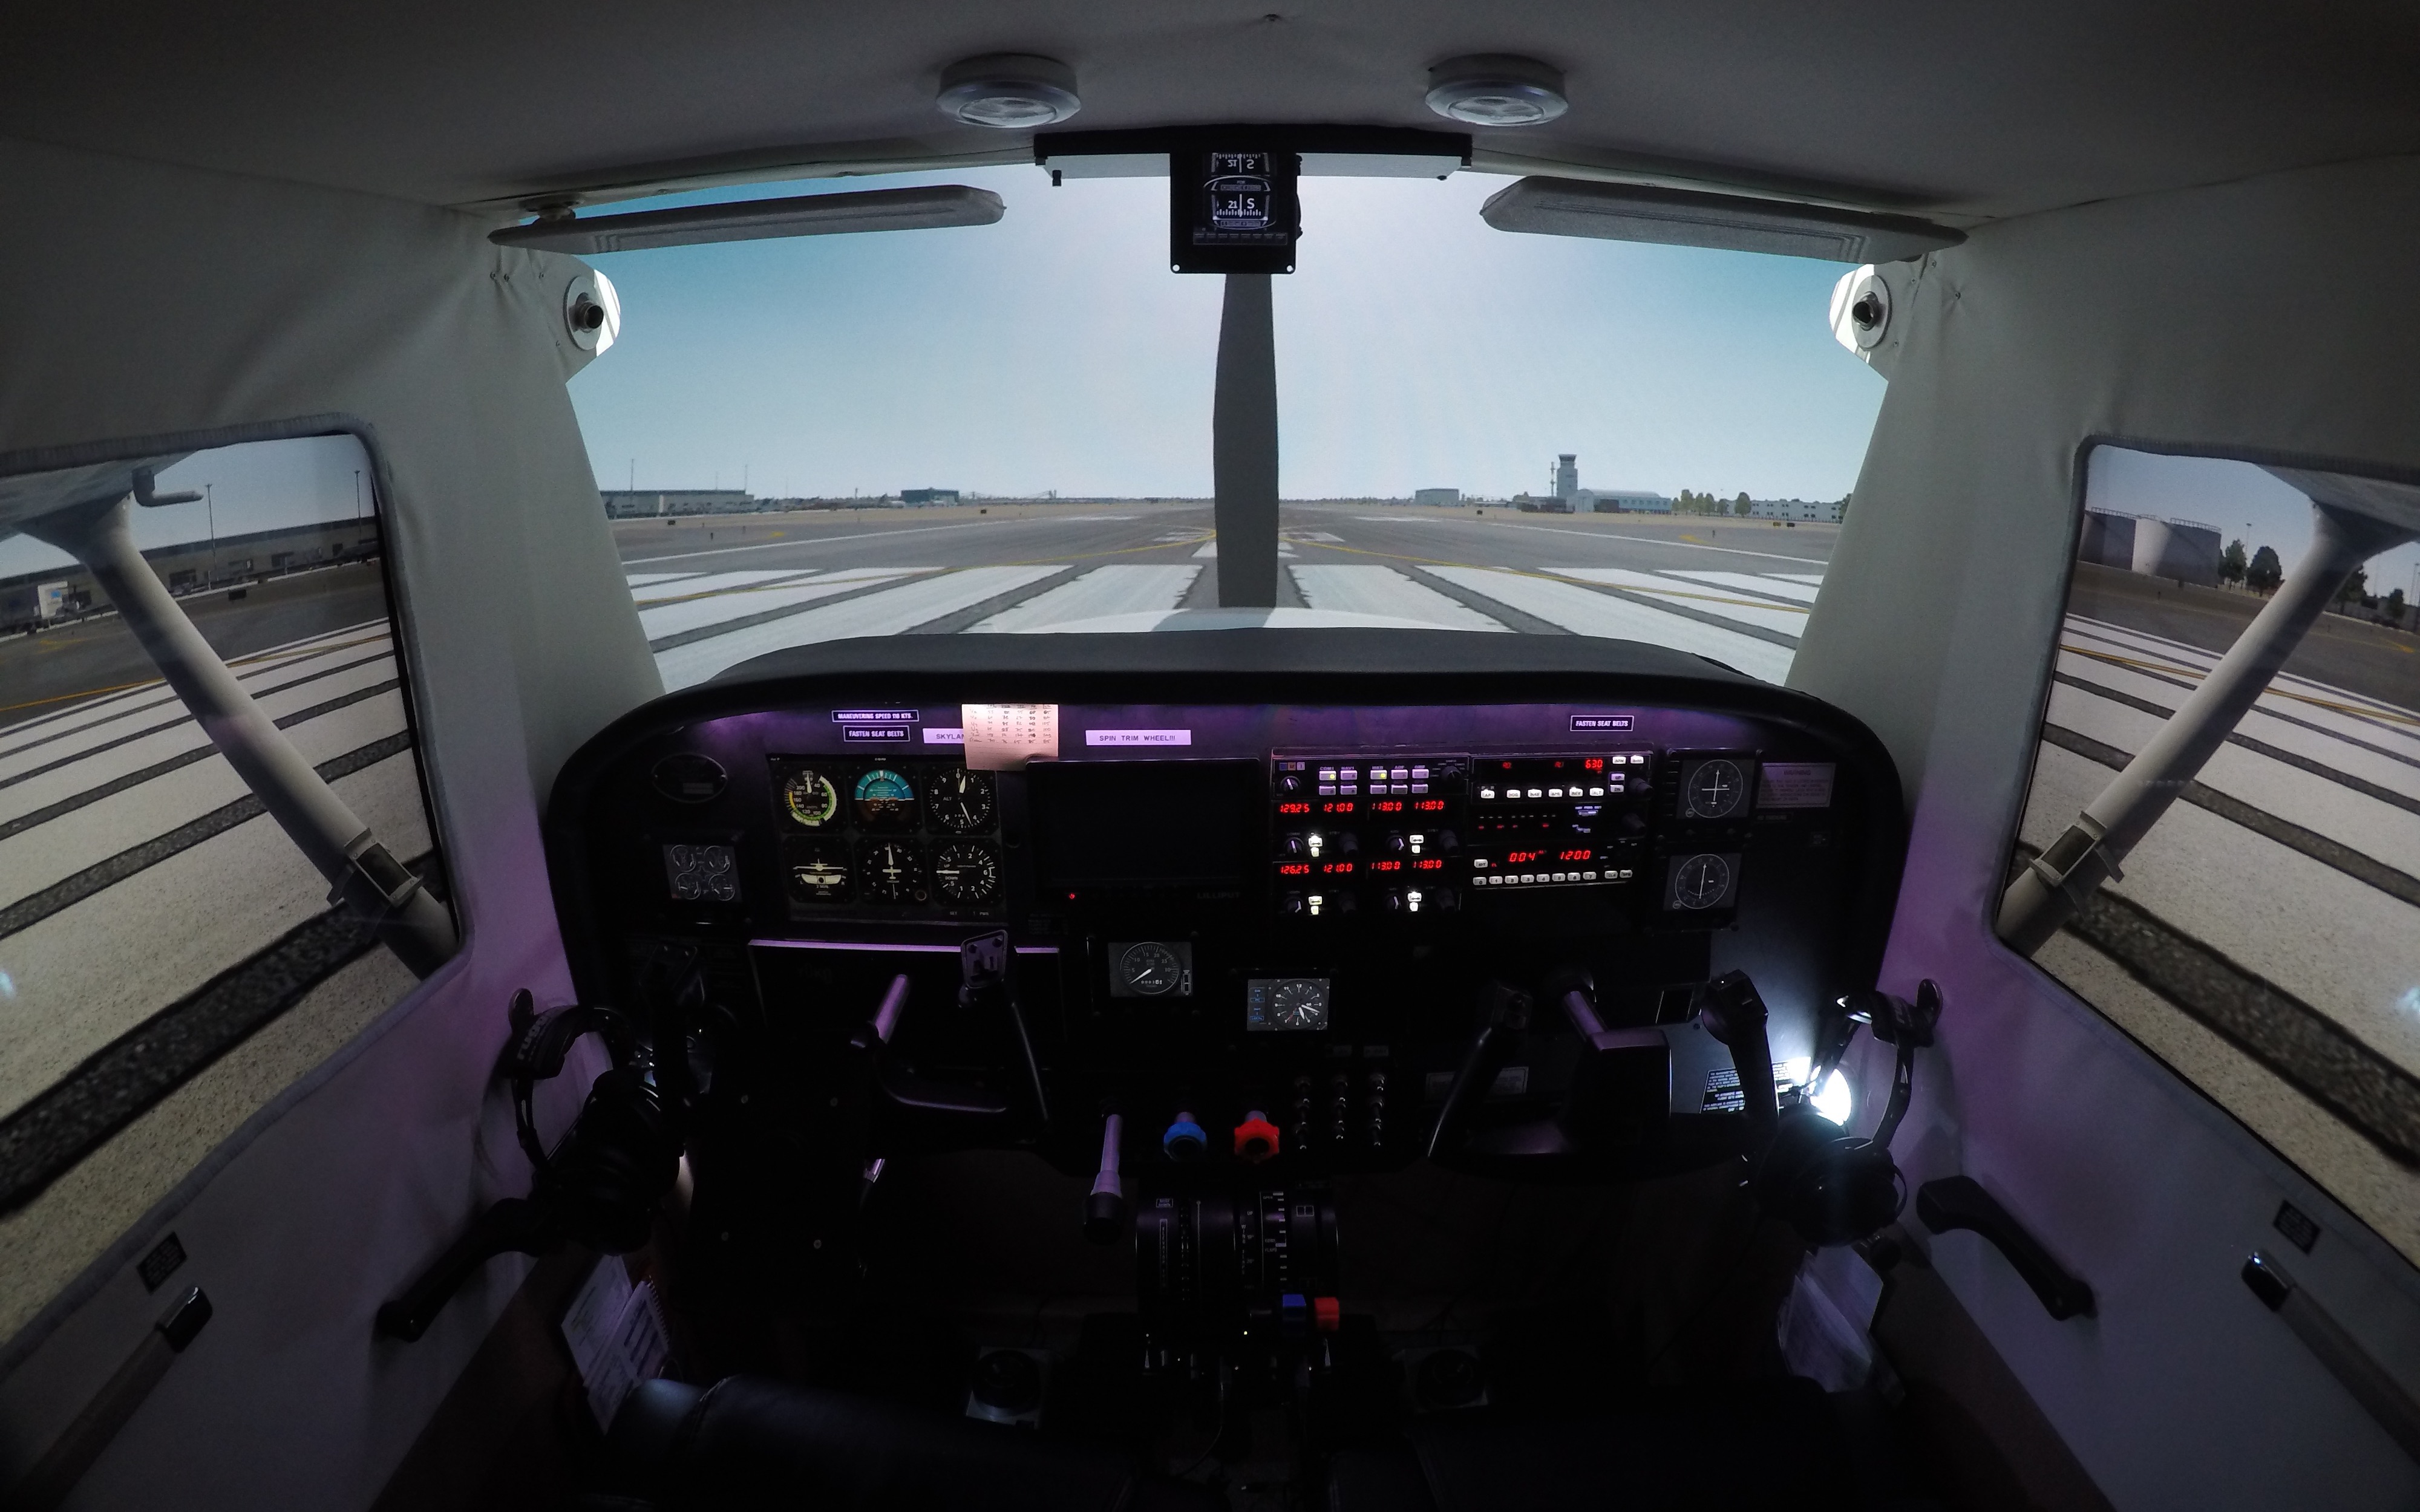
    DCIM106GOPROGOPR7006.

    DCIM106GOPROGOPR7005.

    And I think that looks pretty good. So, with all this behind me, when it’s time to do this for a new aircraft I believe I’ll do the following:

    • Configure the screens first, probably using the “no scenery, no HUD” view so I can just focus on getting the sizing and alignment correct.
    • Then look in the 3D cockpit view to see how things interrupt with the view, and to move the eye point around to get a sense of what I need to delete and move.
    • Use Planemaker to delete objects.
    • Go back into X-Plane to see how it looks and to decide if I need to adjust the wings, etc., then go back and forth with Planemaker until I have those adjustments how I like them.
    • Use Planemaker to get the permanent starting eye point where I want it.

    I actually don’t think that will take very long, now that I’ve done it once. Of course, If Laminar allows unique eye points for each screen, all this will be unnecessary. Until then, I hope it’s of help to you, and that it helps many more X-Plane simmers build their own cockpits. To help with that, you may download my .acf file for the 172 here. It probably won’t be perfect for your sim, but it might be a good starting point. Thanks for reading.

    Share this:

    • Share on X (Opens in new window) X
    • Share on Facebook (Opens in new window) Facebook
    • Email a link to a friend (Opens in new window) Email
    • Print (Opens in new window) Print
  • X-Plane 11 Visuals Continued

    2016-12-13

    |

    X-Plane 11

    A new video, shot with my phone, showing off some of the textures in the default X-Plane 11 scenery textures, and xEnviro clouds and sky textures. I was impressed with the quality of the default textures, although flying around the LA basin this morning I think I’ll look for something that improves upon that part of the world …

    Share this:

    • Share on X (Opens in new window) X
    • Share on Facebook (Opens in new window) Facebook
    • Email a link to a friend (Opens in new window) Email
    • Print (Opens in new window) Print
  • X-Plane 11 Update

    2016-12-12

    |

    Add Ons, X-Plane 11

    I know there are a number of questions here and also at YouTube, and I’ll get to them as soon as I can. But in the meantime, here’s a quick report on my new adventures with the X-Plane 11 beta:

    • I’m pretty blown away. I used X-Plane for years on my Mac before using P3D for the Basement Sim, but with the immersive setup in the sim I’m really astonished by the look and feel of things. The UI is definitely first rate, and I just can’t get over how good and smooth everything is. Not seeing texture tiles resolve into a higher resolution is a very welcome thing in particular. Look out into the distance in XP-11 and it’s just a very different, and more realistic, feeling than it is in P3D, at least for me.
    • I’m more blown away after downloading two add-ons meant to improve the default airport scenery in X-Plane: Prefab Airports (which put accurate taxiways and some buildings at thousands of smaller airports, including my local strip – which is important to me, because it was just a runway in the default scenery), and Airport Environments HD (which adds all sorts of realistic airport textures, much like REX Direct does in P3d). Airports look great now. And the price for these additions? Free. Welcome to the XP community.
    • And I’m REALLY blown away after installing xEnviro. This is payware (and not cheap, at $69 US), but it injects realistic weather into X-Plane, and completely revolutionizes the cloud system. And if there is one thing that XP is weak at out of the box, it’s weather. But I’ll tell you, the first time xEnviro loaded my local weather I said, “Holy #x$5!” It looked just like outside my window. And get this: ZERO frame rate hit, at least for me. Astonishing.

    Tonight’s mission is to get my Saitek panels working correctly. SPAD.neXt now has X-Plane support, but it’s been crashing on me, so I’m going to try some other options. I’ll report back, and as soon as I’m able, I’ll post how I got the visuals right, as I know some of you are waiting for that. But in the meantime, I think X-Plane 11 is a winner, and candidly, I can’t believe it’s a beta. The final product should be world class indeed.

    Share this:

    • Share on X (Opens in new window) X
    • Share on Facebook (Opens in new window) Facebook
    • Email a link to a friend (Opens in new window) Email
    • Print (Opens in new window) Print
  • Fantastic News From PilotEdge

    2016-12-12

    |

    PilotEdge

    WUS-launch-banner

    The long awaited Western Expansion is finally ready and will go live on December 27th. This will bring a massive increase to the coverage area, offering seven new towered fields (six continual, one on a rotating basis) to the service area and many hundreds of thousands of new square miles in which to fly. Just as important is that PE will offer enroute coverage through the entire limits of the five ARTCCs that make up the expansion area. This means you can depart one of the towered fields and fly with advisories to any non-towered field throughout the entire western third of the US. FANTASTIC.  Learn more about it here, and I’ll see you in the KSLC Bravo soon.

    Share this:

    • Share on X (Opens in new window) X
    • Share on Facebook (Opens in new window) Facebook
    • Email a link to a friend (Opens in new window) Email
    • Print (Opens in new window) Print
  • Success On The X-Plane Screen Config

    2016-12-11

    |

    Videos, X-Plane 11

    At least darn close to it! The trick was to use Planemaker.exe to delete the cockpit objects. I’ll get it just right and then I’ll post a how-to. But I have to say, X-Plane 11 looks astonishingly good to me in the sim. I can’t believe it’s a beta.

    Share this:

    • Share on X (Opens in new window) X
    • Share on Facebook (Opens in new window) Facebook
    • Email a link to a friend (Opens in new window) Email
    • Print (Opens in new window) Print
  • A New Era?

    2016-12-11

    |

    Uncategorized

    Perhaps, but not if I can’t get the visuals fixed …

    Share this:

    • Share on X (Opens in new window) X
    • Share on Facebook (Opens in new window) Facebook
    • Email a link to a friend (Opens in new window) Email
    • Print (Opens in new window) Print
  • New For The Basment Sim

    2016-12-11

    |

    Uncategorized

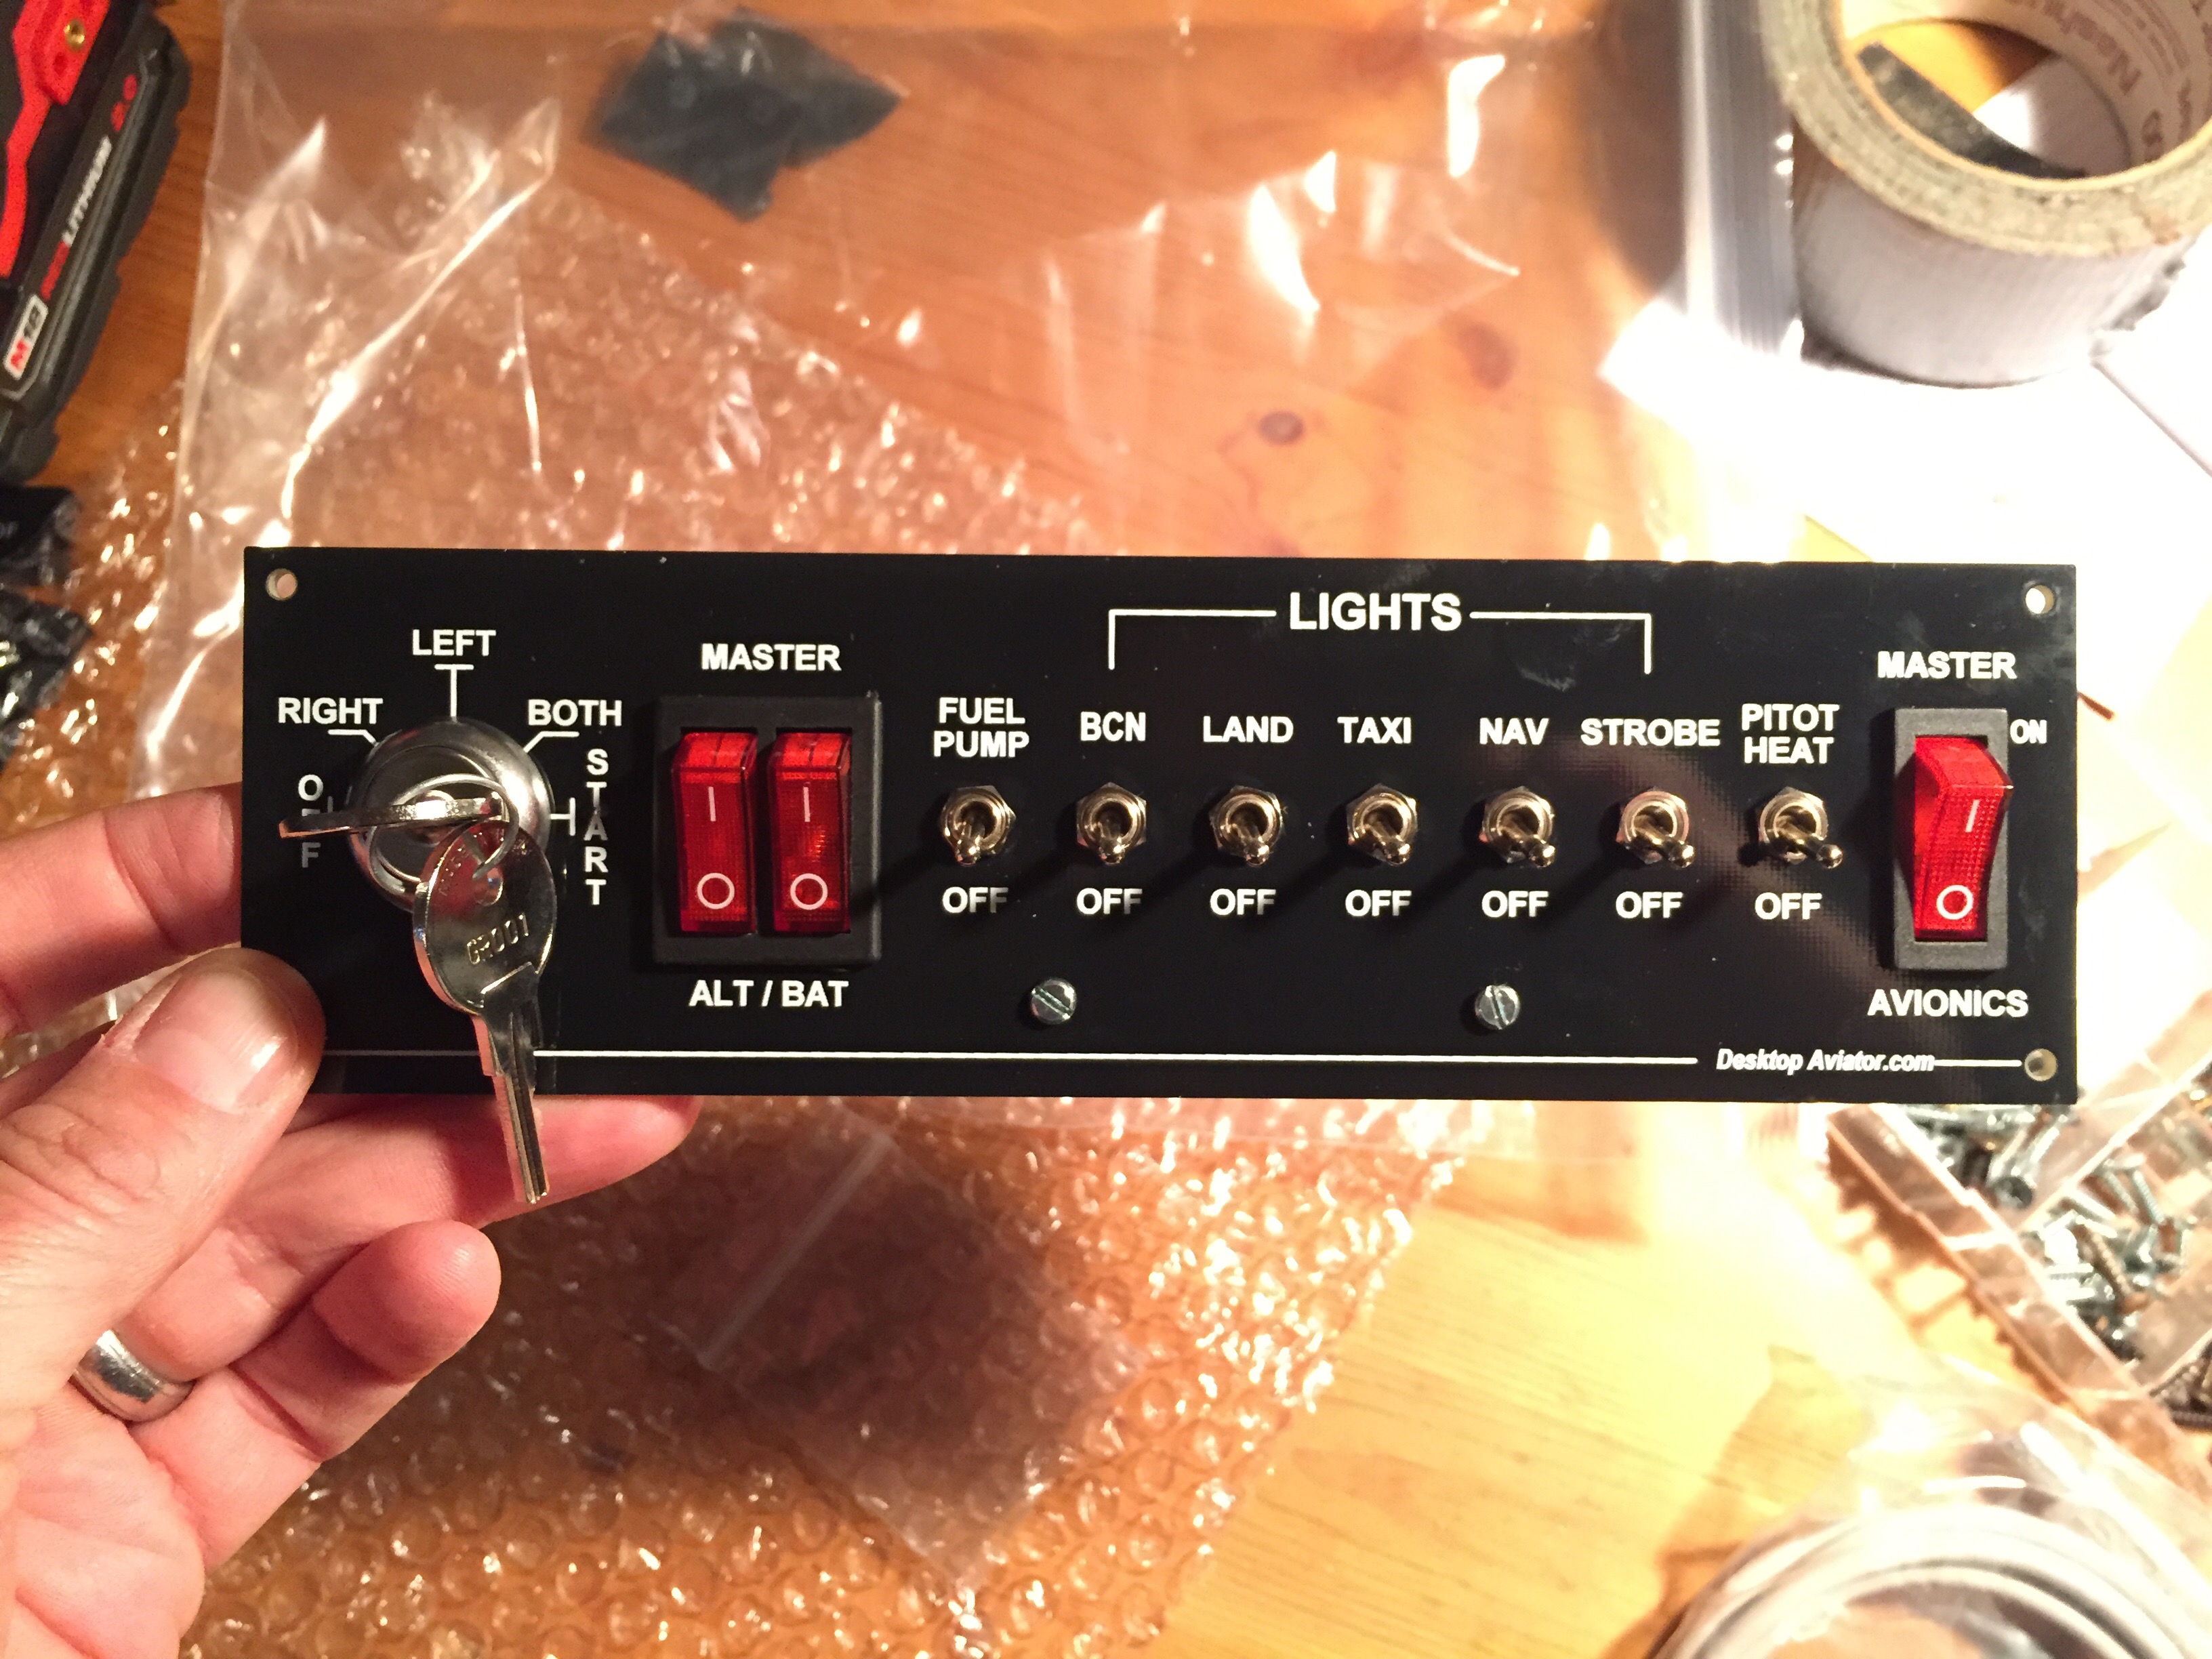
    The Desktop Aviator 1019 Cessna Switch panel. Let the panel rebuild begin!

    Share this:

    • Share on X (Opens in new window) X
    • Share on Facebook (Opens in new window) Facebook
    • Email a link to a friend (Opens in new window) Email
    • Print (Opens in new window) Print
  • “Where Did You Get The Stickers?”

    2016-12-08

    |

    Configuration, Product Reviews

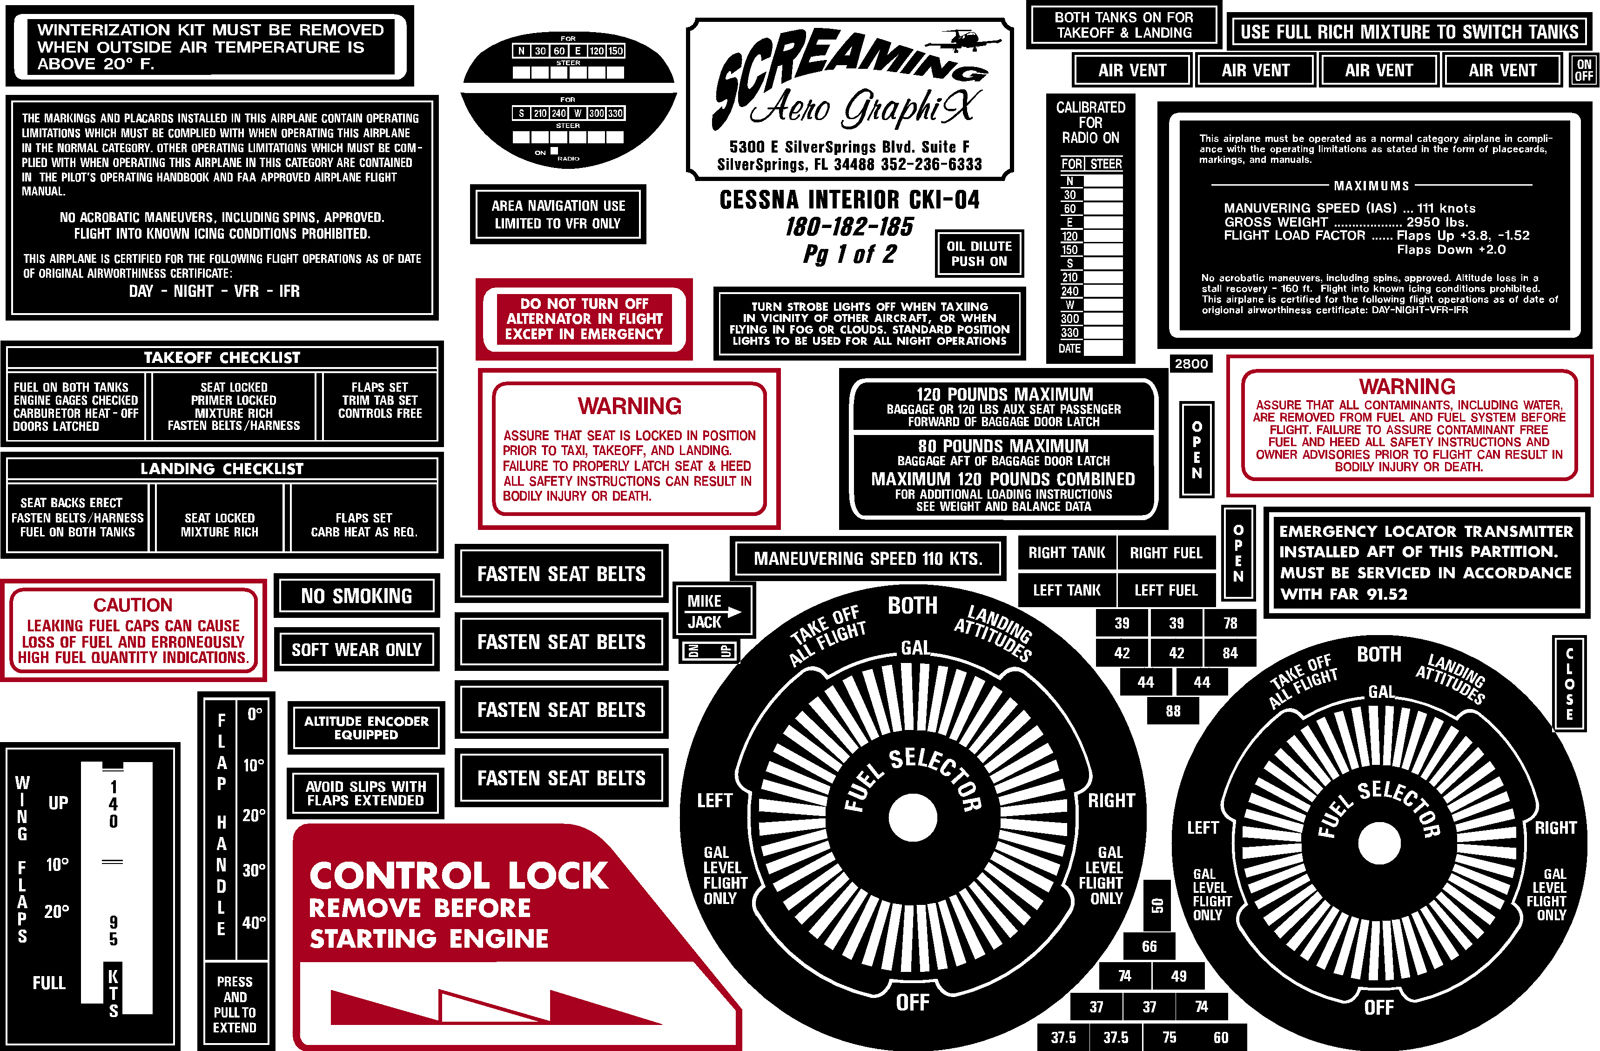
    I get that question often, with people wondering where I came across the very real-world-looking placards and stickers that I have on the dash, the throttle quadrant, and elsewhere. The answer is Screaming Aero Graphics, which sells interior and exterior placard sticker kits for a large variety of aircraft. I purchased mine on eBay, but they have since opened a full-service website where they sell all sorts of aviation decals (including striping, registration numbers, and more).

    I purchased the Cessna 182 kit, and it was easy to use. Just peel and stick, and where a sticker didn’t quite fit my panel (like the flap detents on the throttle quadrant) I just trimmed it. Easy. Service was quick and correct and pricing was fair. Check them out.

    180

    Share this:

    • Share on X (Opens in new window) X
    • Share on Facebook (Opens in new window) Facebook
    • Email a link to a friend (Opens in new window) Email
    • Print (Opens in new window) Print
  • Ground Reference Maneuvers

    2016-12-07

    |

    Real World Instruction

    That was the point of yesterday’s real world lesson. In ground reference maneuvers you learn to fly a consistent shape over the ground – circles, s-turns across a road, rectangles – as practice for keeping the airplane on a consistent ground track when flying the traffic pattern. We actually tackled this earlier in my training, but we didn’t really spend a lot of time on it so we used yesterday’s consistent easterly winds as a reason for a brush up. Which is good, because the last time I did these I was not so good at them.

    The trick in these maneuvers is to vary your bank angle and heading in the air so you fly a consistent pattern over the ground. Think of it: if you fly in a circle with a steady wind from one direction, you will actually fly a spiral pattern as the wind blows you over the ground. So the key to flying a steady ground track is to bank steeply when you are with the wind and not as steeply when you are into it.

    Here’s the track for part of yesterday’s flight, most of which was spent on a ground maneuver not surprisingly called “turns around a point.” There are a few “s-turns across a road” in there as well, as are the wind vectors (the thin yellow lines) which show the easterly wind. I did much better yesterday than a few months back. If you want to review the flight, follow this link.

    You can practice these in the sim, too. I did some of that in this video, and may shoot another as well.

    CloudAhoy 2

    Share this:

    • Share on X (Opens in new window) X
    • Share on Facebook (Opens in new window) Facebook
    • Email a link to a friend (Opens in new window) Email
    • Print (Opens in new window) Print
  • This Just Happened

    2016-12-04

    |

    Uncategorized

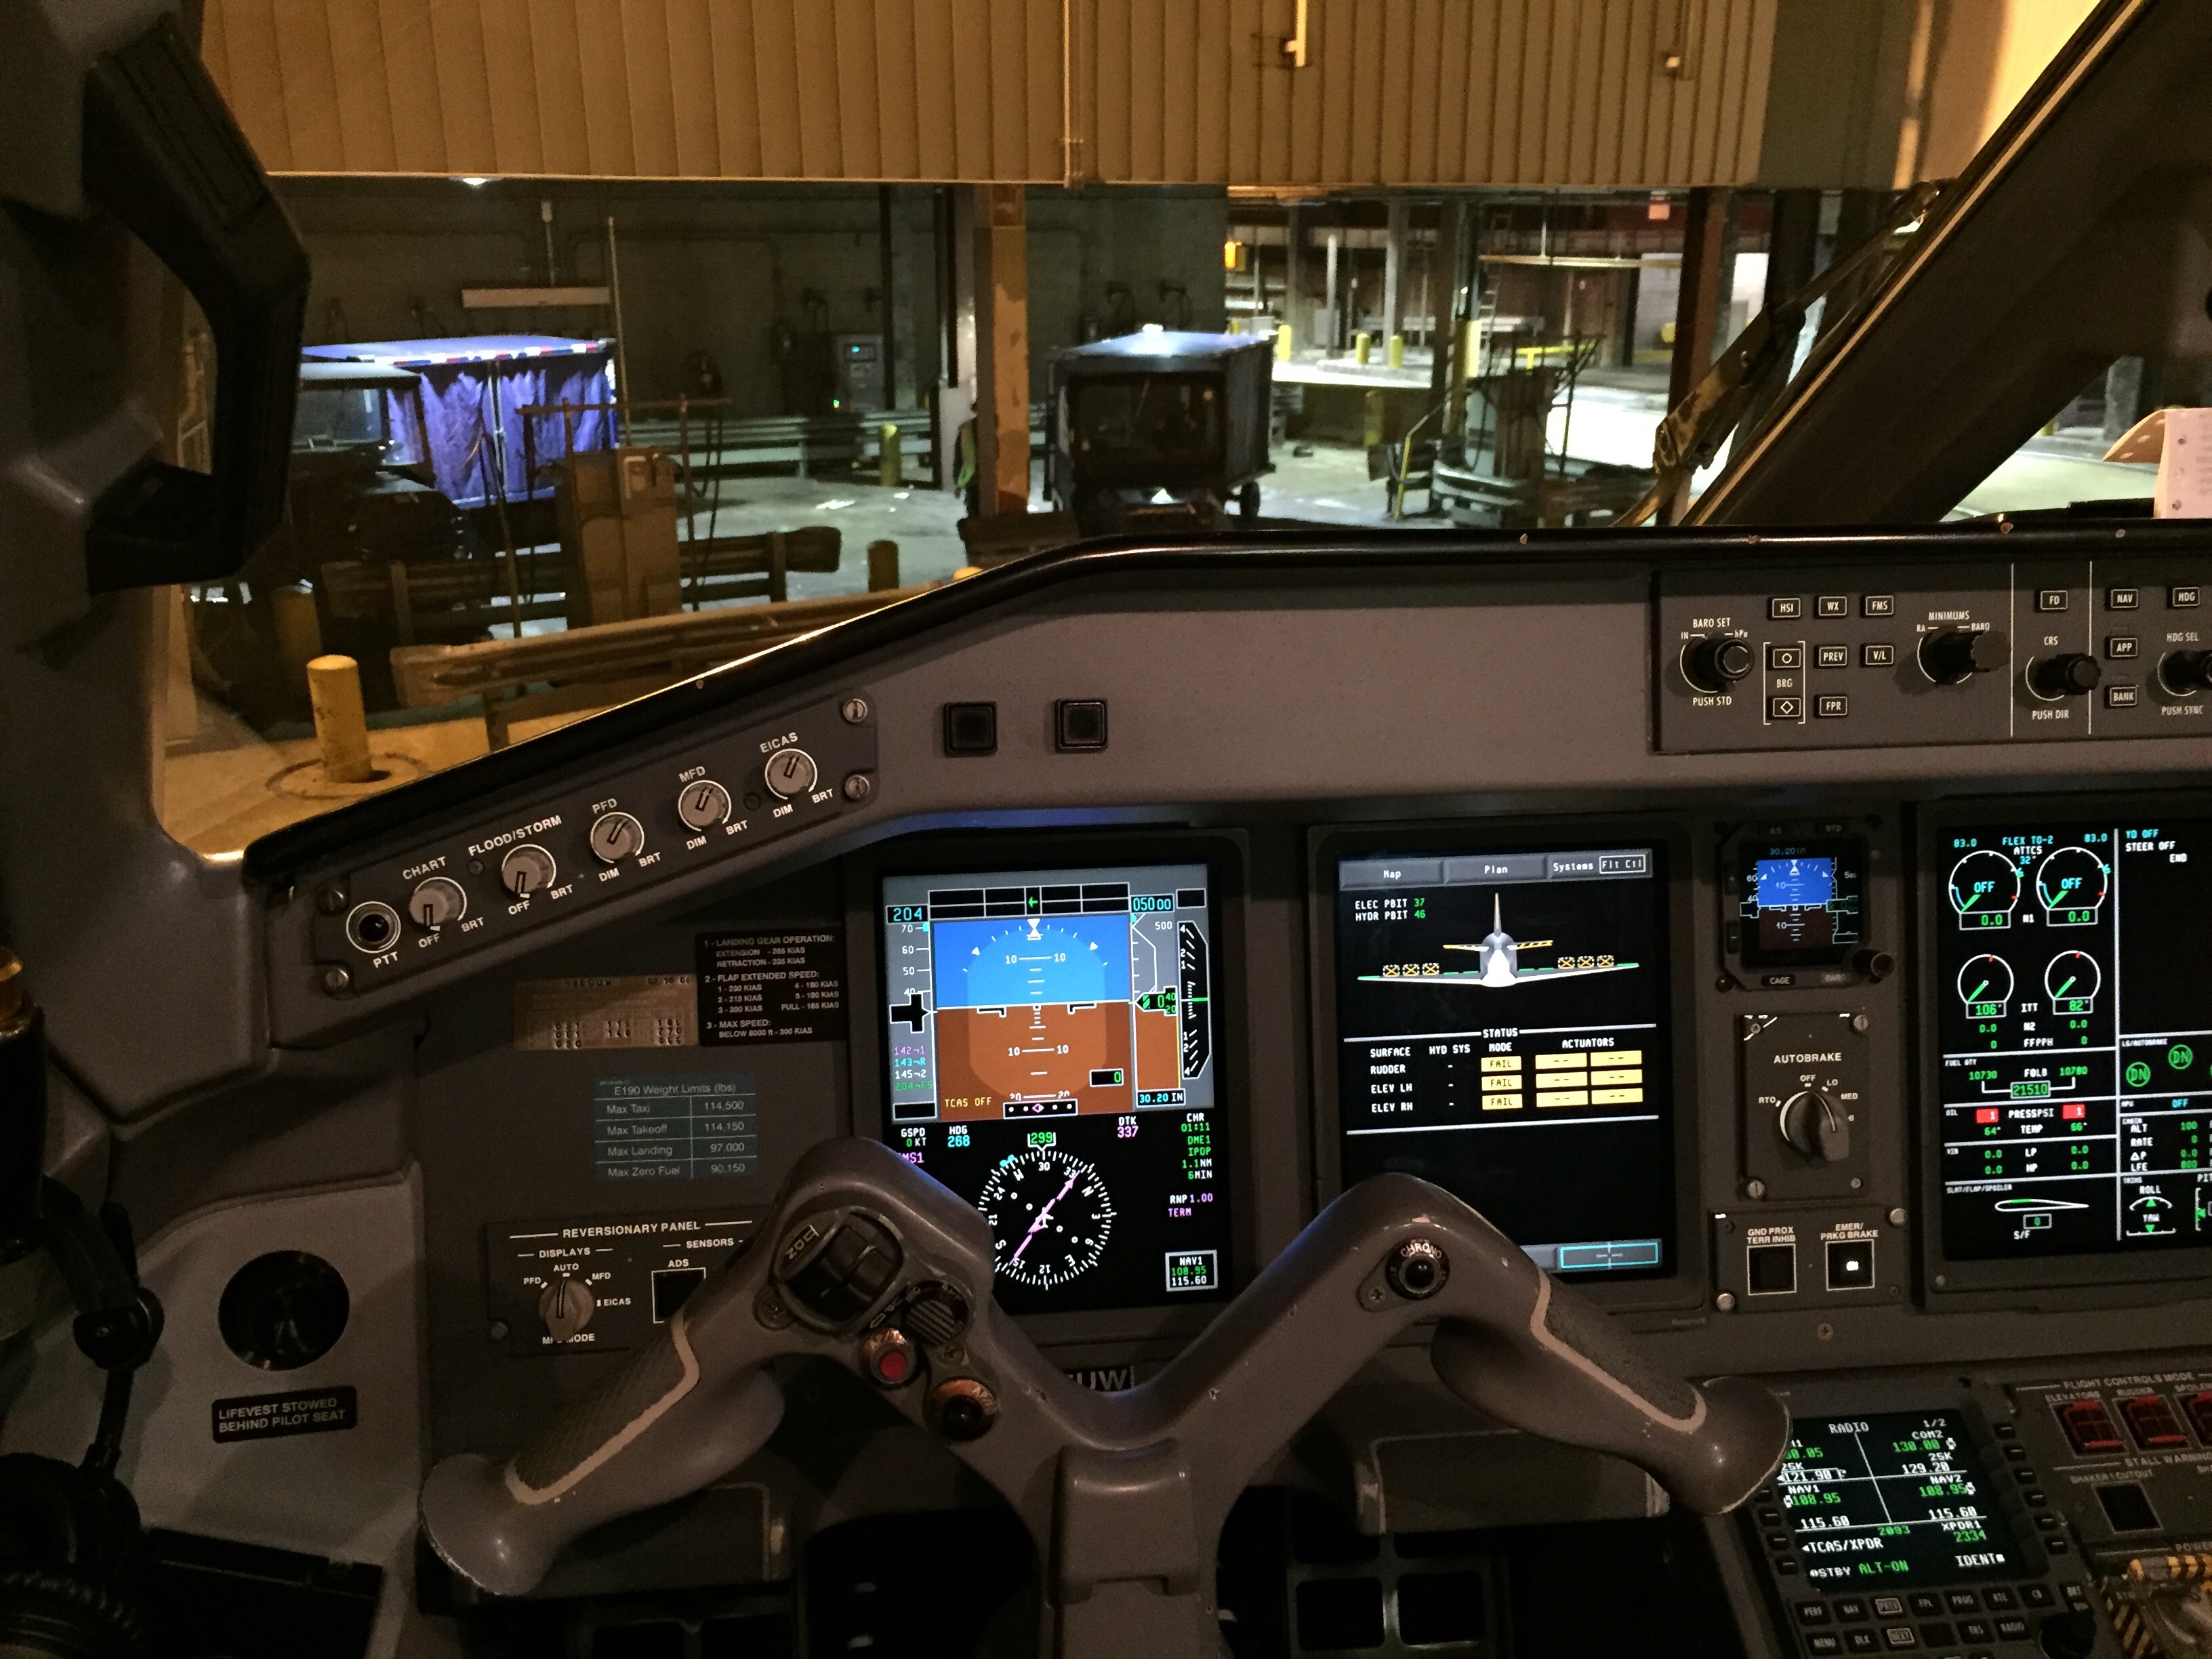
    American Airlines boarded me early today  (I fly with them a lot) and when the crew learned I was a student pilot they let me sit up front. Embraer 190. It was awesome. 

    Share this:

    • Share on X (Opens in new window) X
    • Share on Facebook (Opens in new window) Facebook
    • Email a link to a friend (Opens in new window) Email
    • Print (Opens in new window) Print
Previous Page
1 … 34 35 36 37 38 … 59
Next Page

On The Glideslope

  • Instagram
  • Facebook
  • X

Loading Comments...

You must be logged in to post a comment.