For the past week or two there has been an active thread in the AVSIM P3D forums about a modification one of the members there developed that increases the brightness of Prepare3d scenery, adds more realistic (and darker) shaders for cloud and scenery shadows, and creates a more realistic horizon haze in the far distance. That thread turned into a new thread in which the user, Pe11e, has put up a little app that gives you some configuration options and creates the ability to restore the original shaders if you like.
Note that this modification is for P3D v3 ONLY. I installed it over the weekend, and it really is a marvelous modification. My flights have never looked so realistic, almost amazingly so. A few folks have reported problems with the installation, so be sure to read the entire thread and to back up your ShaderHLSL folder (which is in the P3D folder structure) before you start.
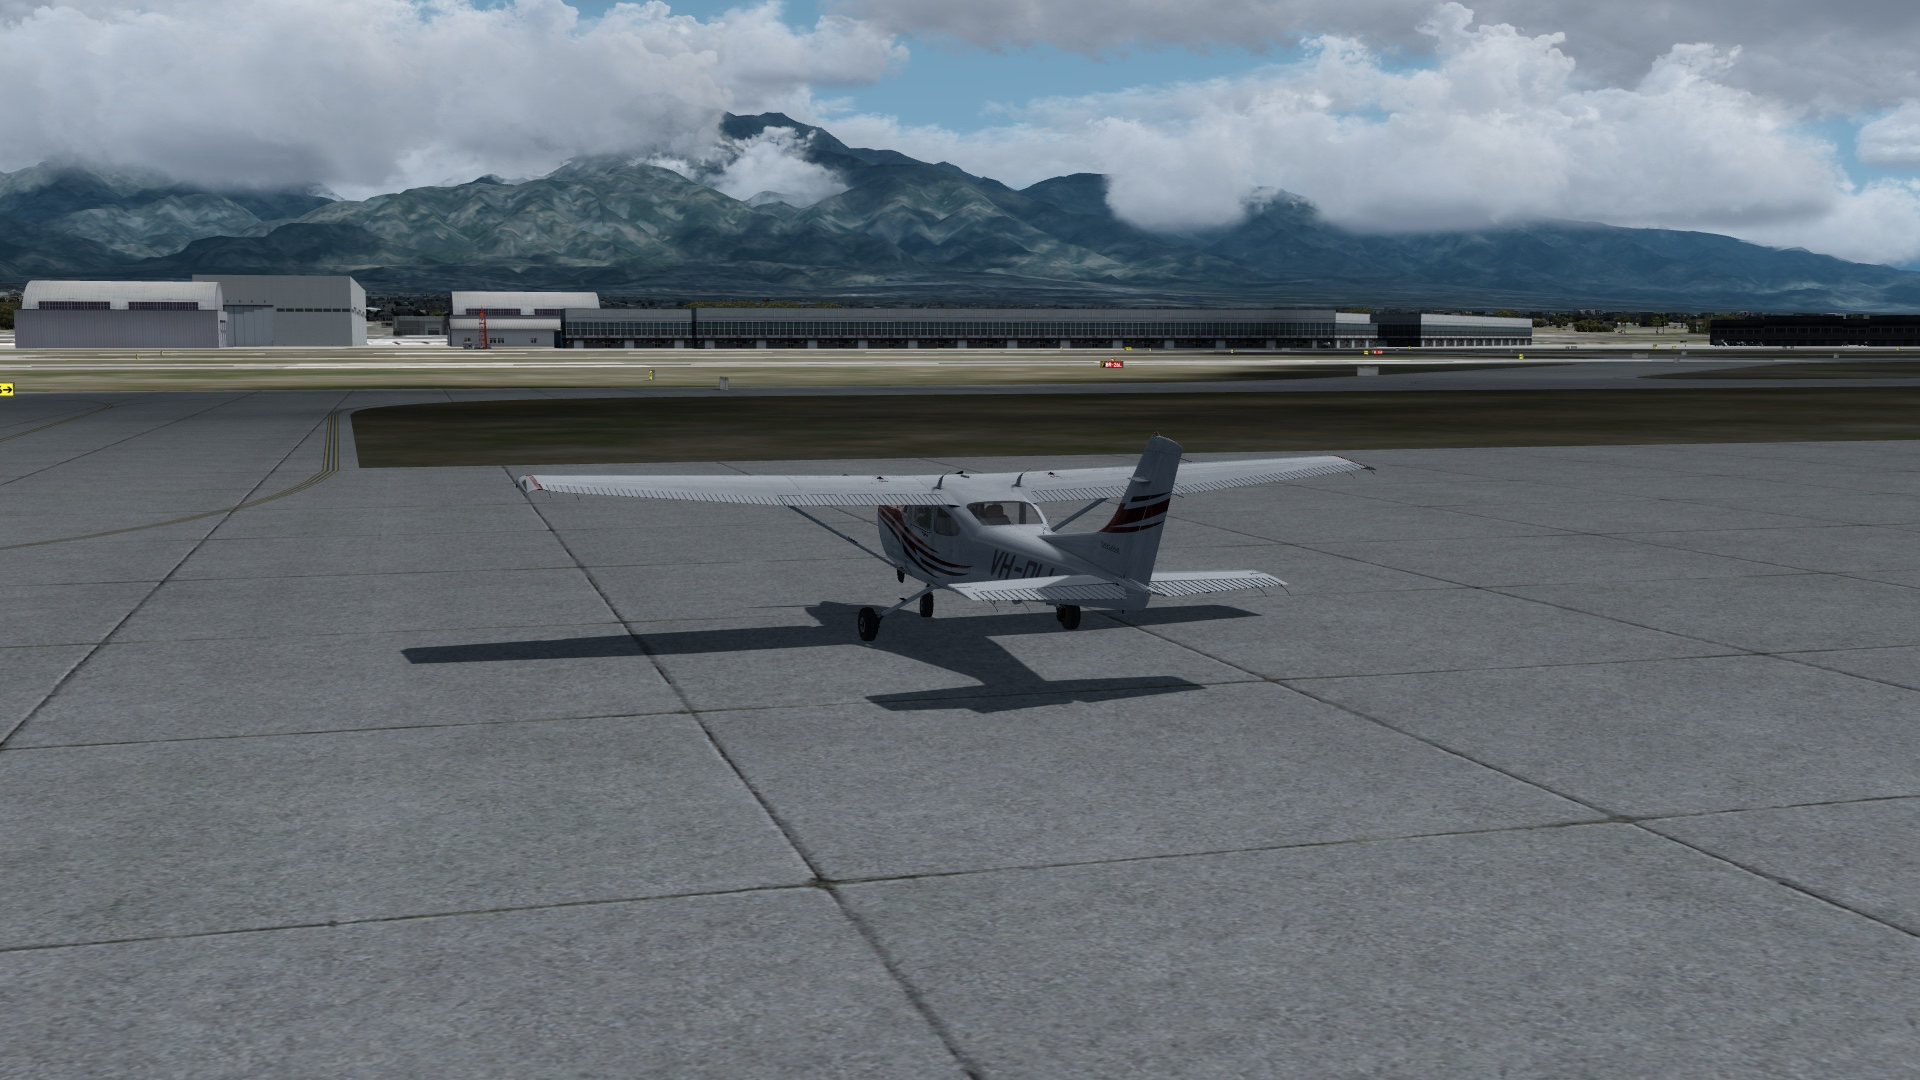
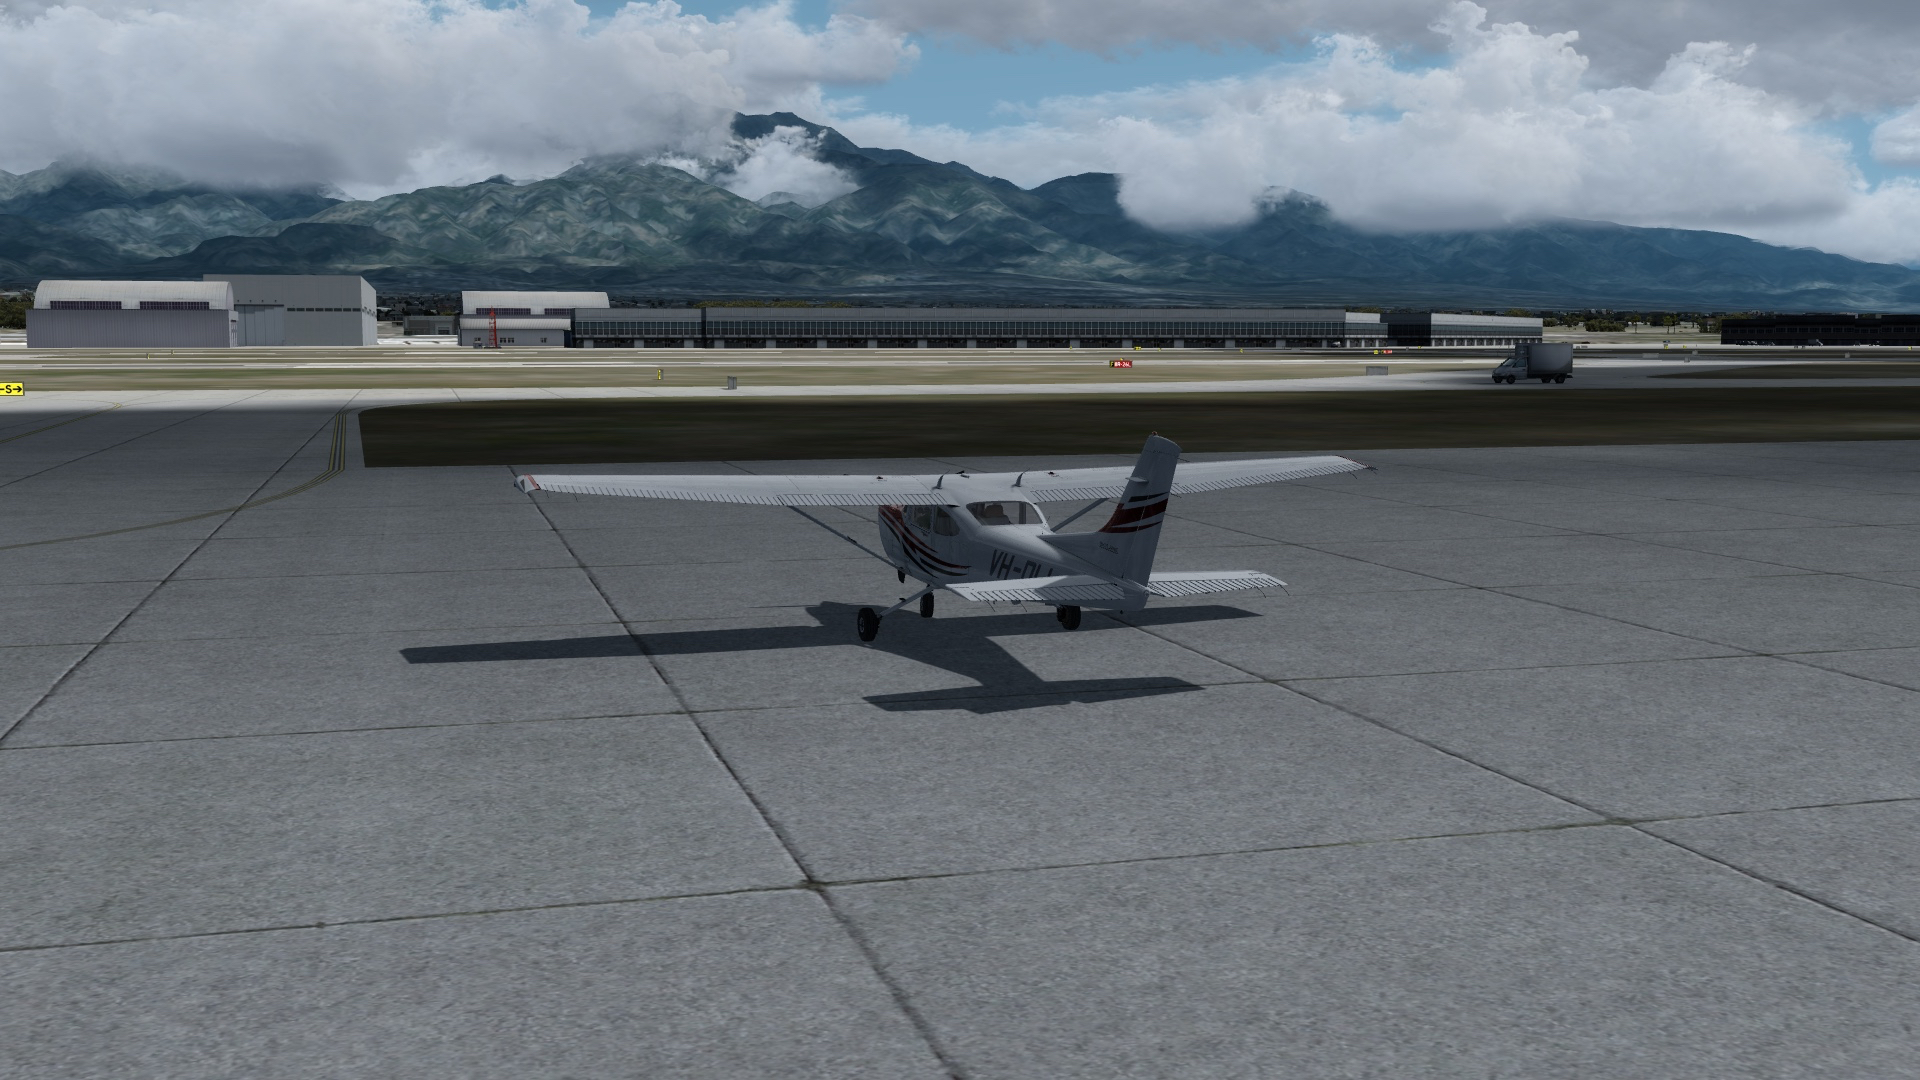
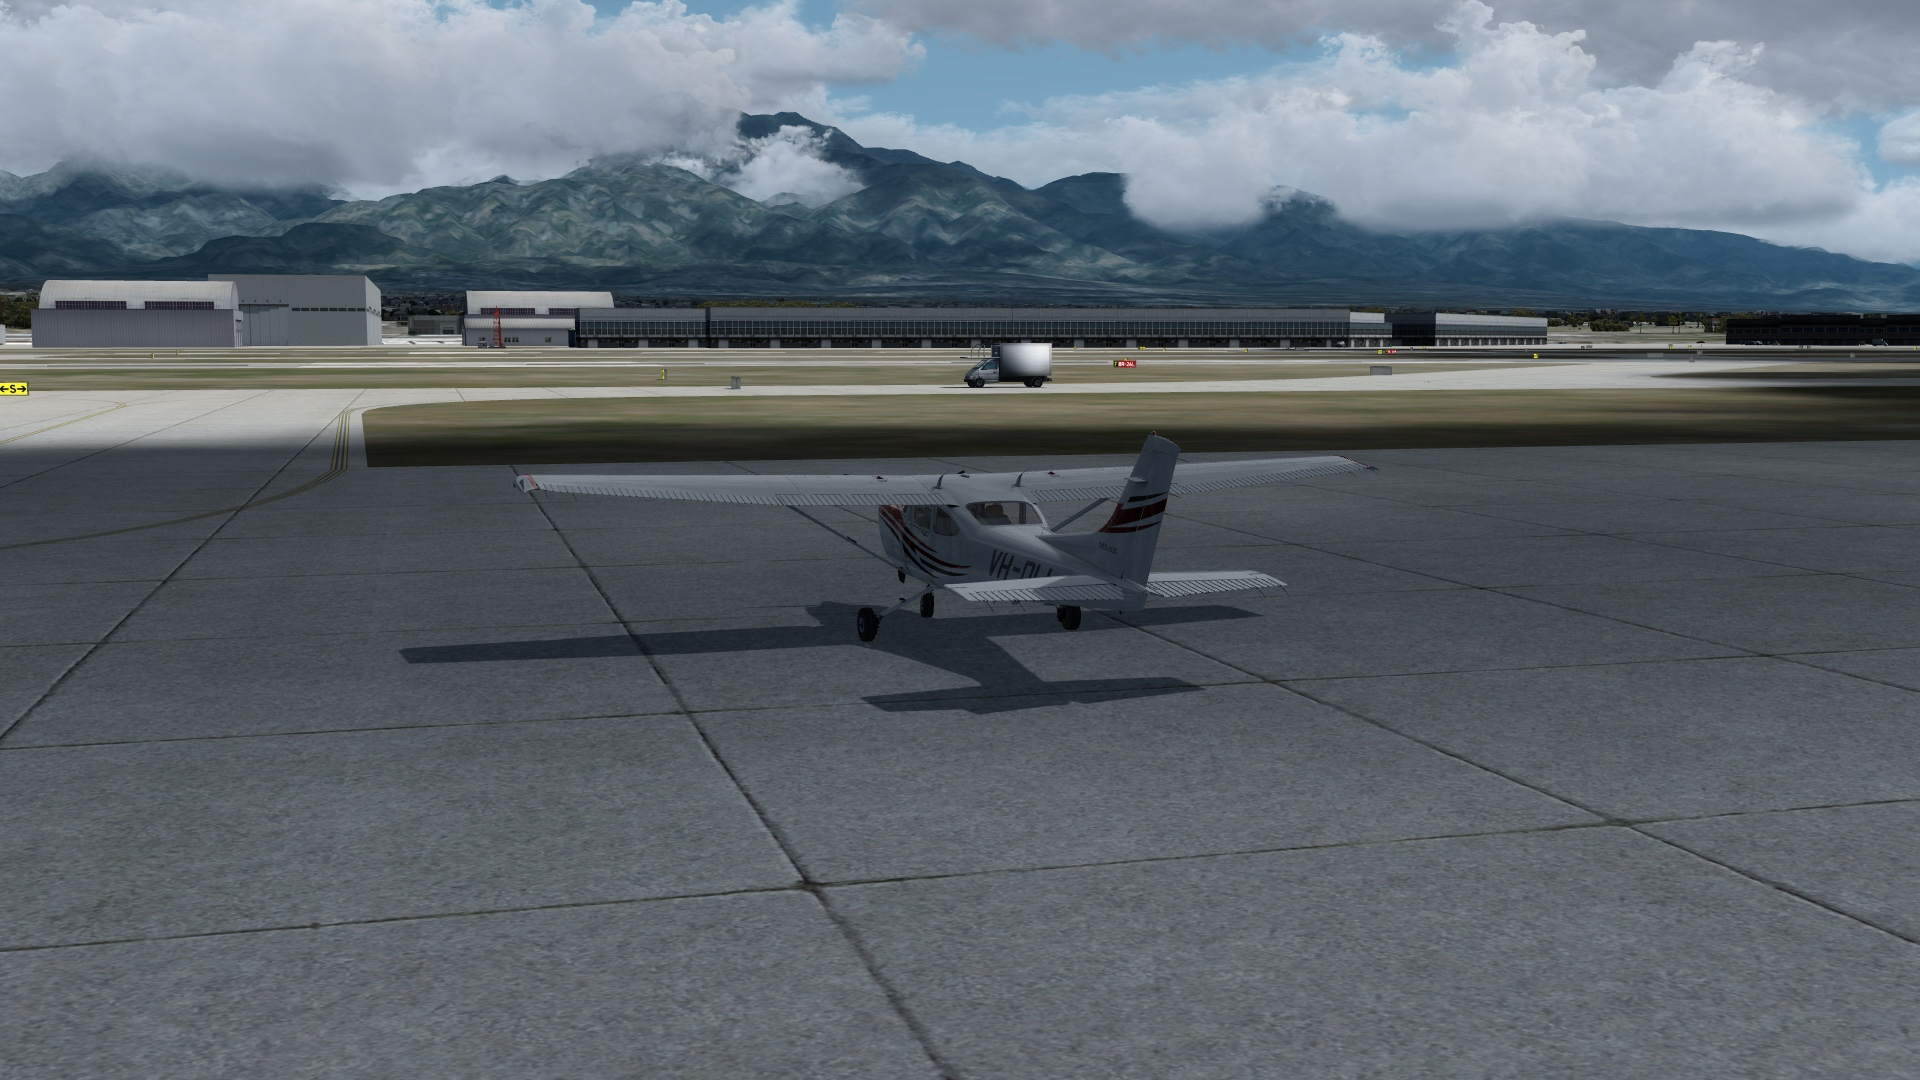
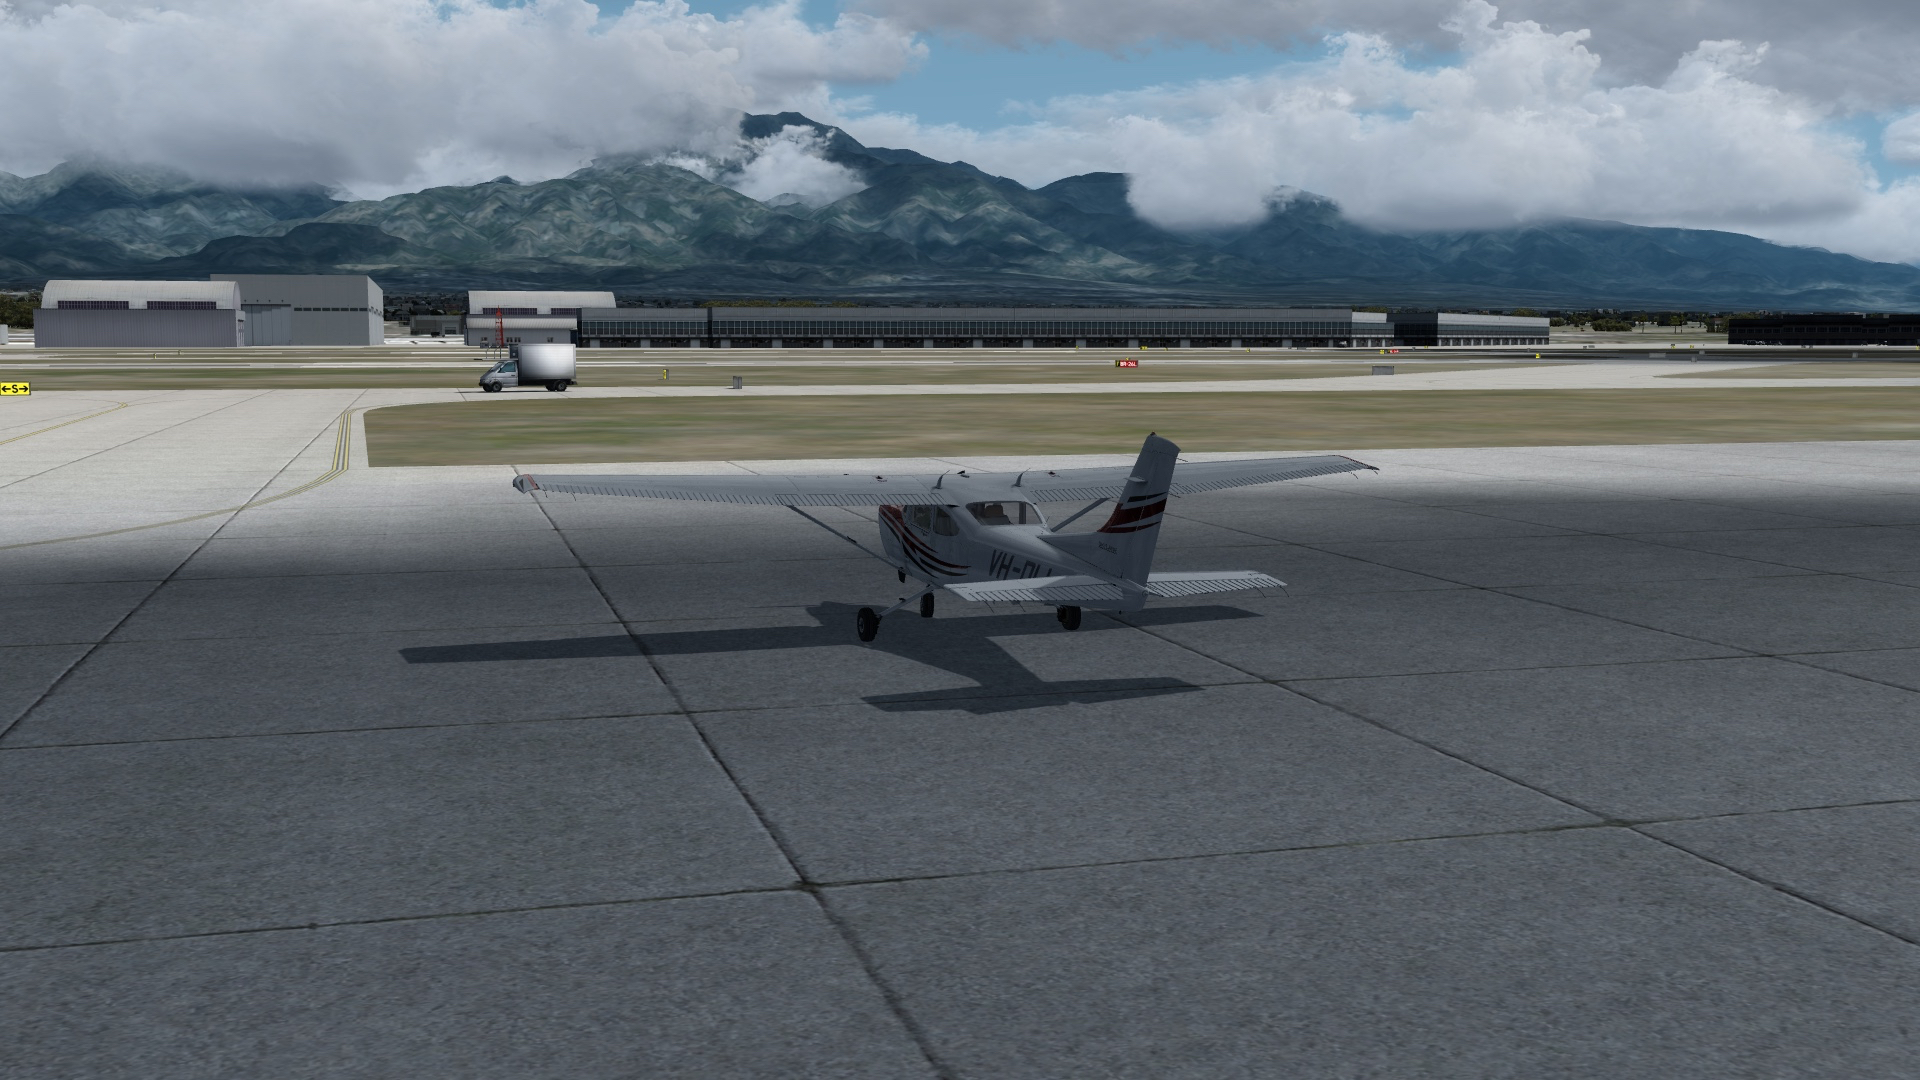
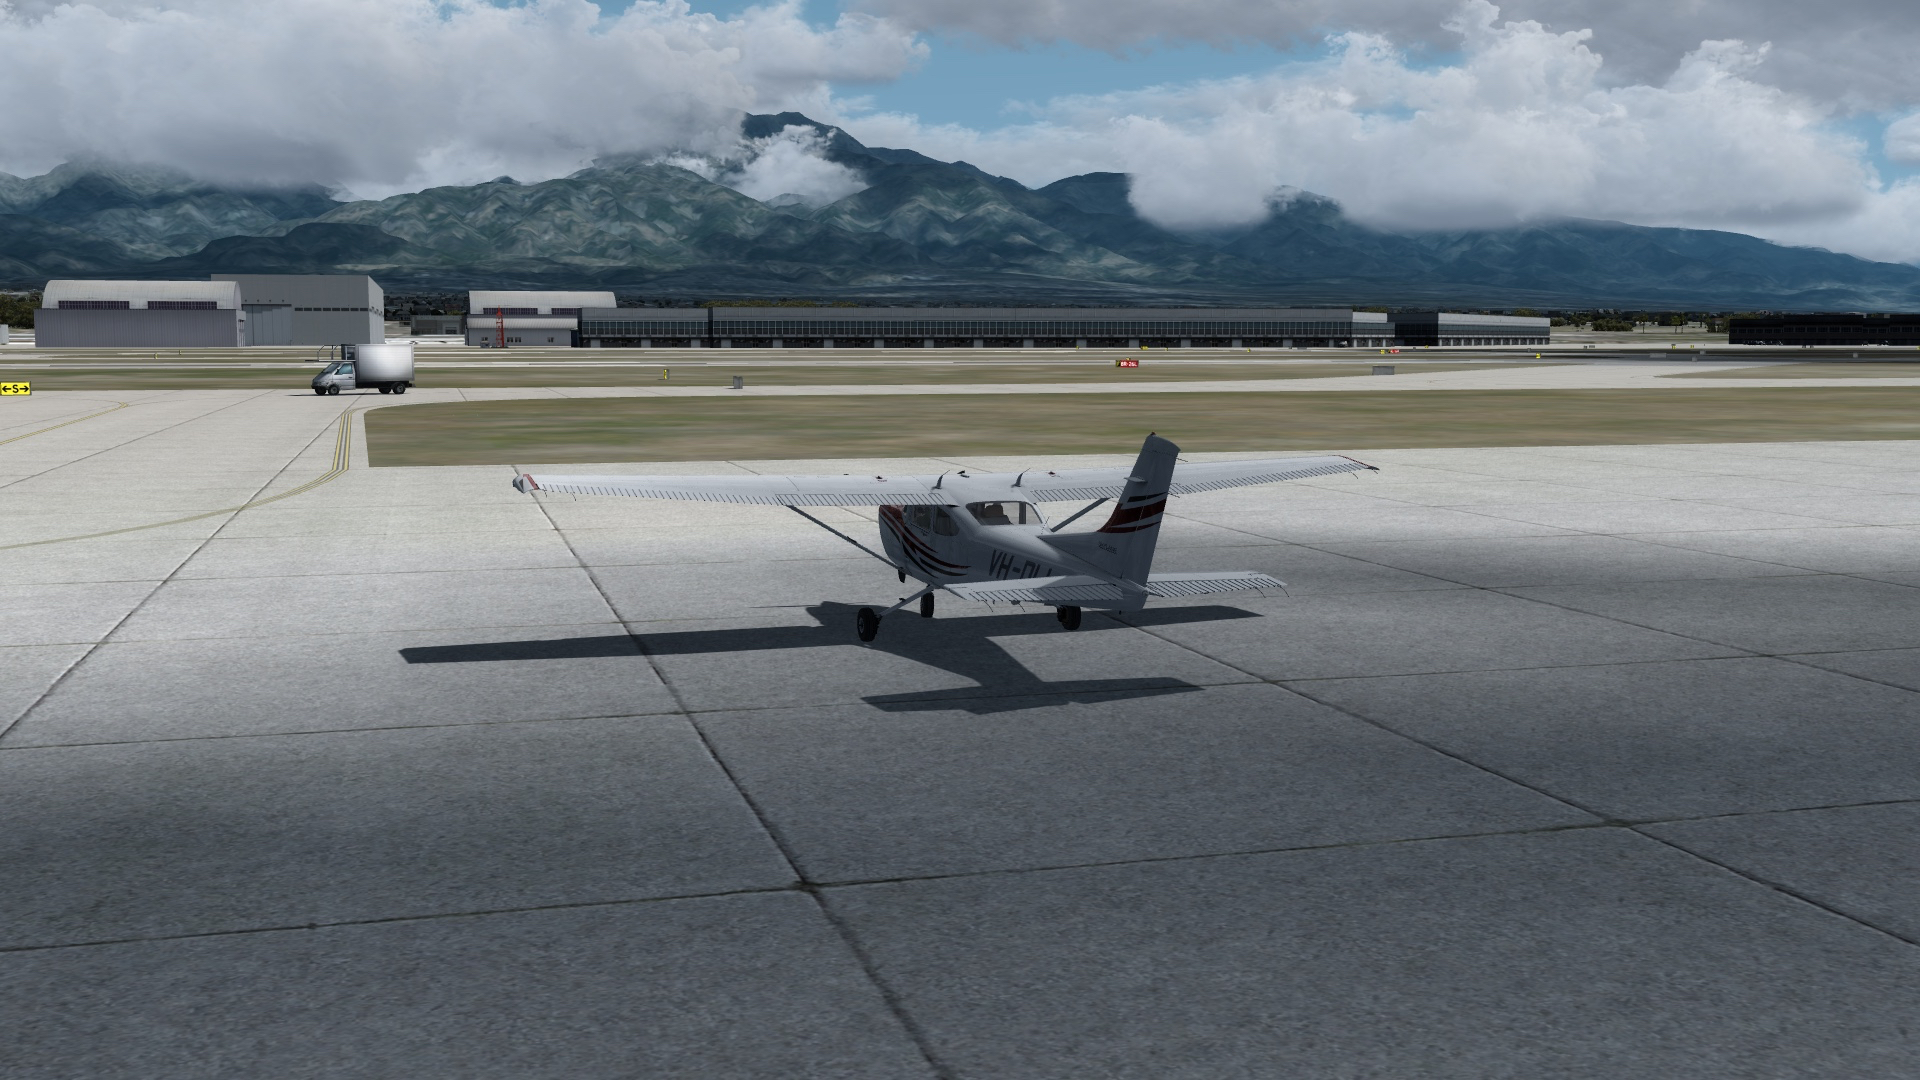
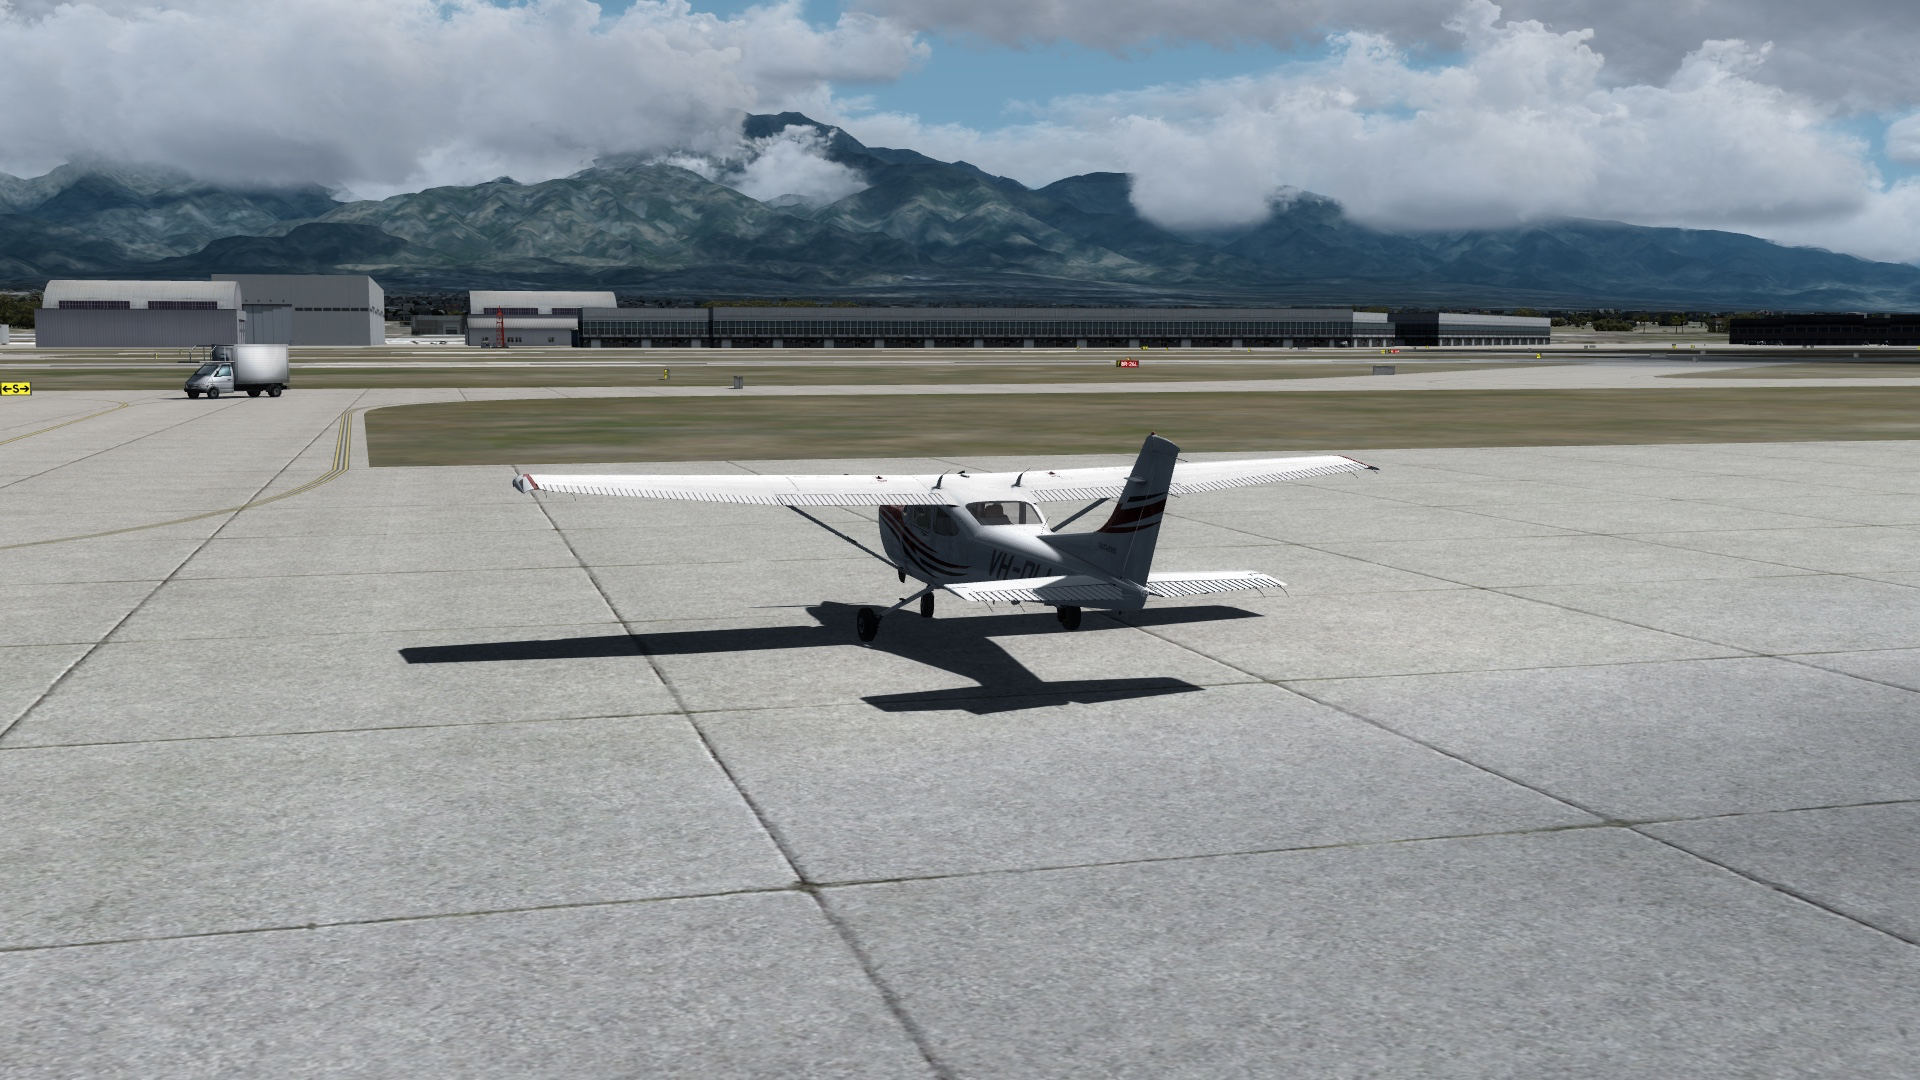
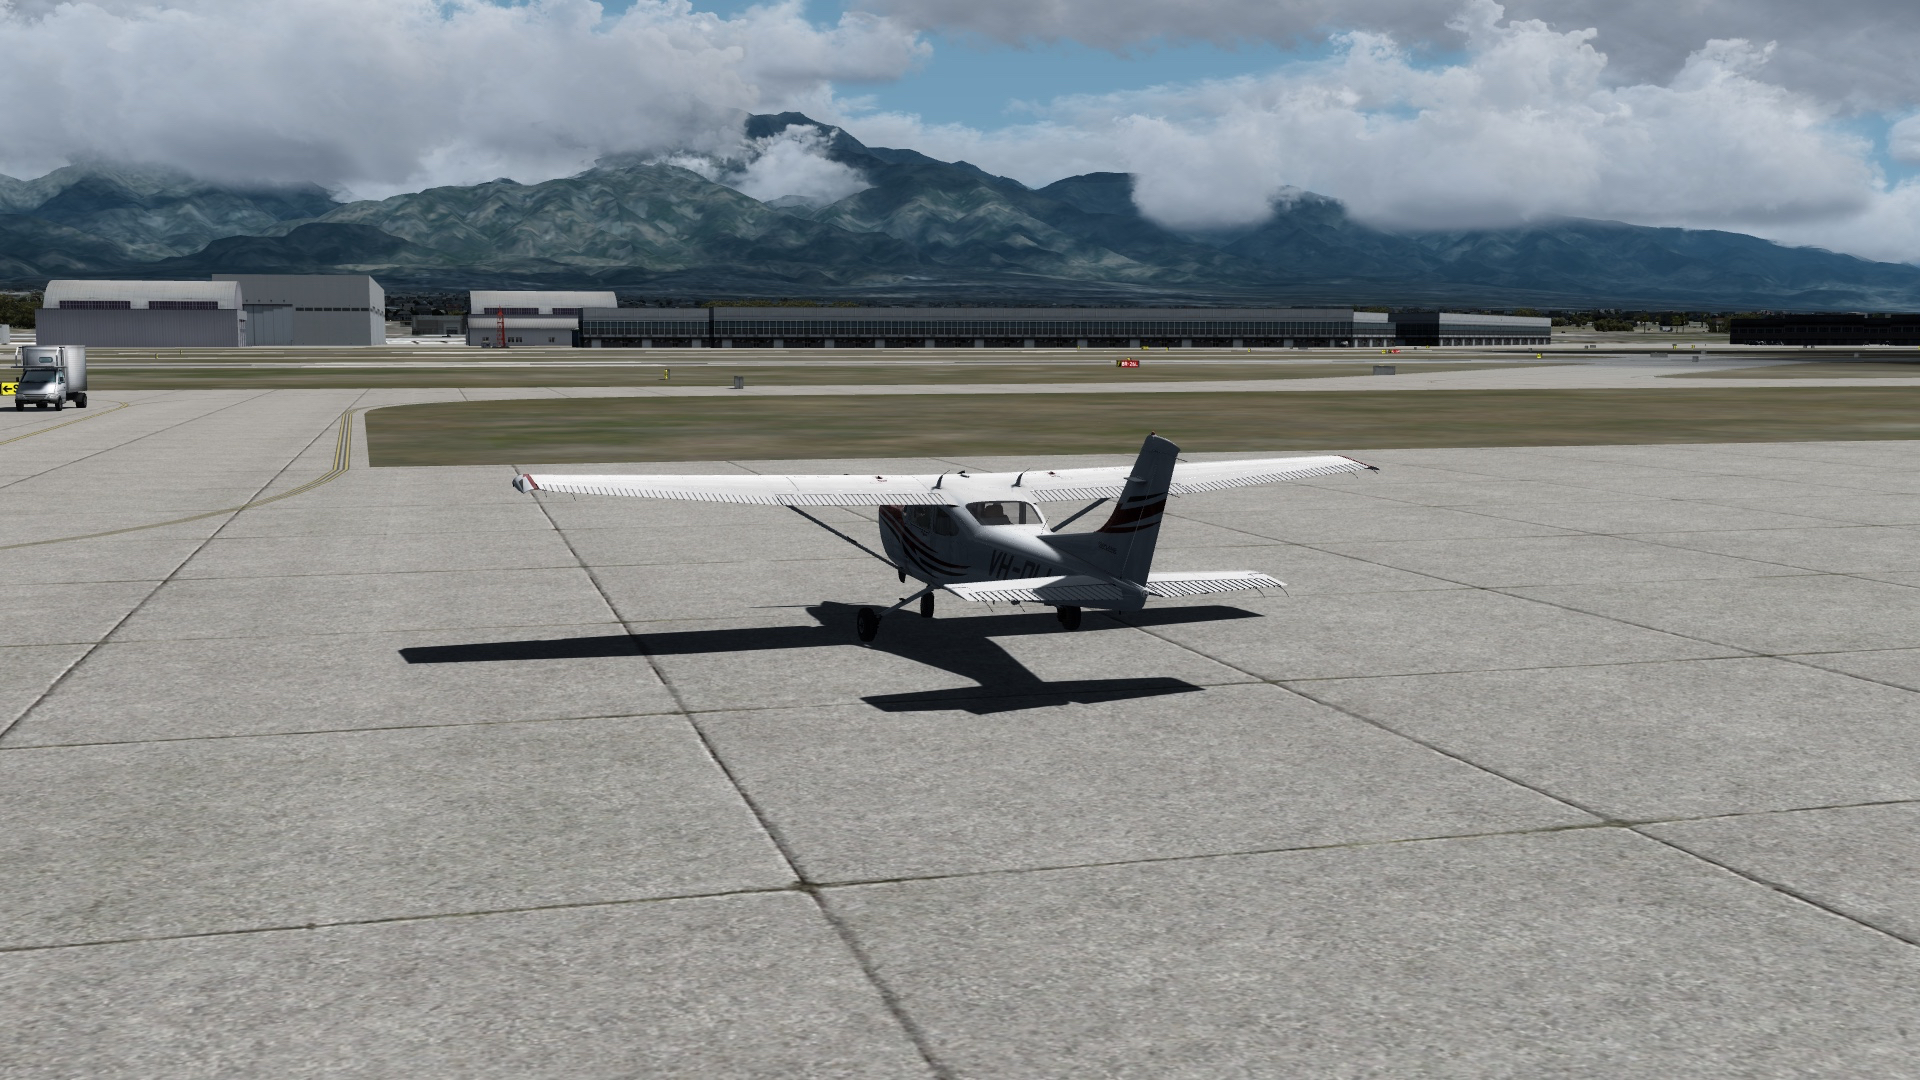
Best of all, the app is free, although Pe11e does have a donation button on the app which I think is well worth using. These more realistic shaders nearly transform the look of the sim, as you will notice the first time you sit on the ramp and watch cloud shadows so realistically passing over the field (as I captured in the screen shots below).
A lot of the airports in the PilotEdgecoverage area are “nontowered” airports, meaning either there is no control tower at that airport, or there are times of the day when the tower is not staffed. This means there is no local air traffic control at those airports, and it qualifies them as “Class G” airspace to the FAA. In Class G airspace no radio communications are required of visual flight rules pilots, but that’s not a smart thing to do because pilots who don’t talk to each other at nontowered airports will probably have a tendency to bump into each other.
As a result, nearly all of these airfields have a “CTAF” radio frequency listed on the charts, with the exceptions being some private fields (which use a default frequency of 126.7). CTAF stands for “Common Traffic Advisory Frequency,” and it’s a radio frequency pilots near that airport tune into to report location to each other, especially their location in and near the traffic pattern for departing or landing at that airport. Basically, at nontowered airports pilots self police and exert their own air traffic control by all tuning into and talking to each other on a single VHF chat line.
Here’s a section of the VHF sectional for an airport near Philadelphia, Brandywine (KOQN). You can tell it’s a nontowered airport because it’s magenta, that it has a rotating beacon because it has a little star, and that it has services like fuel and maintenance because it has a the spurs of a plus sign on the edges of its circle. You can also see the CTAF frequency listed: 123.075, with the magenta “C” next to it. All pilots flying into, out of, or in the near vicinity of Brandywine should tune to that frequency to report their locations and intentions at least once, and if taking off or landing, their position and intentions at key steps along the way (like turning onto final approach).
As I noted above, by far most of the airports you can use in PilotEdge are nontowered, and even though it’s just a training network, you have to presume that there are other people on the network who may be in that area or using those fields, so CTAF calls matter and you’re supposed to make them. Like most things in aviation, there’s a right and wrong way to do it. I was looking for resources to brush up on my CTAF calls, and found this great primer at Recreationalflying.com. Its official title is “Radiotelephony communications and procedures
in Class G airspace,” but I think of it as, “How to make proper CTAF calls.” It’s worth reading and bookmarking if you want to learn these rules of the air.
Two links today worth following. The first is the latest video from MrAviation101. I’ve watched a lot of this kid’s videos, and they just get better and better. This one is a Mooney approach with his girlfriend into Tulsa, and all the ATC calls are audible. Cool.
The second is from Tom Tsui at FSX Times, who has a new set of Saitek FIP gauges up, these for the Carenado C153 II. Beautiful work as always.
The latest video, this one a VFR flight from John Wayne airport, out to and around Catalina Island. A brief stop there for a virtual lunch, then back into the Class Charlie airspace for a 20R arrival at John Wayne. SoCal scenery is by ORBX FTX, which while it gives the sim some visual stutters, is remarkable to look at and fly over. (As with all my videos, click the little gear icon and watch them in 1080 HD if you can.)
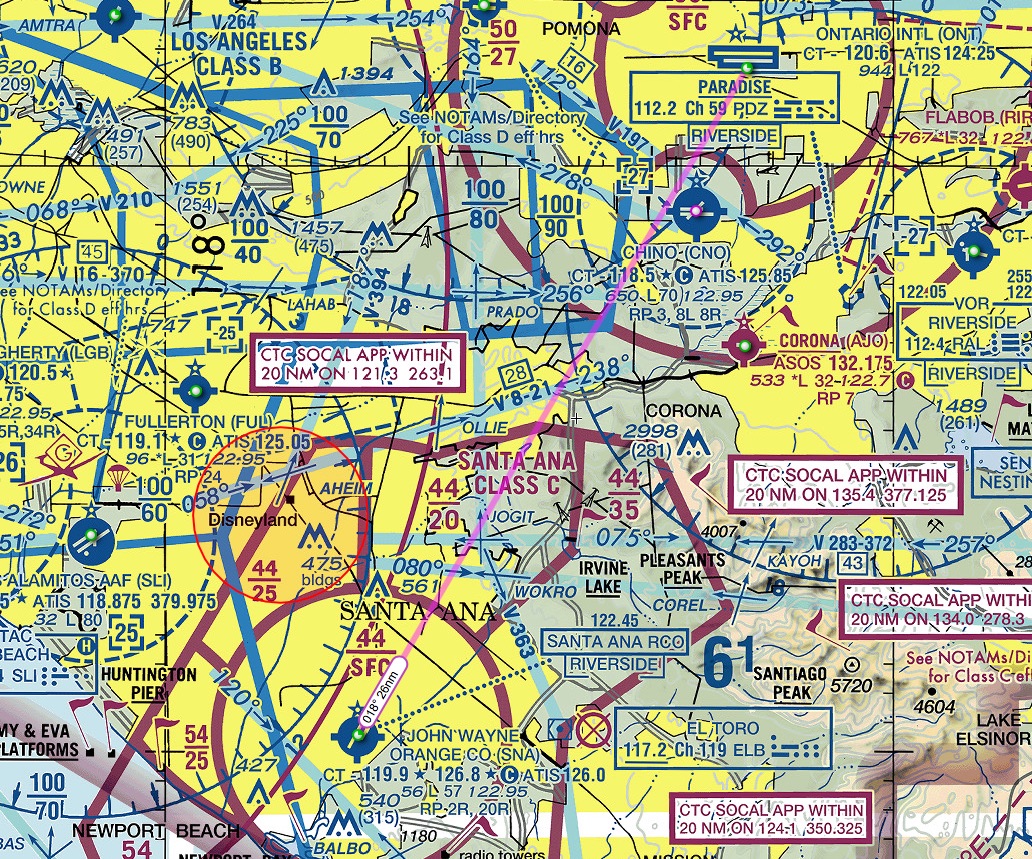
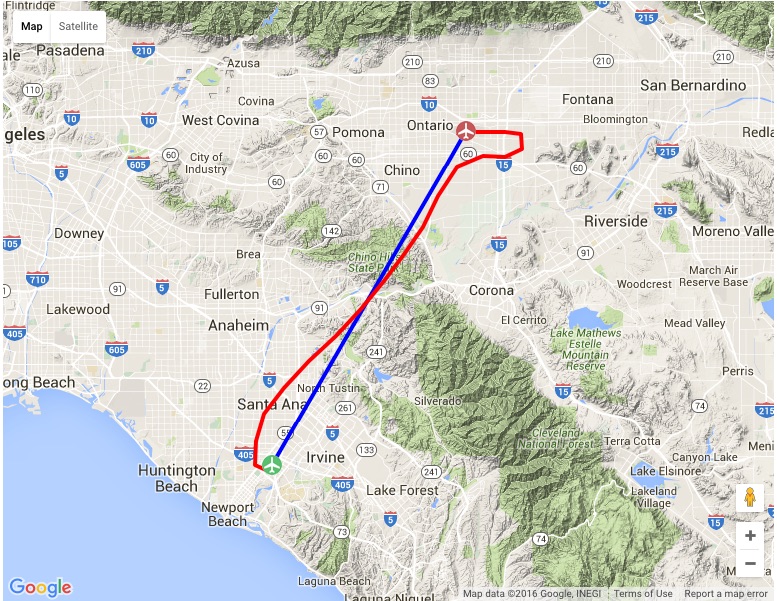
Last night after the kids were asleep I decided to take an hour and try for my V-02 VFR rating in the PilotEdge training program. This is a ATC “flight following” flight from John Wayne’s (KSNA) Class Charlie airspace to Ontario, CA (KONT).
The flight requires several handoffs: from KSNA clearance, to ground, to tower, to SoCal departure, to SoCal center, to Ontario tower, to Ontario ground. You have to hold an ATC-assigned heading and a flight level of no more than 2,400 for the initial part of the flight, after which you can resume your own navigation (although I stayed below 3,000 to stay clear of the KLAX Bravo airspace, just in case).
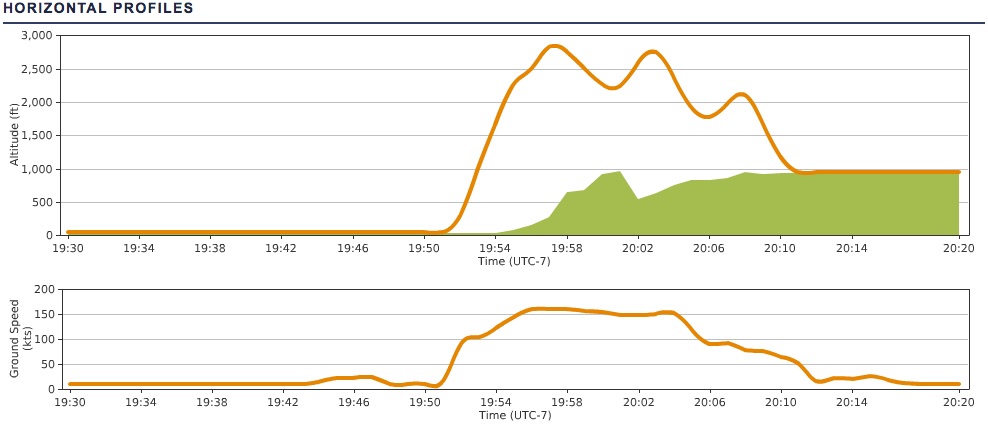
The flight was a lot of fun. I was tired (it was the end of the day), and I switched to SoCal departure before being released by KSNA tower (which is OK in some places but not there), but other than that the flight was straightforward and I passed. Above is the flight track from PEAware, along with a mostly hilarious vertical profile that shows me doing some nice roller-coaster work when I tried to use my auto pilot (it wanted to ascend and descend me to quickly, which I can and will adjust).
The next rating is the V-03, which involves flying two of the five transitions of the LAX Bravo airspace. These are quite a bit more complicated, and after some study and practice, I’ll go for it.
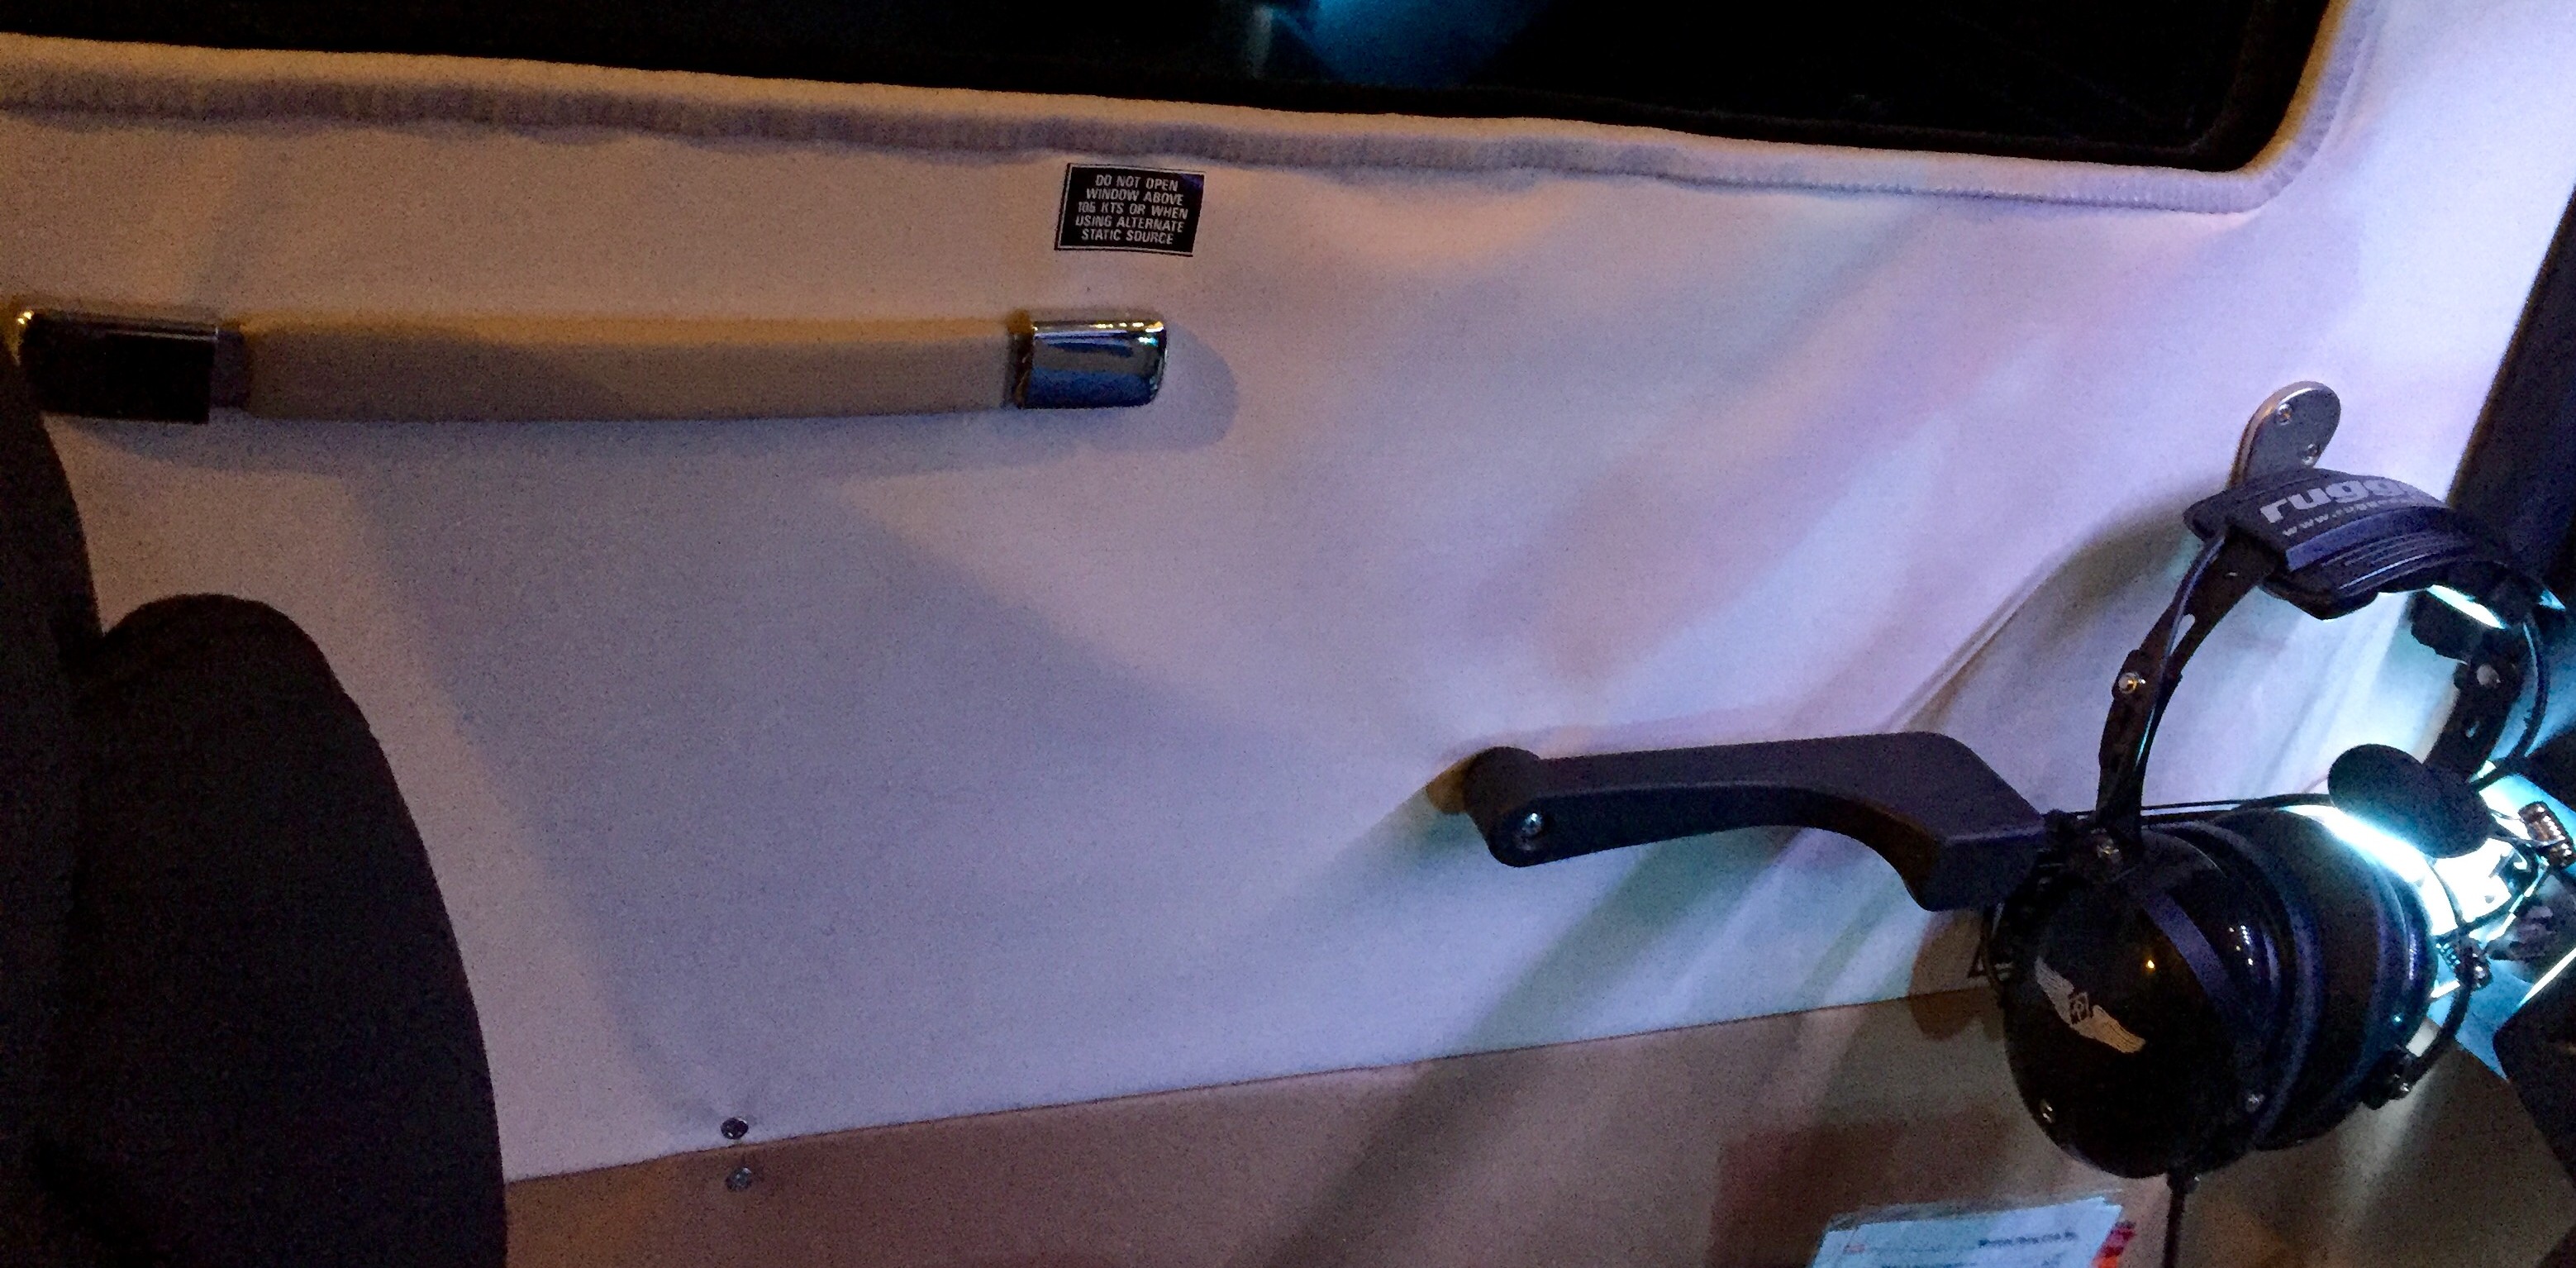
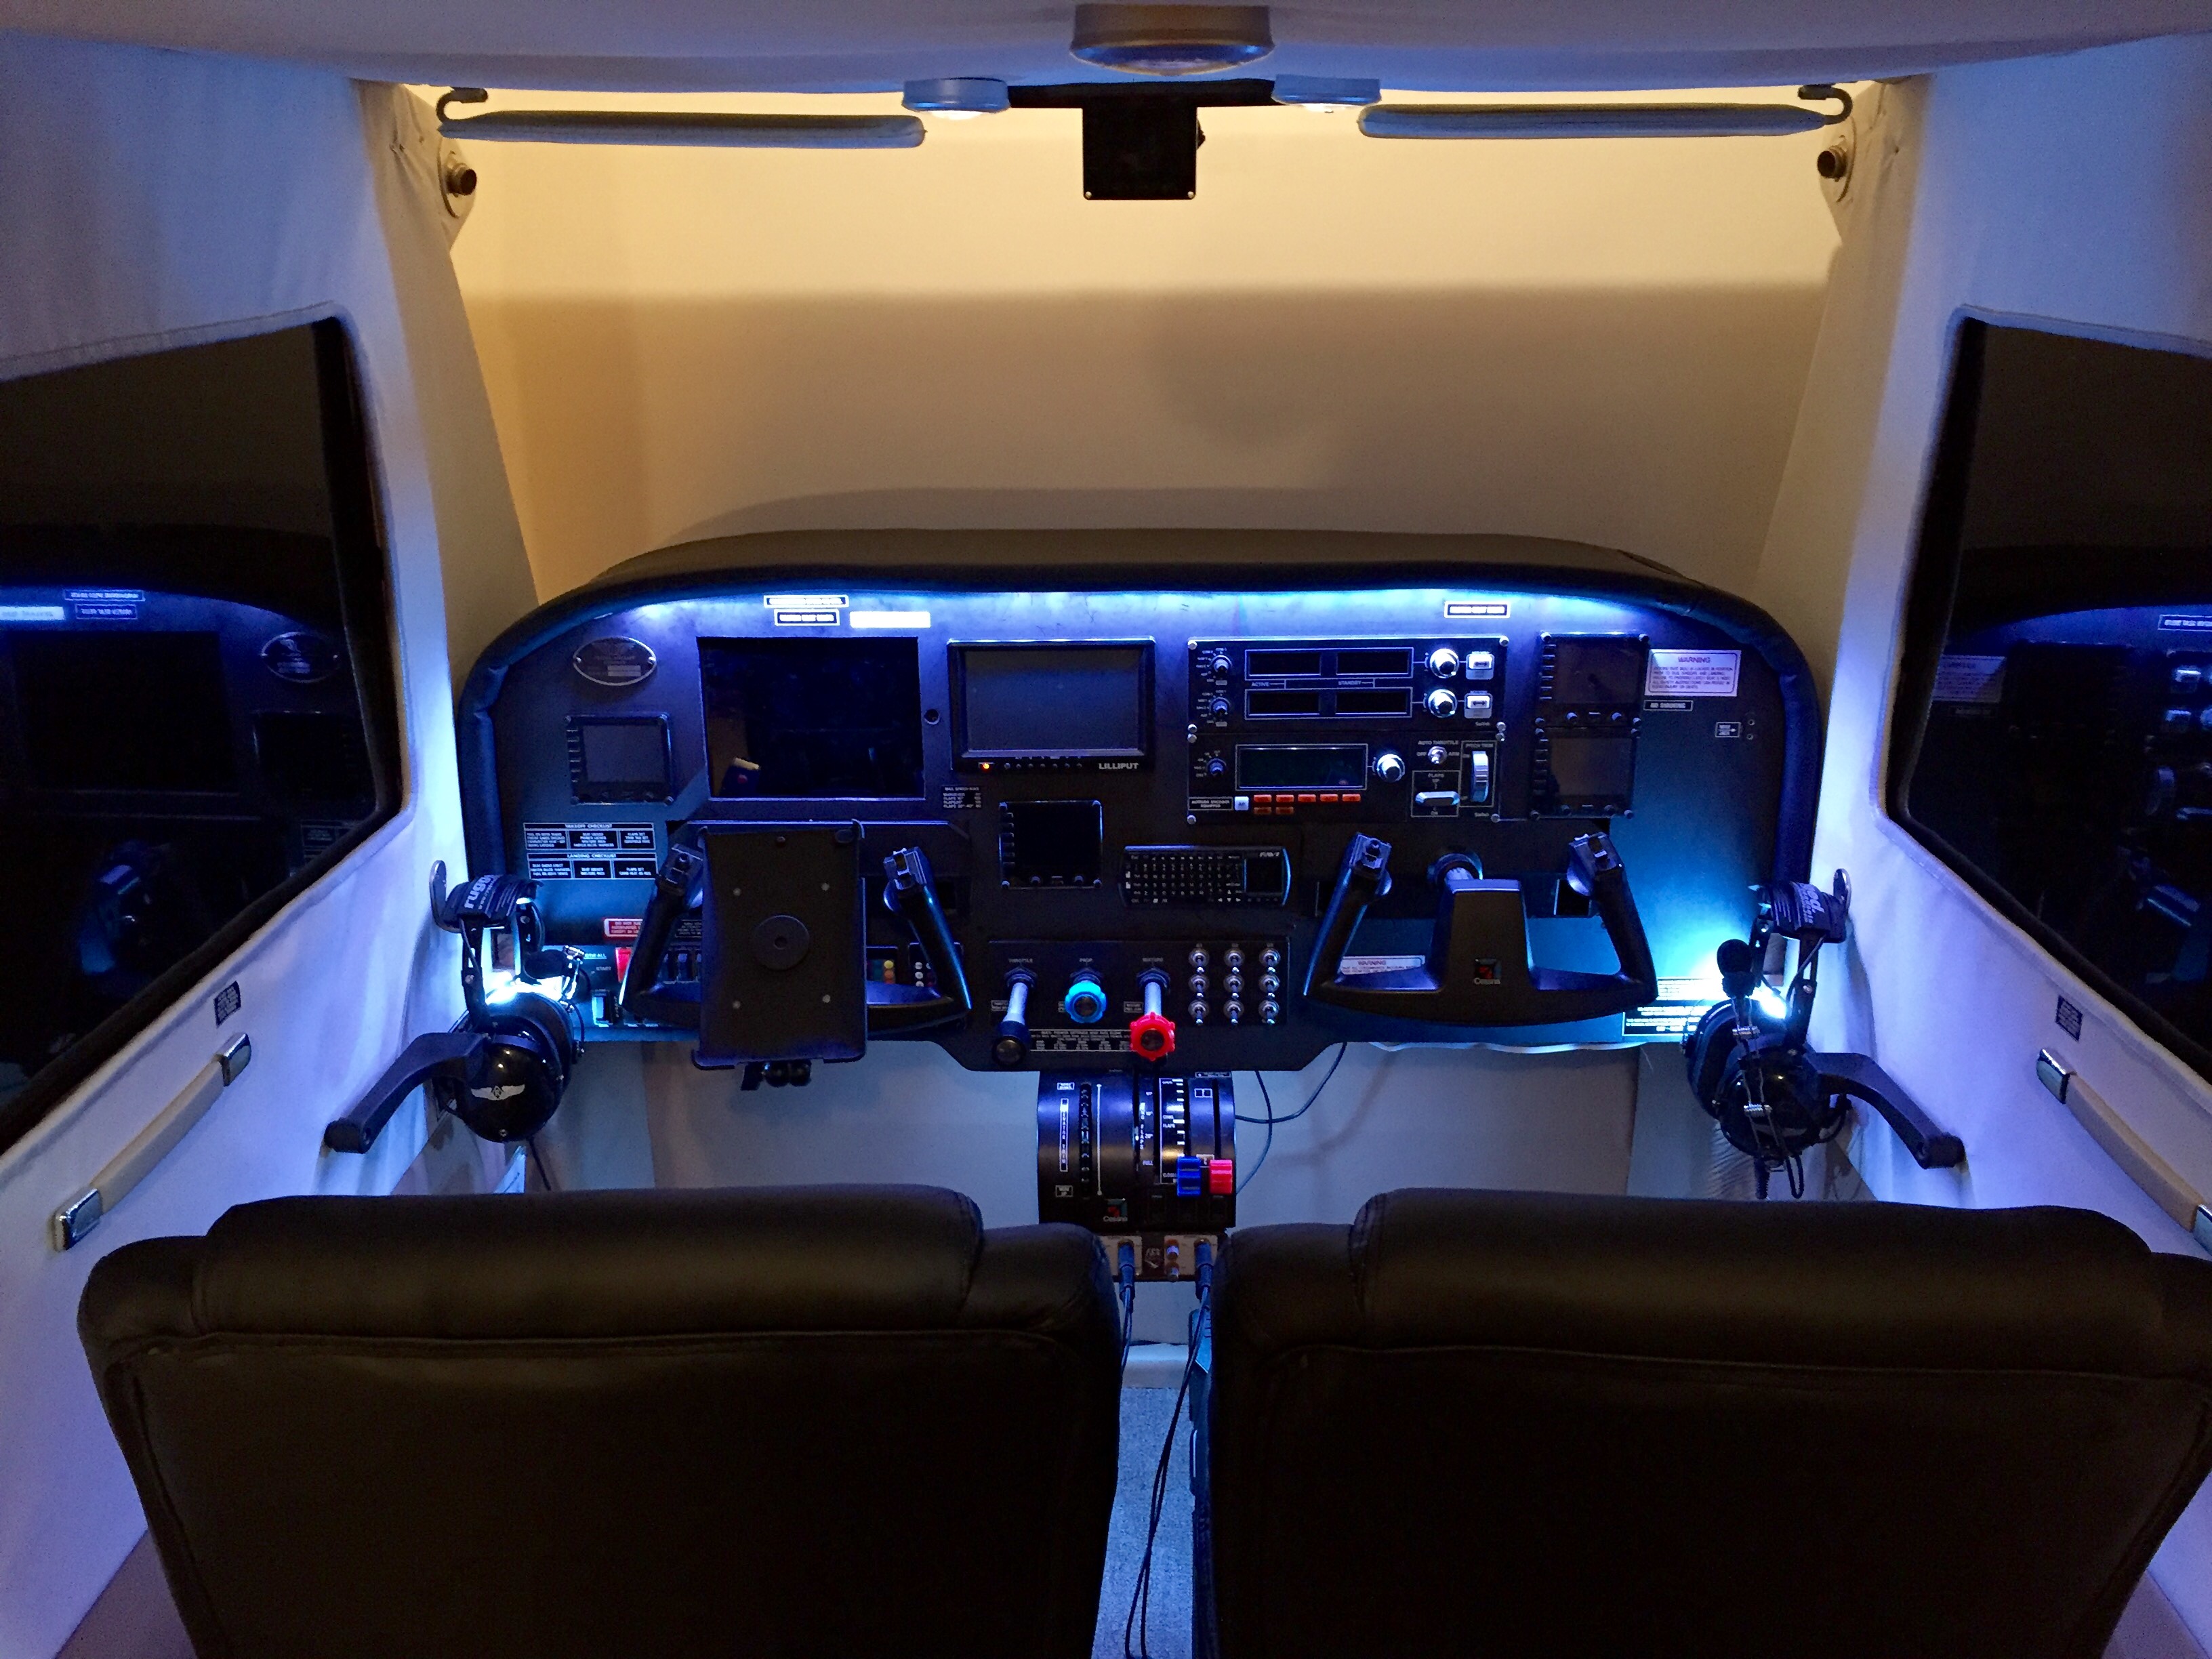
Today I installed some new appointments for the basement sim: two authentic Cessna C172/182 door handles. One of the things I love about Flight Sim Liberty’s simulator is the touches that make it look so real, and I’ve been watching Ebay for some door handles since I started construction. They tend to be expensive (especially the metal ones), but I’ve been watching these two used rubberized handles for a while and finally the price was reasonable, so I pounced.
I think they look great, especially with the door assist handles, and they actually rotate up and down (which is meaningless practically but fun nonetheless!).
I love A2A’s aircraft, and have three: the Cessna 172 Skyhawk trainer, the Cessna 182 Skylane, and the Piper 180 Cherokee. Of these, the 182 is my favorite and aircraft of choice. The A2A simulation, especially with its Accu-Sim component, makes this aircraft as realistic as I can imagine it could be for a simulator. This includes knowing how to start the sucker, which can be a challenge unless you’re into flooding the engine, fouling the plugs, and possibly running down the battery. (But this is why we have checklists, and if you follow the real one for the 182, you’ll be just fine.) The sound of the engine, the flight mechanics (today I was flying and noticed a constant bank to the right, and sure enough that fuel tank was about twice as full as the other), the sound of the brakes and the creaks of the airplane … everything about the A2A aircraft is first rate and terribly realistic.
But I haven’t flown them much over the past month or two, instead sticking with the very nice Carenado 182T. Now don’t get me wrong — the Carenado is a great simulation aircraft. Compared to everything else out there, it’s first rate. But it’s not the same as the A2A. The A2A just feels and flies and sounds terribly real compared to anything else. It’s absolutely about the texture and immersion of the sim, and the A2A wins that hands down. But I’ve foregone it for one reason: it hasn’t played well with the myriad Saitek panels and avionics I have running in the sim.
The A2A C182 Skylane Is Simply Awesome
This problem is well-documented. Still, I haven’t found a good solution, and it’s boiled down to three things: getting the master battery and alternator switches to work correctly, getting the fuel and engine gauges on Tom Tsui’s great integrated fuel gauge to read correctly, and getting the RPM also on Tom’s RPM gauge to read correctly. There’s a fix for the battery / alternator issue, and at times the engine gauges would mostly reflect what the A2A would show on the virtual cockpit panel, but the RPM gauge as always very far off from reality (also well-documented).
Well, today I finally found the fix. It was a roundabout way of getting there, but get there I did. And now the A2A is absolutely perfect, and I can’t wait to fly these aircraft for many years to come. Here’s what worked: First, I deleted all Saitek software and drivers, including the folders in Programs and Programs 86, and only installed the Flight Information Panel drivers (NOT the FIP software) consistent with the guidance near the end of this thread. Then I installed the registered version of SPAD.neXt, activated its LVAR option, and activated SPAD’s A2A 182 profile. Then I changed this line in the .XML file of Tom’s 172 RPM gauge:
< Value Minimum=”0″ Maximum=”35″>(A:General eng1 rpm,RPM) 100 /</Value>
… to this line:
< Value Minimum=”0″ Maximum=”35″>(L:ENG1_RPM,RPM) 100 /</Value>
(Thanks, Tom, for that fix!) After that I played with the A2A 182 profile in SPAD.neXt a bit. I had to change the fuel pump switch snippet to just be a simple fuel pump on/off command. I programmed the BIP panel. And I still run some things via FUSIPC, like controlling the transponder Ident and Alt-C settings with the buttons on the throttle quadrant. But the rest of the setup was straightforward. The swtiches and controls did as they should, and the FIPs ran great … and most important the engine and RPM gauges were accurate. After you get through its (somewhat steep) learning curve, SPAD.neXt really is a great tool, and I’m looking forward to getting the most out of it in the coming weeks.
A new video, this of a night flight over Southeast Pennsylvania, with an aborted approach at KPHL and a brief stop at Wings Field for a virtual cup of coffee. We finish where we began, at Brandywine Airport.
The lighting is courtesy Night Environment’s Pennsylvania package. It can hit your framerates, but is much better with traffic off (or severely reduced). I’d rather not have traffic than have fewer lights. As you can see, Chris Bell at Night Environment does excellent work.
If you have Saitek panels that don’t seem to be working correctly, don’t download new drivers. Make sure there’s enough power to the hub. If you have Saitek FIPs that aren’t loading, don’t mess with SPAD or SPAD.neXt. Make sure they’re not all plugged into the same hub. If you have a Saitek yoke that’s not registering, make sure it’s in a USB 2.0 hub. If you have a Saitek radio panel that’s dropped out for some reason, run turn the power management off on the USB hub.
Does this look complicated to you? Me, too.
Basically, if your Saitek stuff isn’t working right, the first stop should be checking the hub. I was reminded of this last weekend when, for no apparent reason, my Saitek gear stopped working reliably. This included, interestingly, repeated crashing of the Direct Output .dll file while running the sim. I turned off power management. I loaded SPAD. I unloaded SPAD. I reinstalled all the Saitek drivers. I plugged everything into different ports on the hubs. I pulled my hair out.
Then I remembered that I had unplugged all the USB devices and hubs from the PC when I had updated the BIOS the day before. One of those powered hubs I had plugged back into the one USB 3.1 port on the PC. They didn’t like each other. I plugged that powered hub back into a 3.0 port, and everything worked fine.
What could go wrong?
I currently have 17 USB devices running on the sim PC. These are finicky devices, and they require a lot of power. They also are a bit dated, and not all were designed with USB 3.0 (and definitely 3.1) in mind. So if you are using Saitek gear, here are my guidelines for them running as seamlessly as possible from a USB perspective. Each lesson was learned the hard way:
Plug your Saitek yoke and pedals into USB 2.0 ports if possible. They are most reliable this way.
Use ONLY powered hubs if you plan to use external expansion hubs.
MAKE CERTAIN there is enough power on the powered hub to provide at least 500 milliamps to each device plugged into it. If you plan to have four devices plugged into the hub, get a hub that’s a least a 2 amp hub. The more power the better. If it’s a 1.5 amp hub, plug no more than three devices into it. THIS RULE IS VERY IMPORTANT.
It’s OK to use the Cessna or Pro Yokes as hubs, but make sure that they, too, are powered. Plug no more than two (or maybe three) devices into each, as the yoke itself also needs power.
Avoid 3.1 USB ports of possible. They don’t play nice with Saitek gear in my experience. Plug your Bluetooth USB keyboard dongle (or some such thing) into that instead.
Spread your Saitek Flight Information Panels across different hubs. They definitely draw their full allotment of 500 milliamps. Putting more than one on any hub is pushing your luck.
Go into the PC’s device settings, right click on each USB hub listed, select properties, and if there is a “Power Management” tab, click it and turn power management OFF.


You must be logged in to post a comment.