Basic Basement Sim Dimensions

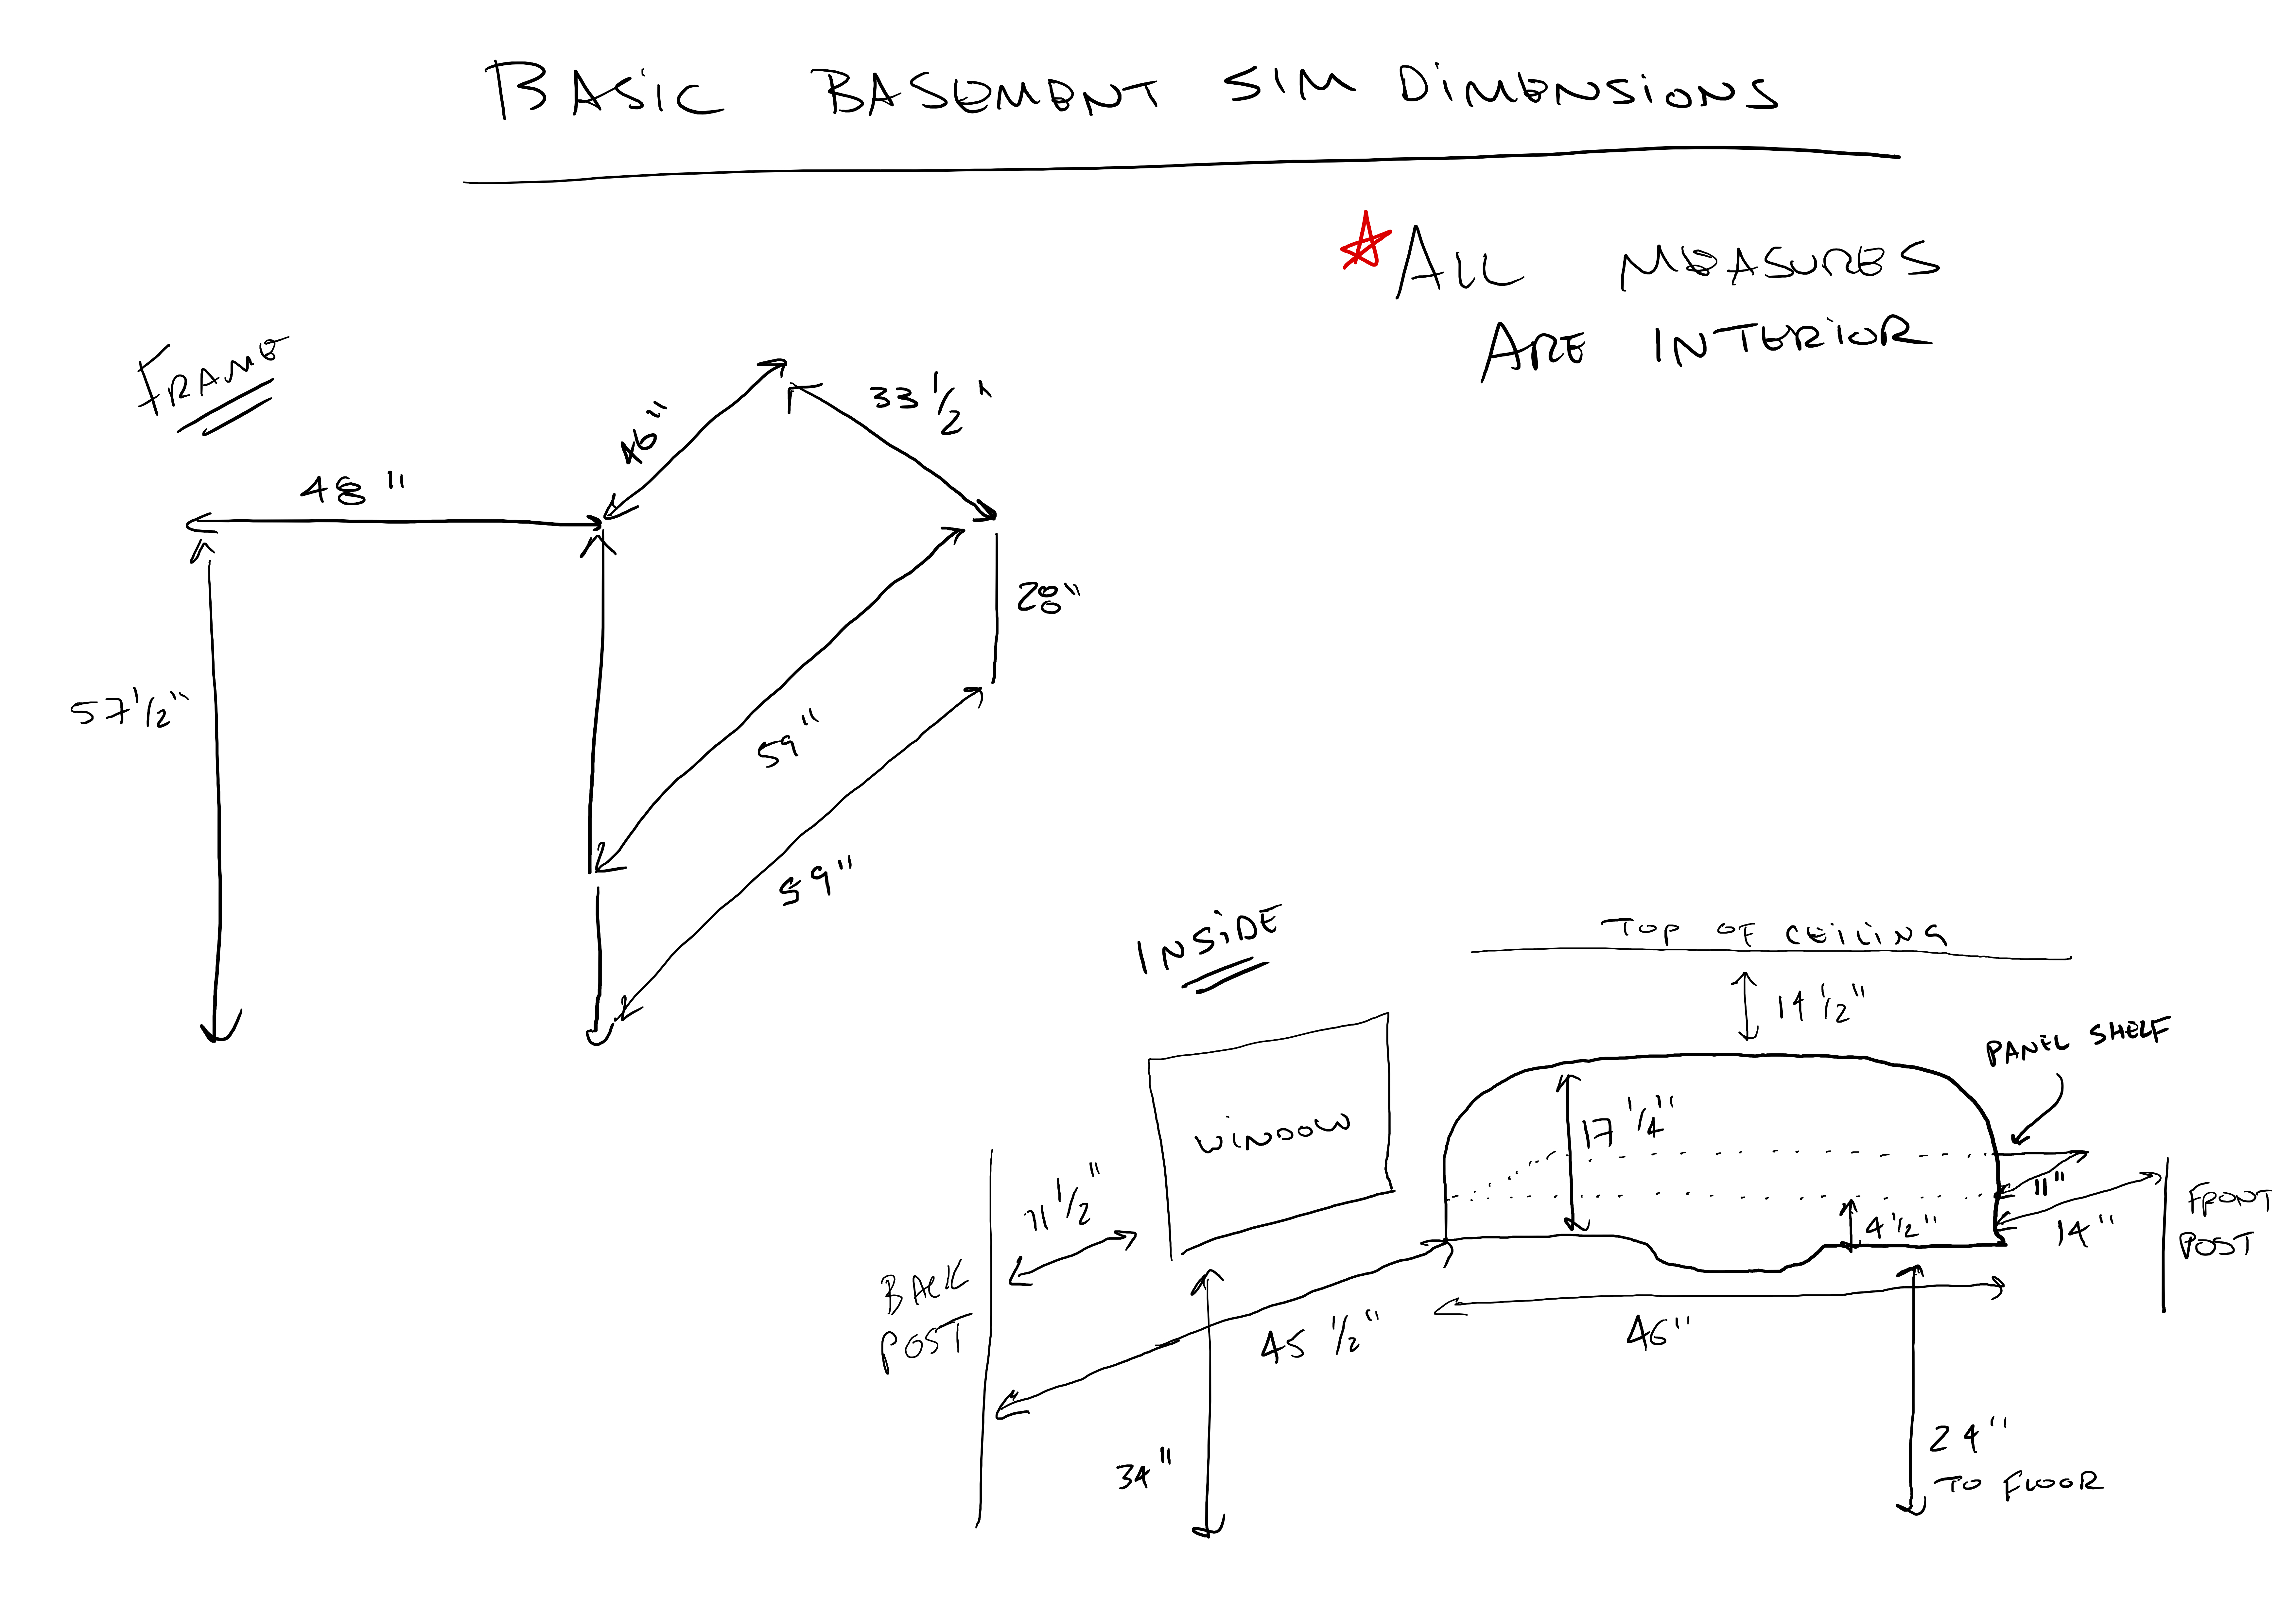
Hi everyone. The basement sim is starting to get a fair numbers of followers over on YouTube, and one of the common questions I’m getting is about the dimensions of the sim. I used Google Sketchup as a basic CAD program in the design, but made some modifications so the original Sketchup file isn’t ready for sharing. So today I just got out a ruler and made some measurements, and drew the attached. I hope it’s helpful to those thinking about building their own GA cockpit, and I’ll try to get the Sketchup file posted eventually.

Here’s the basic dimensions, all in INCHES. You may click this to make it larger or right-click to download it.

Basement Sim Dimensions


If you would like a PDF of this, you may download one here. And if you would like the real-world-sized PDF of the Cessna 172 panel that I used for the panel, you may download it here. I hope this helps.

Flight Debriefs With CloudAhoy

After my flight lesson yesterday my CFI did something cool. During the debrief he asked me to look at a website with him, CloudAhoy. This site apparently links to an app on his iPhone that, when activated, tracks our flight and uploads it to the CloudAhoy servers. I know ForeFlight does this, but what’s cool about CloudAhoy is that it reads the data of the flight and tags it for debrief purposes. It automatically detects the sections of slow flight, stalls, steep turns, etc., and overlays it on Google Earth imagery of the terrain (or VFR sectionals
or IFR charts) so you can debrief the different sections of your training flight. It also can overlay the wind vectors, which is helpful for checking turns around a point, pattern work, etc.

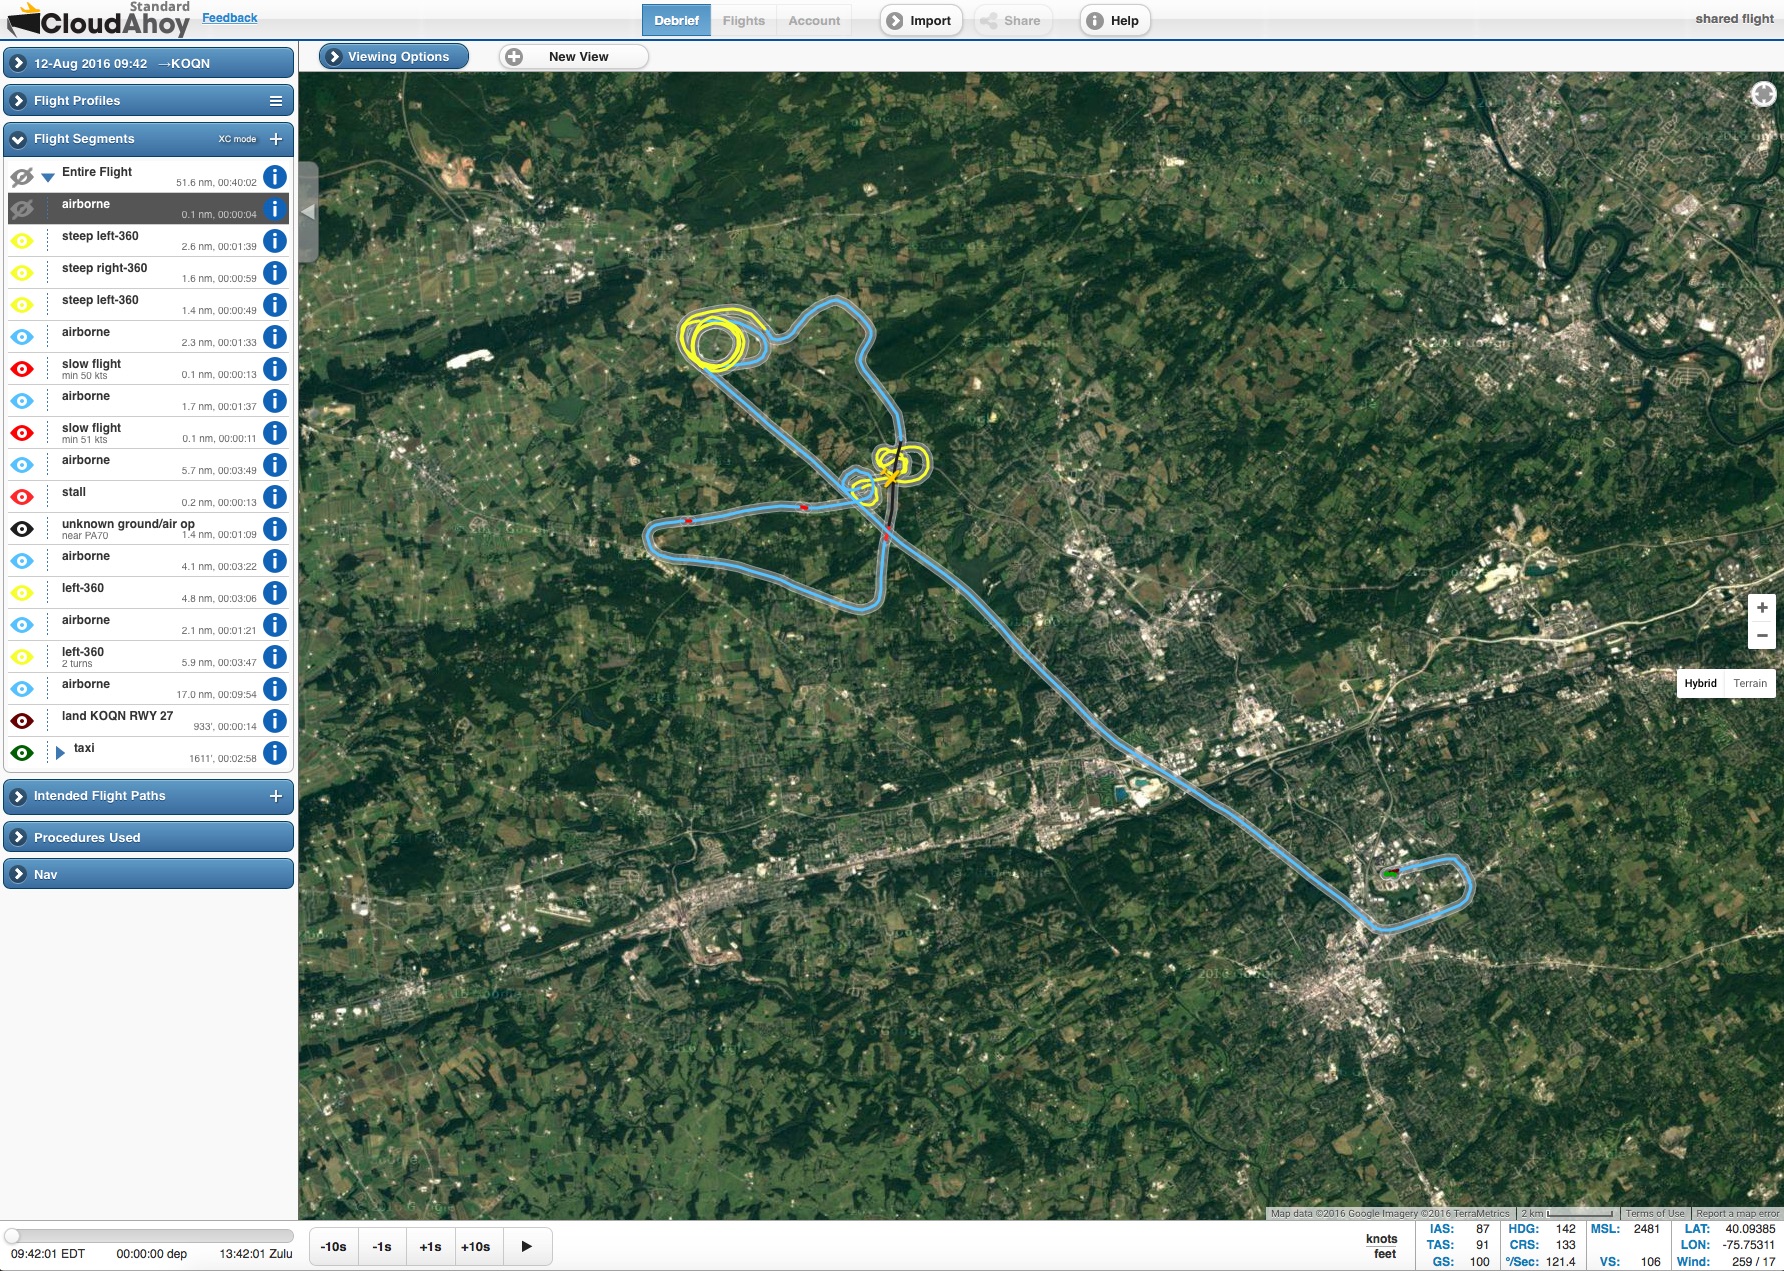
Here is the overhead image of yesterday’s flight. He turned the app on after I had done IFR work with the foggles on, so the track doesn’t include the first third or so of our lesson. Like all the pics I post here you can click it to see it full-sized. The red sections are stalls, the spaghetti section in the middle was steep turns left and right, and the circles were turns around a point.
CloudAhoy

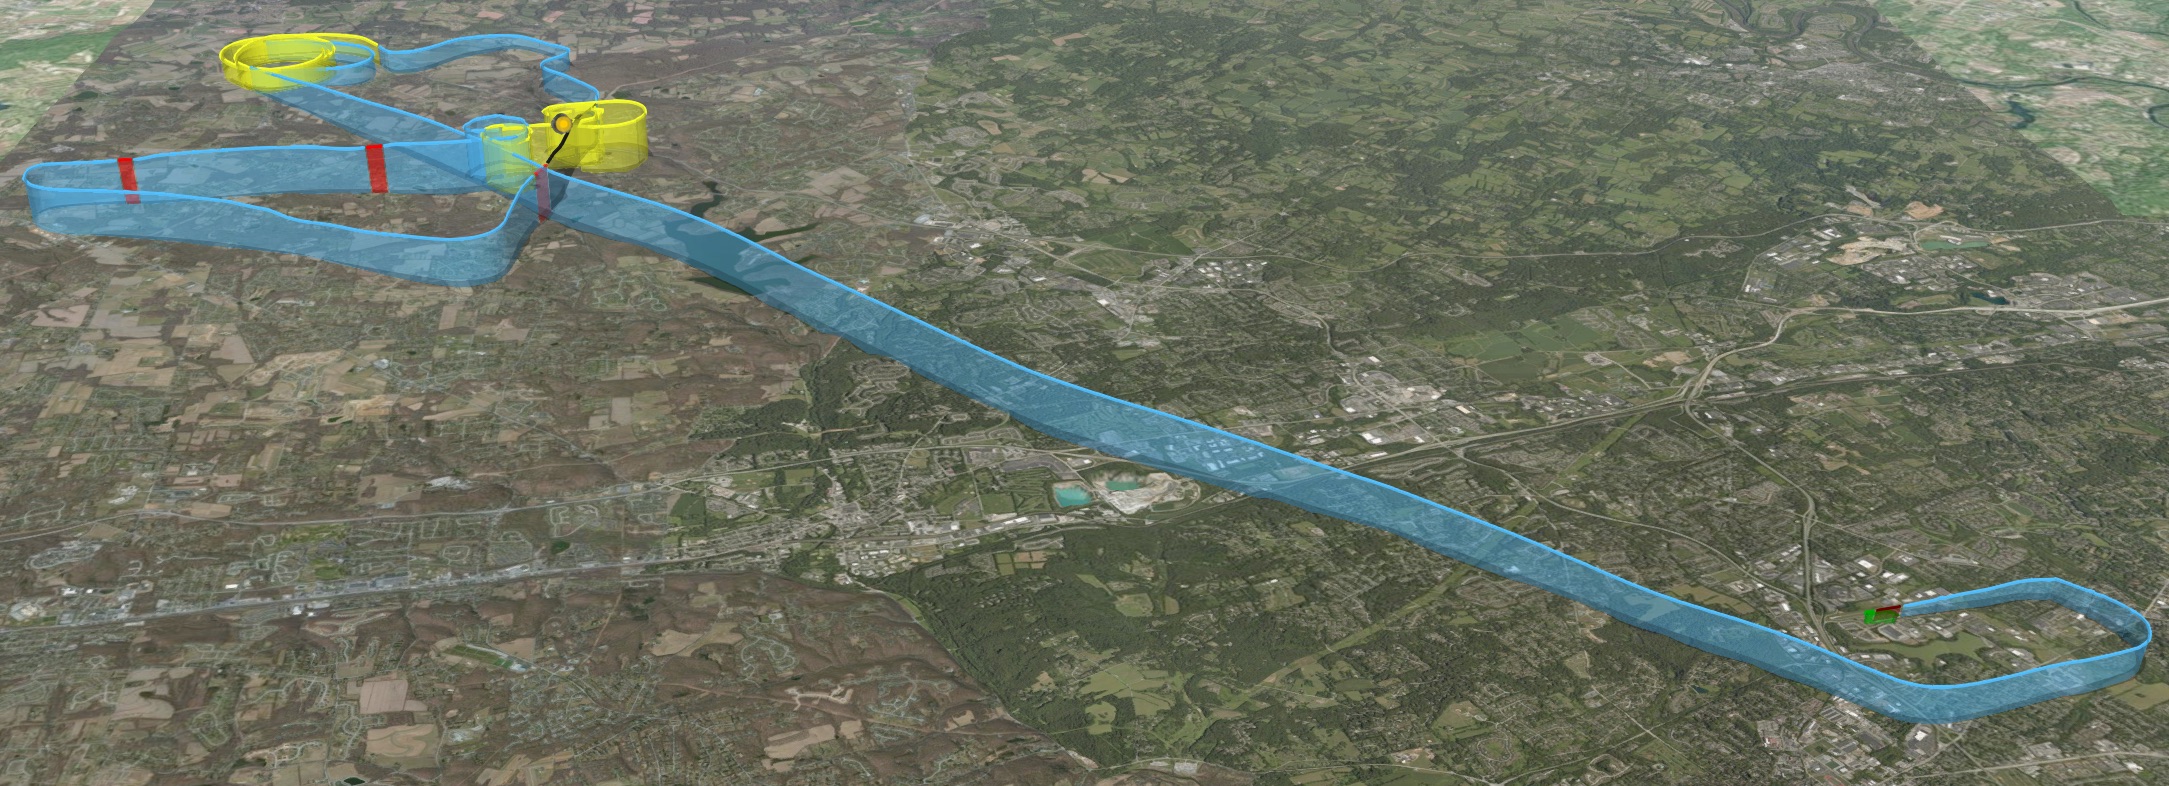
The controls at the bottom of the screen allow you to replay the flight in real time, or at faster or slower speeds, and the segments on the left allow you to skip to particular parts of the flight the app has tracked. Very cool. Even more cool is that CloudAhoy can render the flight track in 3D. Look at this …
CloudAhoy 2

Here’s my landing pattern, with a few hitches from where the app probably lost GPS or cell tower contact on the approach:
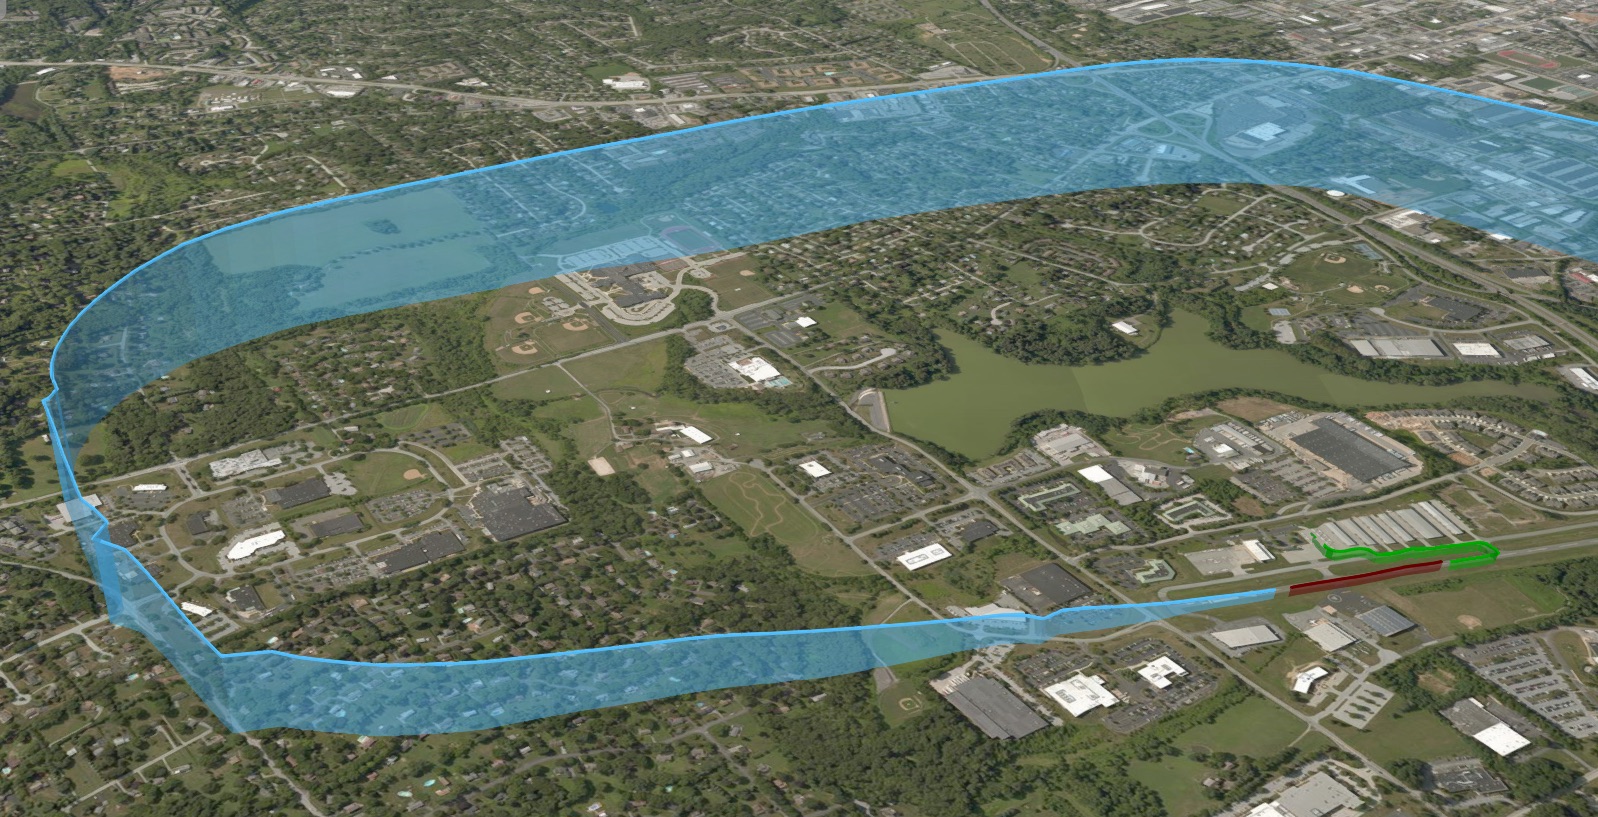
CloudAhoy 3

Finally, you can replay the flight from the cockpit, with a view like this:
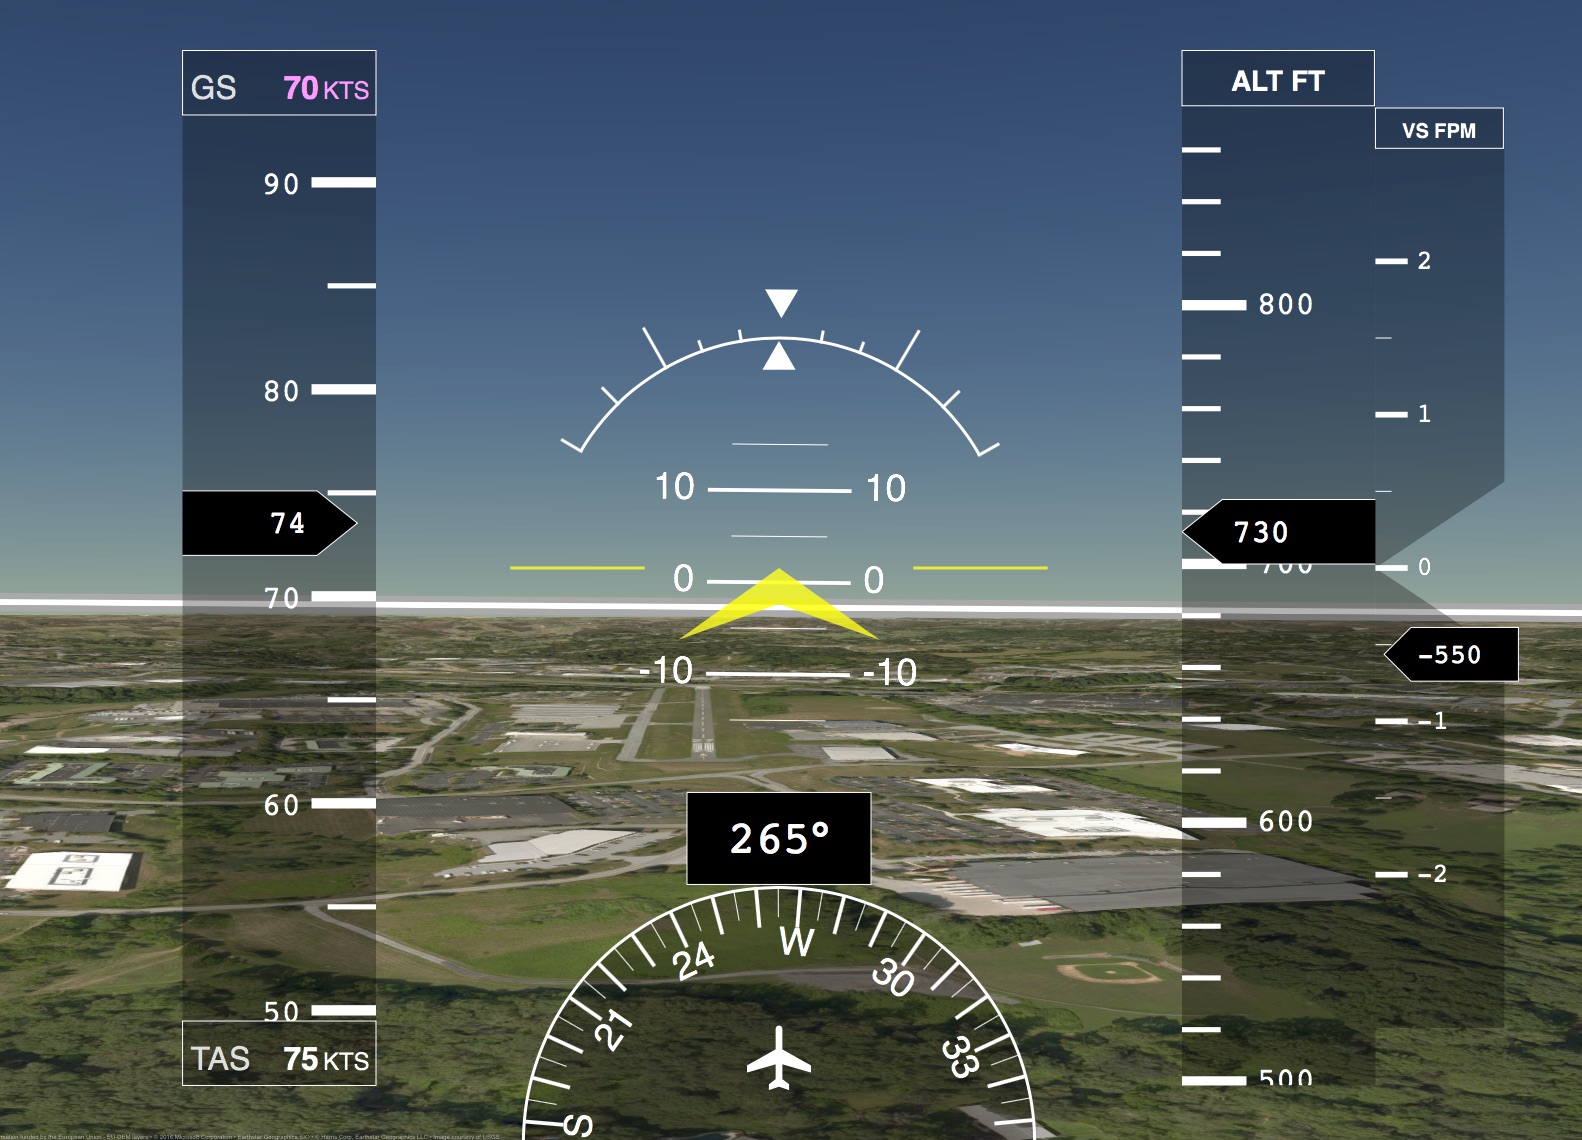
CloudAhoy 4

I just replayed this part of the flight and monitored my speed on the approach. I did pretty well. Was still around 83 knots or so on base, but was through the 70s on final and right at 63 (the indicated landing speed for this airplane) over the threshold. I can see this is going to be a valuable tool in my instruction. You can see the flight yourself by clicking here.

There is a free version of the CloudAhoy service, but it’s limited in what you can debrief and share. The full subscription is $45 per year, and it immediately seems worth it to me as a student pilot. I’ll be signing up. And finally, you can connect the service with X-Plane, FSX, and Prepar3d as well. I’ll try this today, as it would be cool to track simulated training flights from the basement sim.
ForeFlight 8 Set For August

ForeFlight 8 Set For August

One of the best real world tools that I’ve used for my simulation work and my real world flight training has been ForeFlight, which is an electronic flight bag app that I run on my iPad. I use it to plan routes in PilotEdge, for VFR navigation and charts while flying the sim, and as a backup to my paper logbook for training. I also take it along when I travel for business, pulling the commercial route I’m flying off FlightAware and loading them into ForeFlight on the iPad so I can track the route and read and follow the IFR procedures for arrival and approach. It’s truly great software.

And now the next generation is coming, with ForeFlight 8 set for August release. And it looks fantastic:

A2A Cessna 172, 182 & Piper 180, 250 LVAR Lists

If you’re trying to get your A2A Cessna or Piper to work in Prepar3D with your Saitek gear using SPAD.neXt, then you’re going to need to do some button assignments using LVARs (local variables) rather than the standard simconnect variables. Fortunately, A2A has posted PDFs of these LVARs, which I have linked to here:

Free Airspace Lesson Tonight (US Time)

Free Airspace Lesson Tonight (US Time)

One of the online resources I track as part of my flight training is Private Pilot Study, which uses Google+ hangouts to lead video conference briefings on different elements of pilotage. 

Tonight the topic is airspace, and it’s being led by Keith Smith, founder of PilotEdge and one of my personal web-aviation heroes. Time is 7 PM Mountain time US. If my schedule permits I plan to attend. 

As for Private Pilot Study, it’s an excellent resource with twice-weekly instructor-led sessions on all matters of private pilot knowledge. If you can’t participate in the hangout you can watch real-time, and if you can’t watch due to your schedule, you can view later via the archives. Check it out. 

CTAF 101

A lot of the airports in the PilotEdge coverage area are “nontowered” airports, meaning either there is no control tower at that airport, or there are times of the day when the tower is not staffed. This means there is no local air traffic control at those airports, and it qualifies them as “Class G” airspace to the FAA. In Class G airspace no radio communications are required of visual flight rules pilots, but that’s not a smart thing to do because pilots who don’t talk to each other at nontowered airports will probably have a tendency to bump into each other.

As a result, nearly all of these airfields have a “CTAF” radio frequency listed on the charts, with the exceptions being some private fields (which use a default frequency of 126.7). CTAF stands for “Common Traffic Advisory Frequency,” and it’s a radio frequency pilots near that airport tune into to report location to each other, especially their location in and near the traffic pattern for departing or landing at that airport. Basically, at nontowered airports pilots self police and exert their own air traffic control by all tuning into and talking to each other on a single VHF chat line.

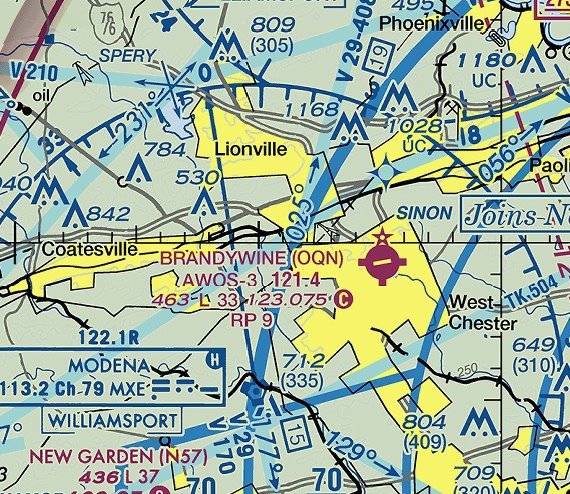
Here’s a section of the VHF sectional for an airport near Philadelphia, Brandywine (KOQN). You can tell it’s a nontowered airport because it’s magenta, that it has a rotating beacon because it has a little star, and that it has services like fuel and maintenance because it has a the spurs of a plus sign on the edges of its circle. You can also see the CTAF frequency listed: 123.075, with the magenta “C” next to it. All pilots flying into, out of, or in the near vicinity of Brandywine should tune to that frequency to report their locations and intentions at least once, and if taking off or landing, their position and intentions at key steps along the way (like turning onto final approach).

Koqn

As I noted above, by far most of the airports you can use in PilotEdge are nontowered, and even though it’s just a training network, you have to presume that there are other people on the network who may be in that area or using those fields, so CTAF calls matter and you’re supposed to make them. Like most things in aviation, there’s a right and wrong way to do it. I was looking for resources to brush up on my CTAF calls, and found this great primer at Recreationalflying.com. Its official title is “Radiotelephony communications and procedures
in Class G airspace,” but I think of it as, “How to make proper CTAF calls.” It’s worth reading and bookmarking if you want to learn these rules of the air.

Power To The Hub!

The USB hub, that is.

If you have Saitek panels that don’t seem to be working correctly, don’t download new drivers. Make sure there’s enough power to the hub. If you have Saitek FIPs that aren’t loading, don’t mess with SPAD or SPAD.neXt. Make sure they’re not all plugged into the same hub. If you have a Saitek yoke that’s not registering, make sure it’s in a USB 2.0 hub. If you have a Saitek radio panel that’s dropped out for some reason, run turn the power management off on the USB hub.

Photo Apr 19, 7 55 01 AM
Does this look complicated to you? Me, too.

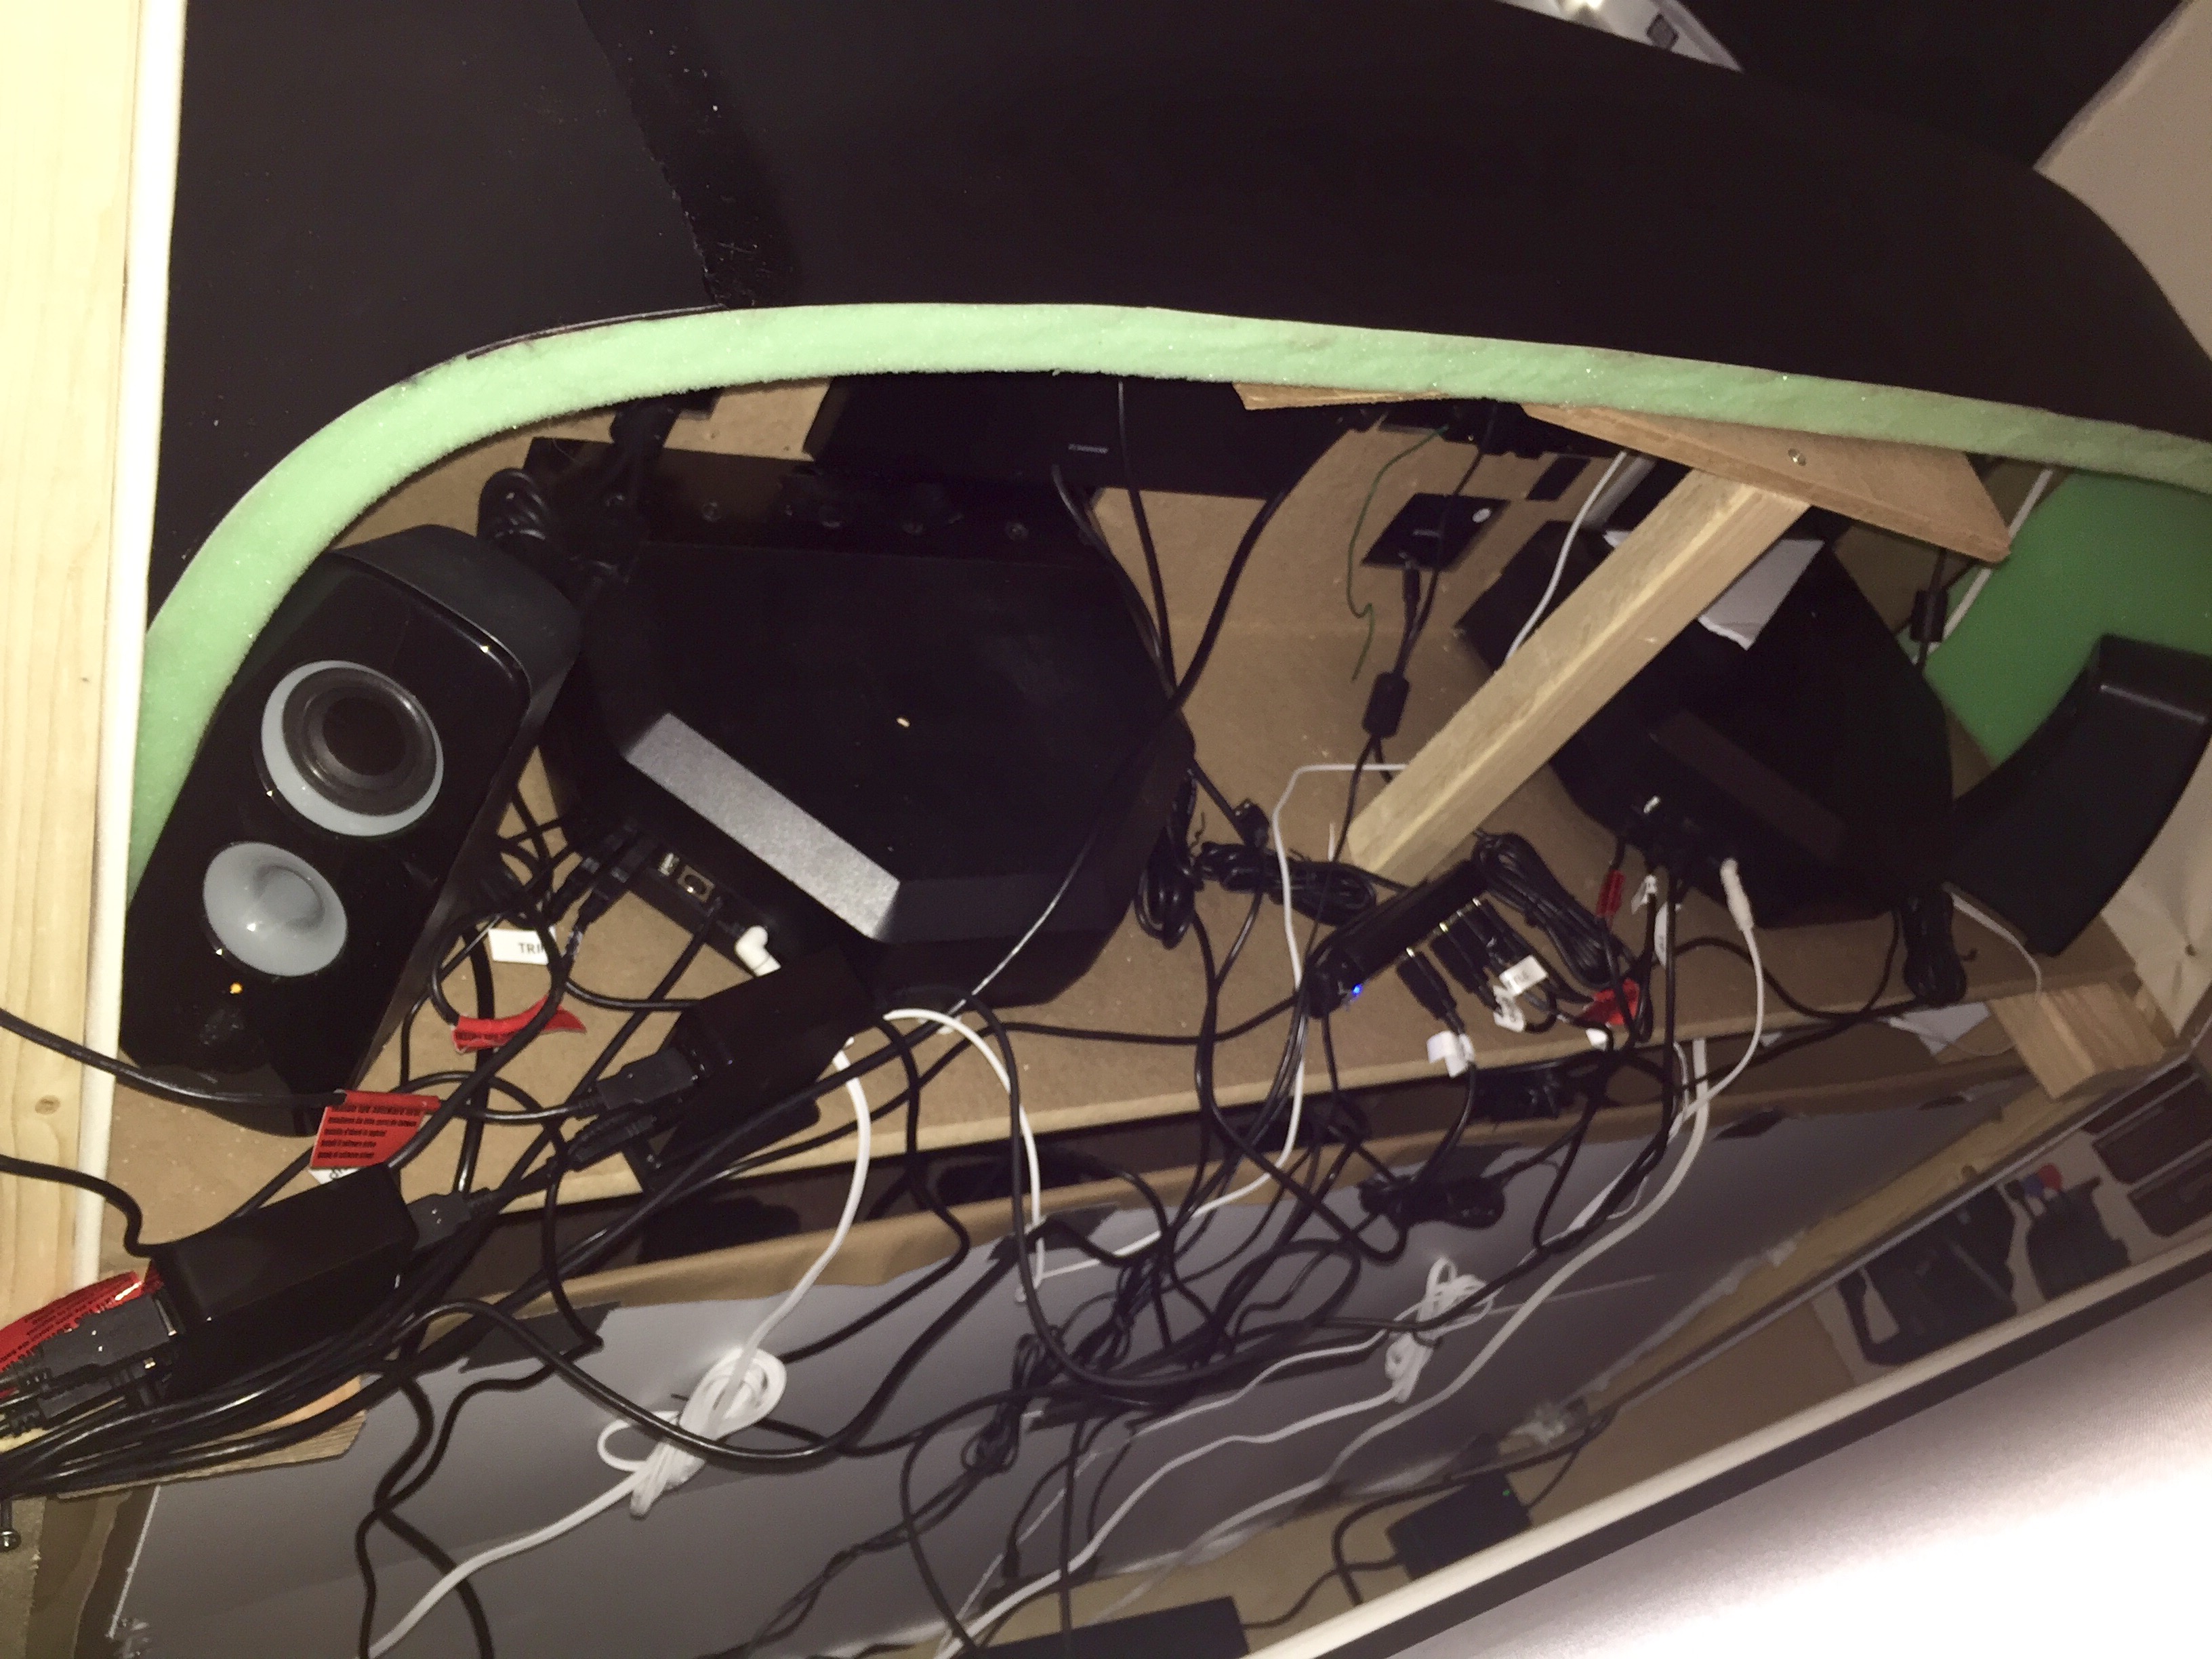
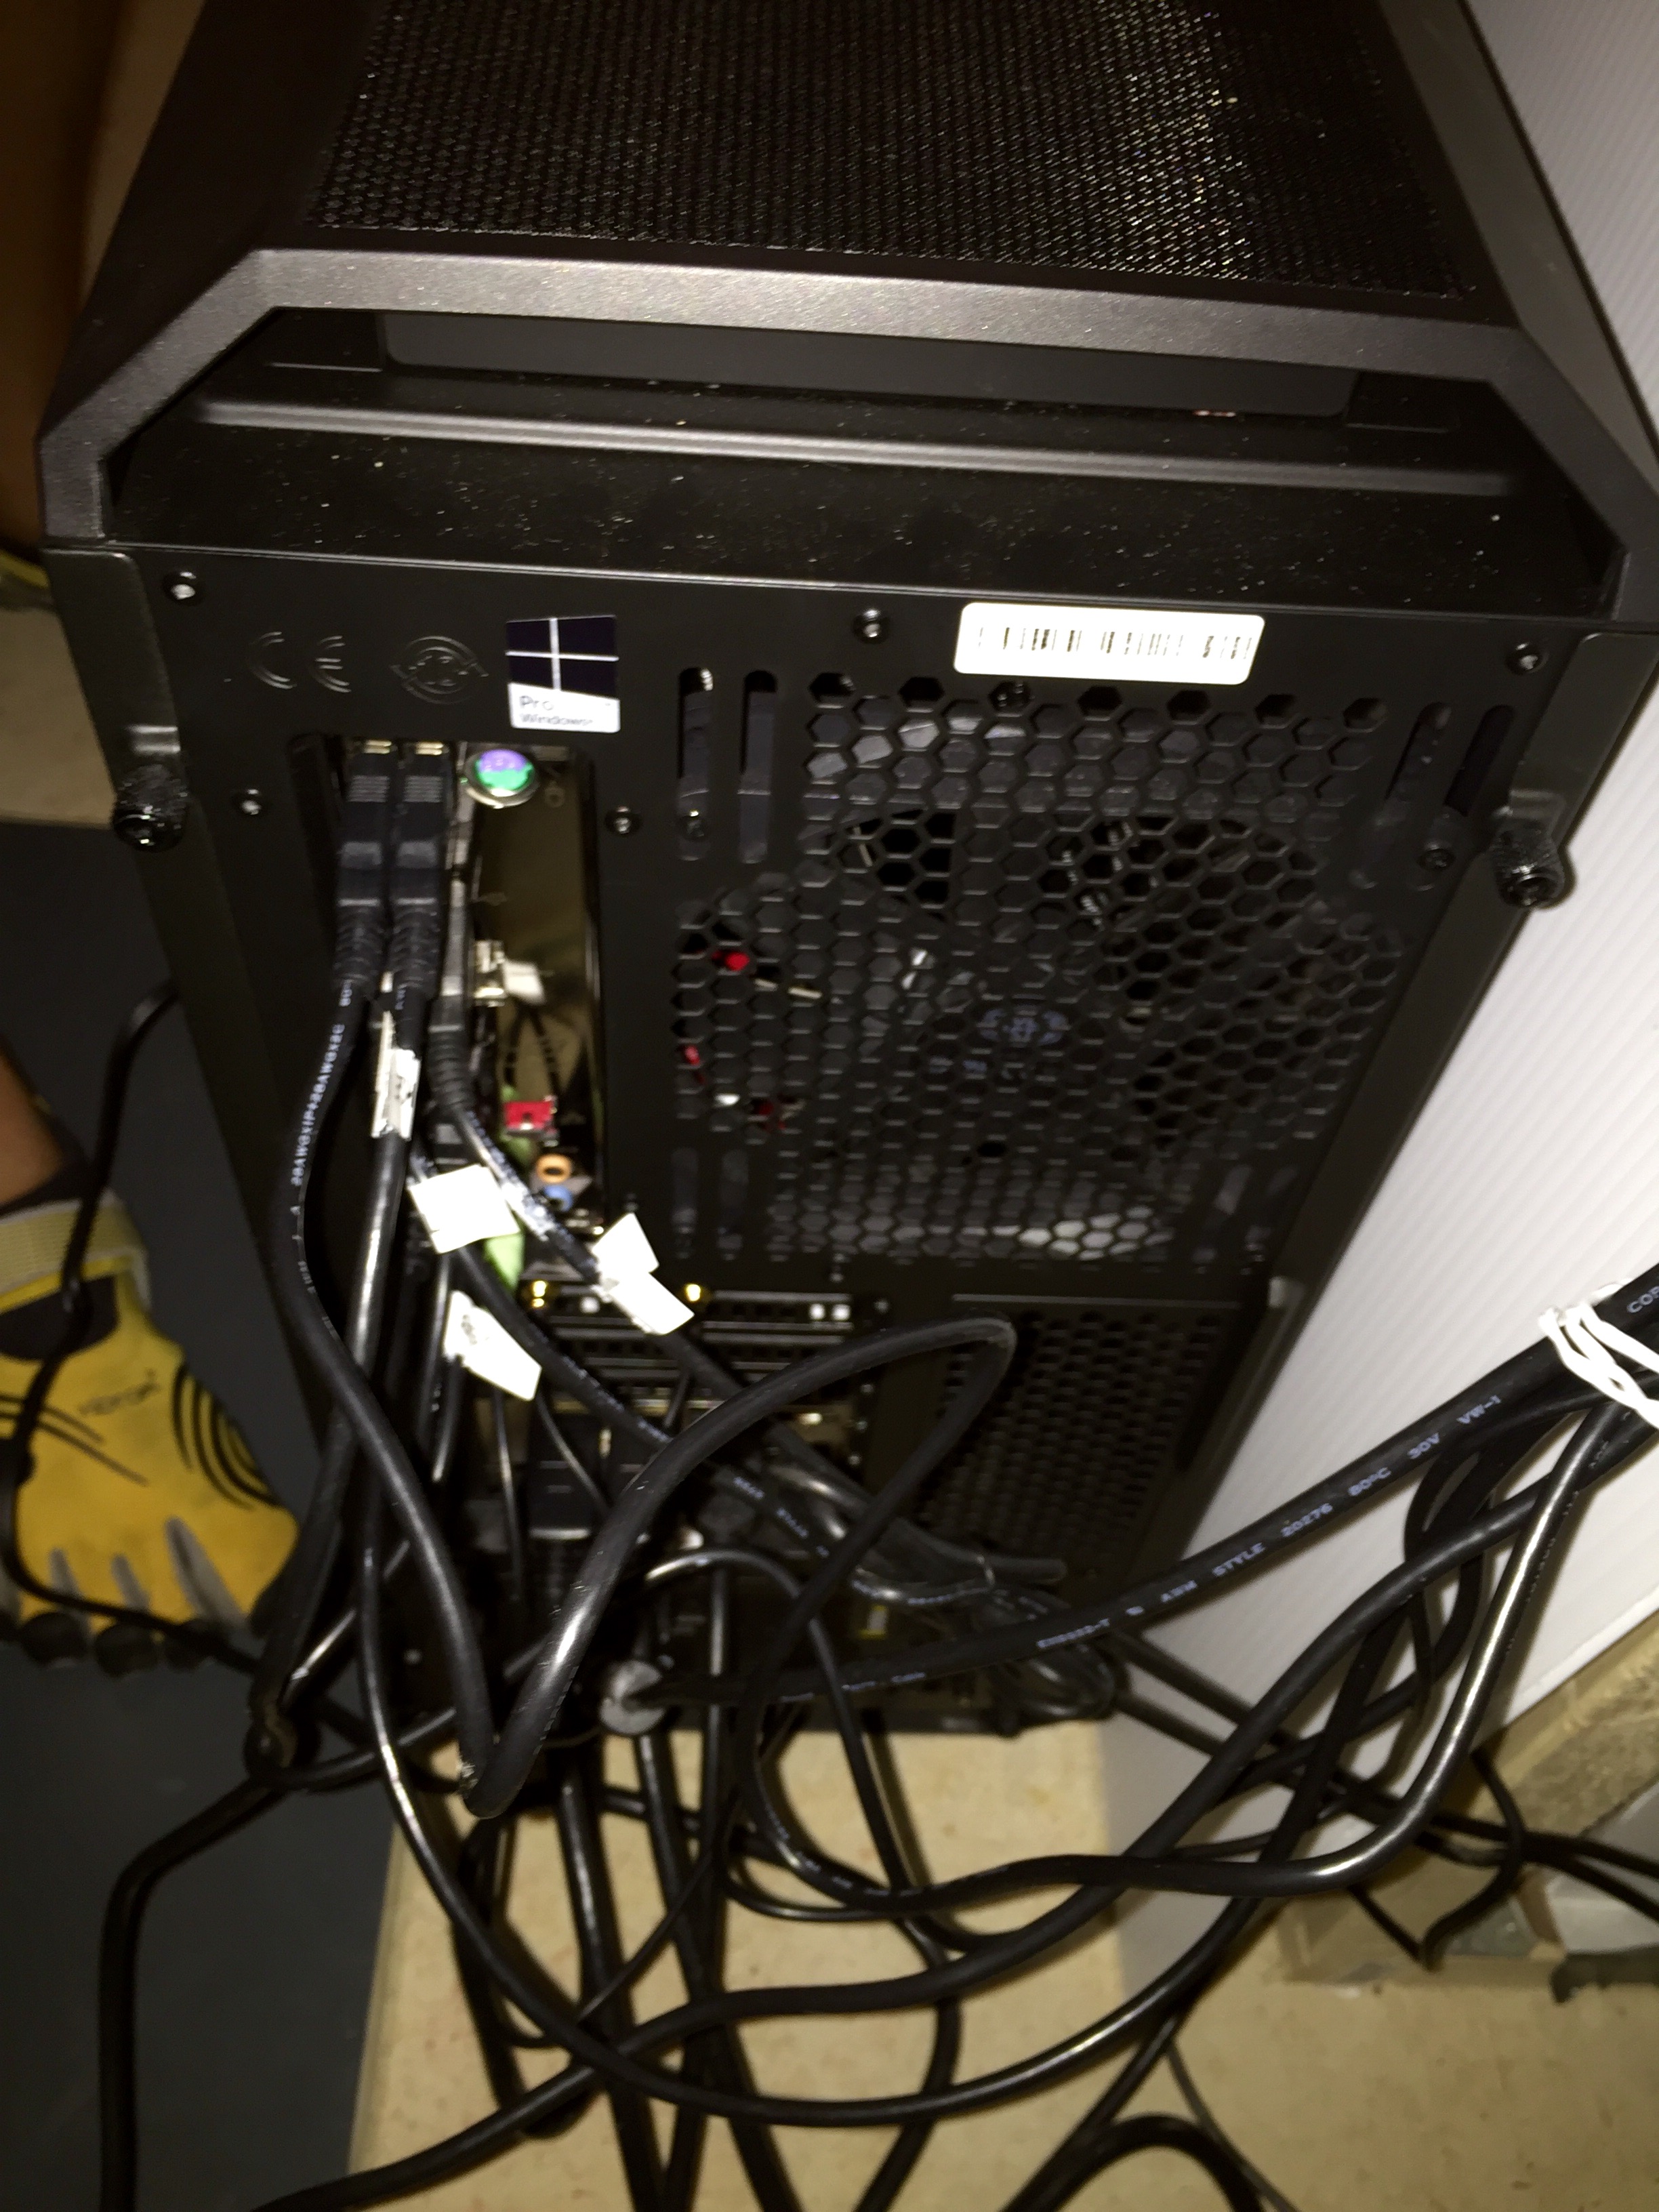
Basically, if your Saitek stuff isn’t working right, the first stop should be checking the hub. I was reminded of this last weekend when, for no apparent reason, my Saitek gear stopped working reliably. This included, interestingly, repeated crashing of the Direct Output .dll file while running the sim. I turned off power management. I loaded SPAD. I unloaded SPAD. I reinstalled all the Saitek drivers. I plugged everything into different ports on the hubs. I pulled my hair out.

Then I remembered that I had unplugged all the USB devices and hubs from the PC when I had updated the BIOS the day before. One of those powered hubs I had plugged back into the one USB 3.1 port on the PC. They didn’t like each other. I plugged that powered hub back into a 3.0 port, and everything worked fine.

What could go wrong?

I currently have 17 USB devices running on the sim PC. These are finicky devices, and they require a lot of power. They also are a bit dated, and not all were designed with USB 3.0 (and definitely 3.1) in mind. So if you are using Saitek gear, here are my guidelines for them running as seamlessly as possible from a USB perspective. Each lesson was learned the hard way:

  1. Plug your Saitek yoke and pedals into USB 2.0 ports if possible. They are most reliable this way.
  2. Use ONLY powered hubs if you plan to use external expansion hubs.
  3. MAKE CERTAIN there is enough power on the powered hub to provide at least 500 milliamps to each device plugged into it. If you plan to have four devices plugged into the hub, get a hub that’s a least a 2 amp hub. The more power the better. If it’s a 1.5 amp hub, plug no more than three devices into it. THIS RULE IS VERY IMPORTANT.
  4. It’s OK to use the Cessna  or Pro Yokes as hubs, but make sure that they, too, are powered. Plug no more than two (or maybe three) devices into each, as the yoke itself also needs power.
  5. Avoid 3.1 USB ports of possible. They don’t play nice with Saitek gear in my experience. Plug your Bluetooth USB keyboard dongle (or some such thing) into that instead.
  6. Spread your Saitek Flight Information Panels across different hubs. They definitely draw their full allotment of 500 milliamps. Putting more than one on any hub is pushing your luck.
  7. Go into the PC’s device settings, right click on each USB hub listed, select properties, and if there is a “Power Management” tab, click it and turn power management OFF.
  8. Just to be sure, download and occasionally run this free power management utility as well.

When I troubleshoot Saitek gear, I now go in this order:

  1. Make sure the power packs for the hubs are actually plugged in tight on both ends. Those plugs can get loose.
  2. Make sure you have no more than three or four devices on each hub.
  3. Make sure you haven’t switched a hub to a 3.1 port somewhere along the way.
  4. Run the power management utility and check the power management settings.
  5. Then start thinking drivers and other stuff …

But first, check those USB hubs. That’s where the problem probably sits.

How To Talk ATC

As I’ve been learning my way around PilotEdge I have by necessity been learning my way around the language of Air Traffic Control. One thing I’ve noticed is that sometimes pilots on PE seem to be working hard to sound “official,” whereas what I’ve noticed when listening to the real thing is that real-world pilots (and GA pilots with ATC in particular) are talking an official language but sounding natural (and often, like normal human beings). I’m certain much of that comes with familiarity, and remembering that the controller is, in fact, a person who wants to help you rather than someone waiting for you to screw up.

To that end, here are two resources from the Aircraft Owners and Pilots Association on talking with ATC: their new pilot’s guide to ATC communication, and their PDF document, Communicating With ATC: Learn to Talk Like a Pro. Both are worth reading, as I’m sure that the better you get at knowing the official language, the sooner you’re able to manage it in a familiar and human way.