
Readers have been asking for my plans since I put the site online, but my early Google SketchUp files were rough and I made some changes during construction, so I haven’t posted them. Today I took the time to get them in order, and here they are. I will put together a more detailed set that includes the basic supplies I used as well, but in the meantime I figure this will help those looking to build their own basement simulators. I’ve been really flattered by the number of simulations enthusiasts who have started building their own based on what they’ve seen here, so if this can help them and others on their journey, I happy to offer it.
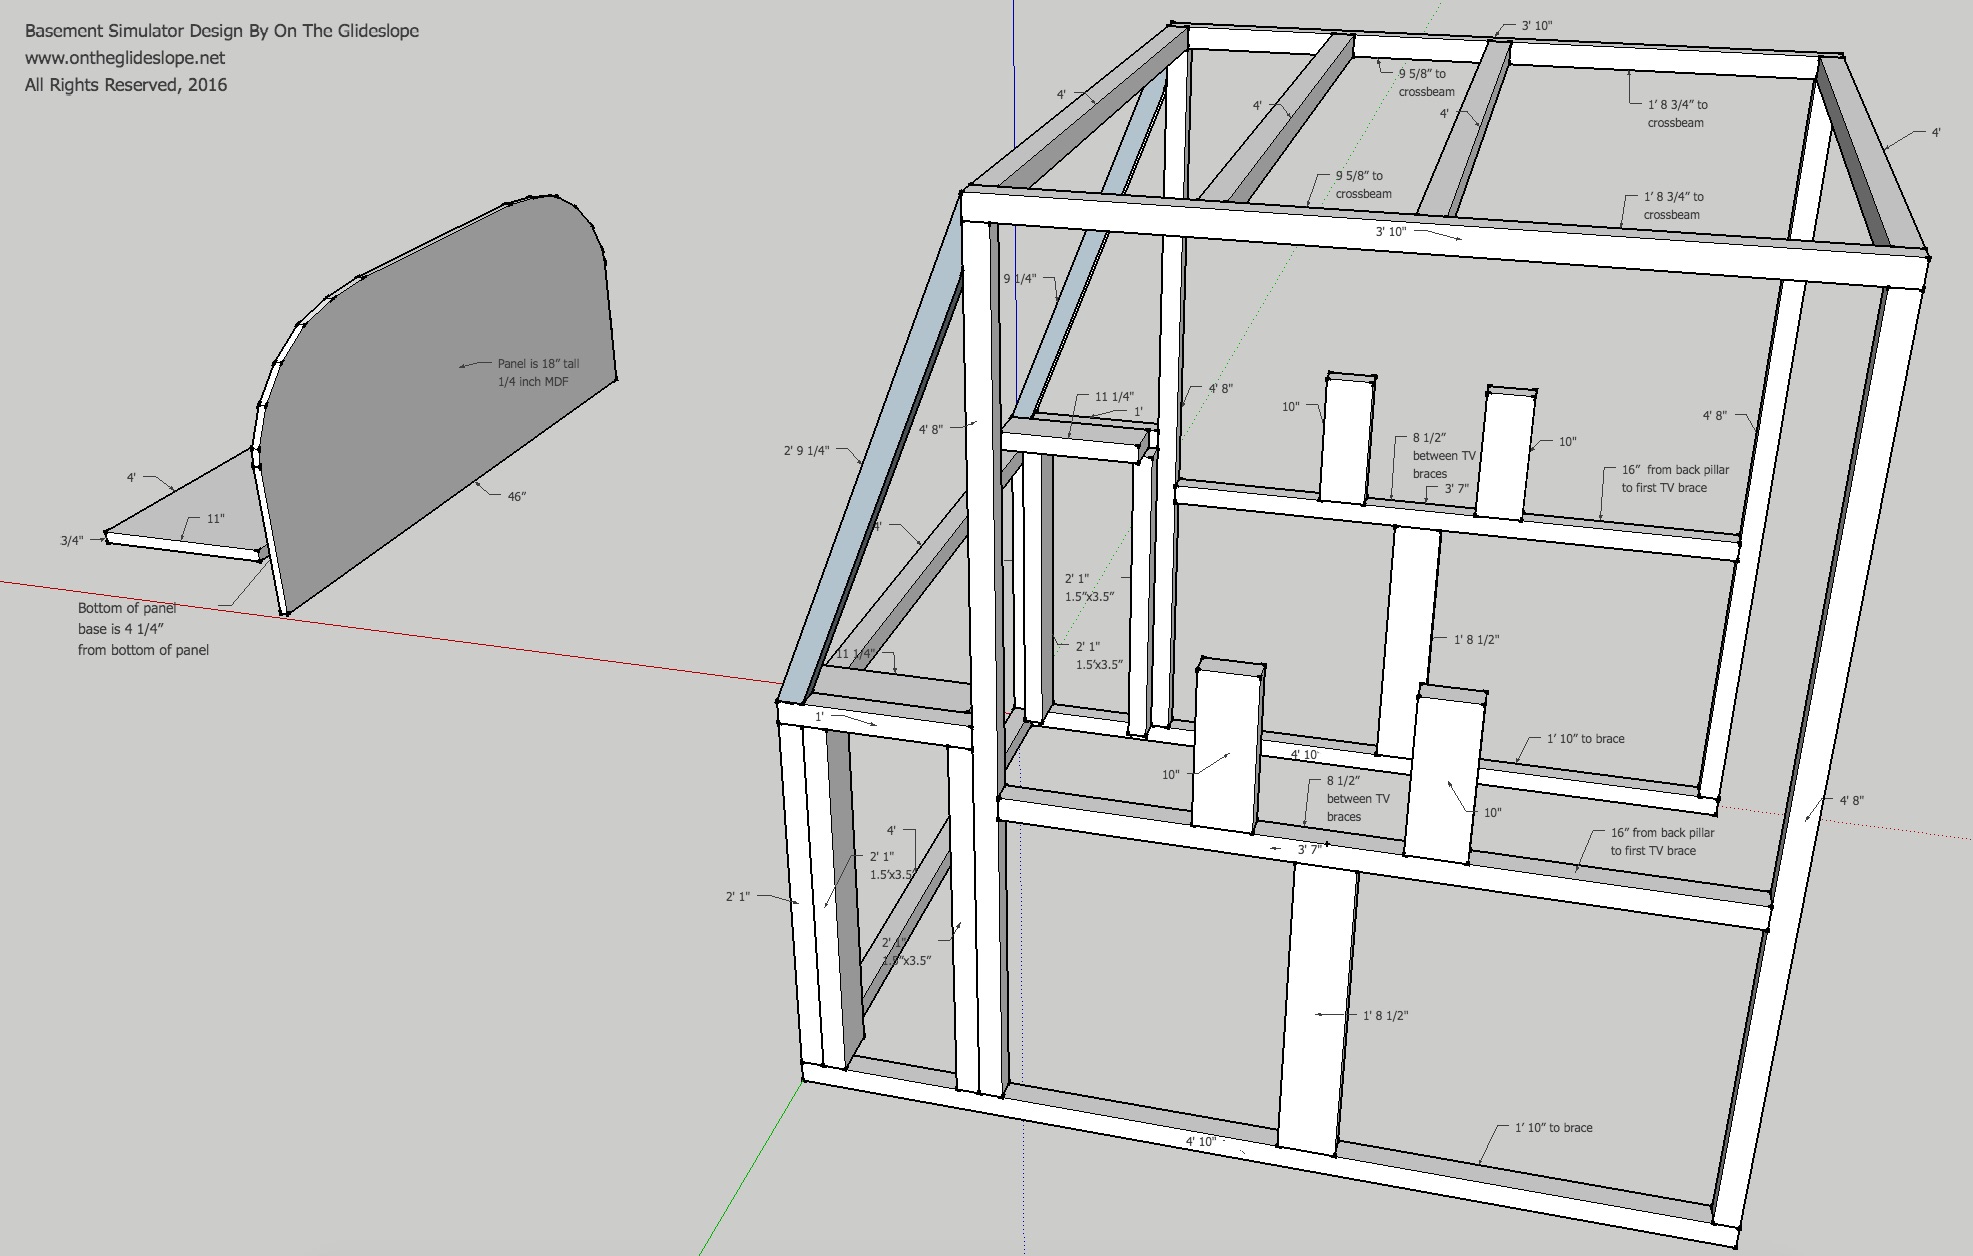
First, the lumber (and remember to measure twice, cut once!) …
Cut from 1 1/2″ x 1 1/2″ studs:
- Six 4′ cuts
- Two 3′ 10″ cuts
- Four 4′ 8″ cuts
- Two 3′ 7″ cuts
- Two 4′ 10″ cuts
- Two 2′ 1″ cuts
- Two 1′ cuts
- Two 2′ 9 1/4″ cuts
Cut from 1 1/2″ x 3 1/2″ studs:
- Four 10″ cuts
- Two 11 1/4″ cuts
- Two 1′ 8 1/2″ cuts
- Four 2′ 1″ cuts
1 piece 3/4″ x 11′ x 48″ MDF for the panel base
1 piece 1/4″ x 18″ x 46″ MDF for the panel itself
In terms of other supplies, I used long wood screws to connect the frame pieces together, and metal L-brackets to brace the corners (screwed in with 1/2 inch wood screws). Note that I DID NOT attached the panel base to the cockpit frame with screws. It simply sits on top, which makes it easy to adjust and take in and out.
And here are the basic plans: a .JPG here and a .PDF here. The panel template (which is a life-sized C172 panel schematic as a PDF) is here. Note that the panel PDF is 42″ across, and that I cut the template in half so I could make it 46″ wide. I hope it helps, and good luck!
Leave a Reply
You must be logged in to post a comment.