Ready to go.
A viewer request flight for Puerto Rico. We take the Aerosoft Beaver amphibian, departing San Juan Bay off the floats, then heading east to land at Jose Aponte de la Torre. Improvisation required to dodge clouds and weather along the way, and to manage some unexpected terrain inhibiting an otherwise straight forward left downwind approach at TJRV. I had a lot of fun on this one. Thanks for watching.
Details:
– Rex 4 direct with soft clouds
– AS16 and Cloud Art
– Orbx global, vectors, and OpenLC NA
– Aerosoft Beaver
Today in my real-world flight instruction we did pattern work. This was the second lesson in the past three days, and I have been very grateful to get some time in the airplane after logging a whopping two hours in August. I think I had six or seven lessons either scrub or need to be canceled on my part in the past month, and that was getting very frustrating for me. But that’s another post.
Two days ago we got back in the saddle with hood work, slow flight under the hood, a power-off stall and recovery, emergency procedure (engine out) and recovery, steep turns, and turns around a point. All was with some good winds, some bumps, and the need to dodge a cloud or two. Two days ago I flew very well, and that was very heartening as I was concerned I was getting too rust. Today we did pattern work, flying out to Chester County airport to take advantage of its 5,000 foot runway and more easy touch-and-gos. Overall I flew pretty well, or as my CFI described it, “not too bad.” I cannot wait for the day where landings feel natural, although I feel like I’m getting much better and thinking pitch for speed, and being comfortable flying the airplane downhill with the nose pointed down right up to the landing itself. I think I’ve spent far too much time (nearly 2,000,000 miles) in airliners sitting on a three-degree glide slope. But we’re getting there.
Here’s todays pattern work via my phone and the CloudAhoy service:
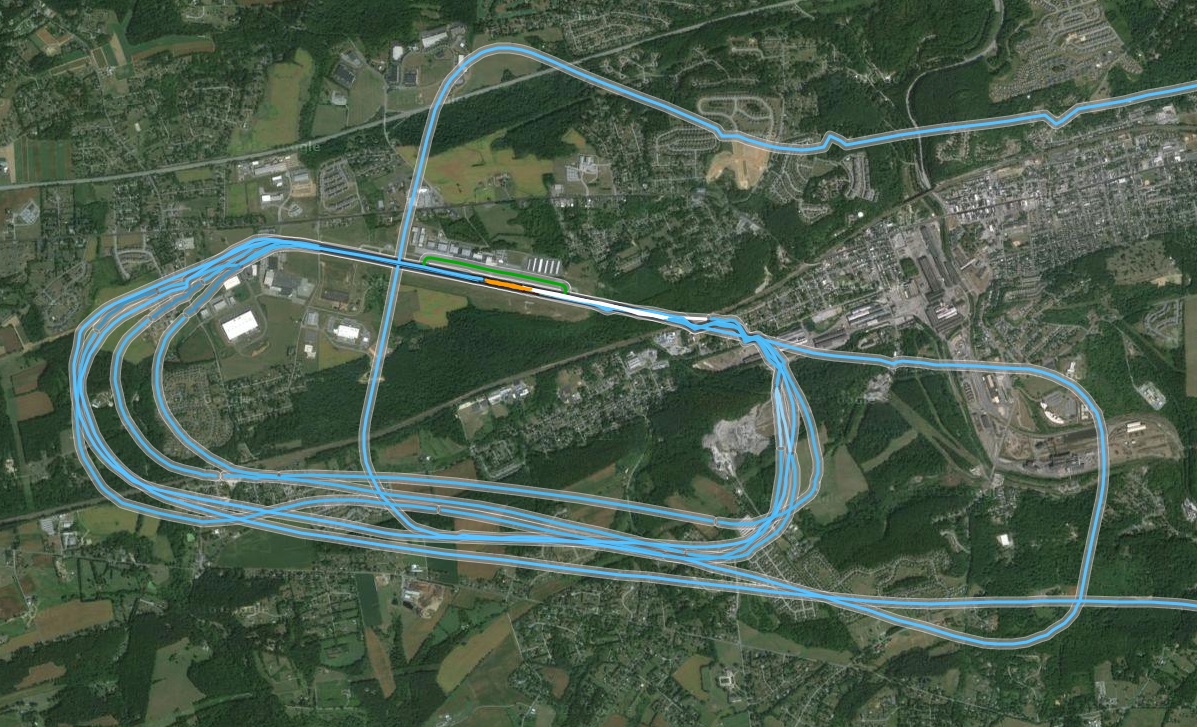
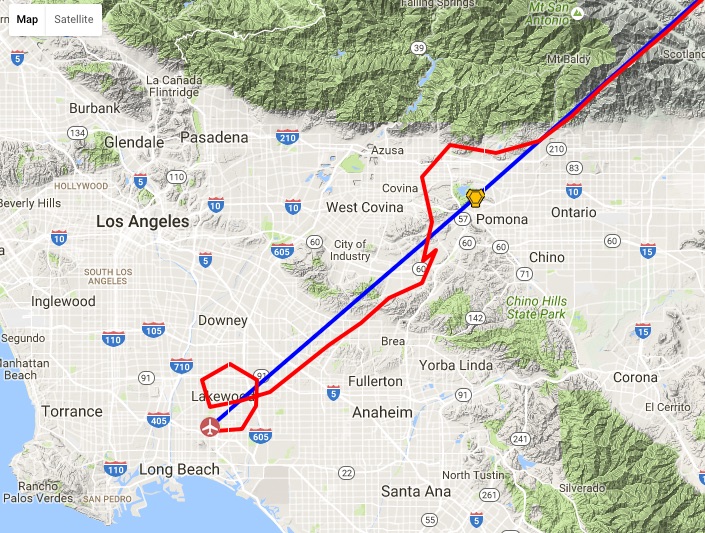
Chester has a local noise abatement procedure to turn to 260 degrees after takeoff, which is why you see the oddly-shaped crosswind leg. And that one long downwind was when we extended to get behind a Baron that was making a straight-in final approach. That was a good learning experience, as I in essence did the full descent procedure (which would normally occur downwind/base/final) just on final approach. Wins were a bit across from the WNW, so we did a pretty good job of flying a square pattern given that. The main critique from my CFI was to anticipate my turns better.
I flew this same lesson in the sim yesterday as preparation for today, using CloudAhoy connected to Prepar3d. It’s interesting to compare those patterns with the real-world ones from today:
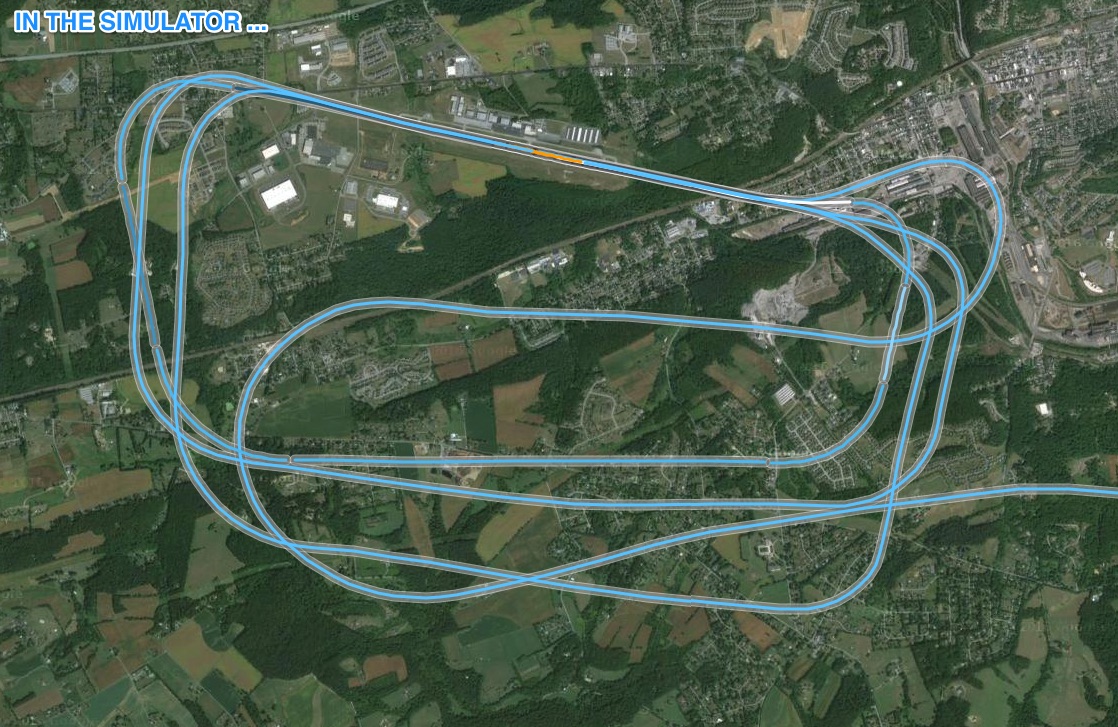
In the sim I’m clearly flying far too wide of a pattern, and too long of a pattern. It’s hard to judge when you’re 45 degrees ahead of the field in the sim, but I need to turn sooner if I’m going to simulate strong pattern work.
After the pattern work it was back to the home field for landing, which was fine. I ballooned just a bit over the runway, but I’ll correct that with smaller movements on the elevator. Here’s the whole flight, and you can click this image to enlarge it:

I recently had this exchange with a reader and thought it might be worth posting.
I have a question regarding your setup.
I have upgraded my pc to exactly your specifications (6770k 4 gh -> overclocked to 4,6; 16GB DDR4 3000, NVidiaa GTX 980TI) with 3 monitors (all 3 with nvidia surround connected together to get 3x full hd).
The good thing: when I am at ORBX pacific NW scenery with normal airports (Concret Mun eg) i get 30 fps with a view configuration like yours (3 aditional views one left, one right and one main). When I go to KSEA (san francisco) i only get 11 FPS.Could you please send me your settings (Graphics, NVIDIA?, any tewaks?)? And do you use hyperthreadeing?
I have changed Afinity Mask to 14 (have swiched off HT but it males no change)
Thank You!
***
Hi [name],
My settings are pretty standard. I use no real tweaks in the config file after corresponding with Rob Ainscough who said he uses none and believes P3D is best when it self configs. I do use HT, but have alternated over the past year from using it to not using it. I use AM 116, and then I use the Project Lasso app to assign all the add-ons to the other cores (0-1, 5-7) so that P3D can run on a few cores by itself. I think that helps with FPS. I also overclock the 980ti a bit (+50). All that said, in Orbx SoCal with Orbx vector my FPS can be very low. I turn the scenery way down when I’m down there. The bottom line is that three or four open windows is a test, even with our powerful gear. But 11 FPS would be very low for me.
I would send my graphic settings but I change them a lot based on when I’m flying (for example, SoCal – very few AI aircraft, normal scenery settings, vs out in the mountains where I max everything out). I also use a different graphic setting at night than in the day (lower resolution for everything including terrain because you can’t see it).
I did an informal analysis of the FPS impact of different settings on my rig a few weeks back, which I’ve not yet published, but it showed that by far the biggest FPS hits for me were (in set order):
– Airline, GA, and Road Traffic
– Casting Shadows (with clouds being the big hit, more so than scenery and vegetation)For what that’s worth.
Let me know how the rumble keeps working out!
BFG
Rob Ainscough, P3D beta tester and AVSIM moderator, has put online at AVSIM a user guide for Prepar3d. It’s already getting great reviews, and it’s free. Get it here, and here’s the description.
![]() This AVSIM Prepar3D Guide will cover the following topics to help users get the most of Lockheed Martin’s Prepar3D platform. Some of the information in this guide is applicable to prior versions of Prepar3D (V2.x and V1.x), however the primary focus of this guide will be for Prepar3D V3.x onwards:
This AVSIM Prepar3D Guide will cover the following topics to help users get the most of Lockheed Martin’s Prepar3D platform. Some of the information in this guide is applicable to prior versions of Prepar3D (V2.x and V1.x), however the primary focus of this guide will be for Prepar3D V3.x onwards:
The basic flow of this guide will take you thru; basic purchase and installation process, how to update your Prepar3D installation when new versions are released, configuring your graphics settings, exposing what settings increase process loads, adjusting you 3rd party products configuration settings to improve performance, some Prepar3D configuration settings (often called “tweaks”), setup of SimConnect (used by many 3rd party products), working thru compatibility with older FSX products, a quick guide to basic overclocking, and finally setting up input control devices (controllers).
This document will assume limited computer experience, but it will cover both easy and advanced topics. Parts of this document will expect users to understand how to use a text editor (like Notepad) to edit/modify content in text files.
Hopefully there is some information to be gain in this document for the new user and the experienced user.
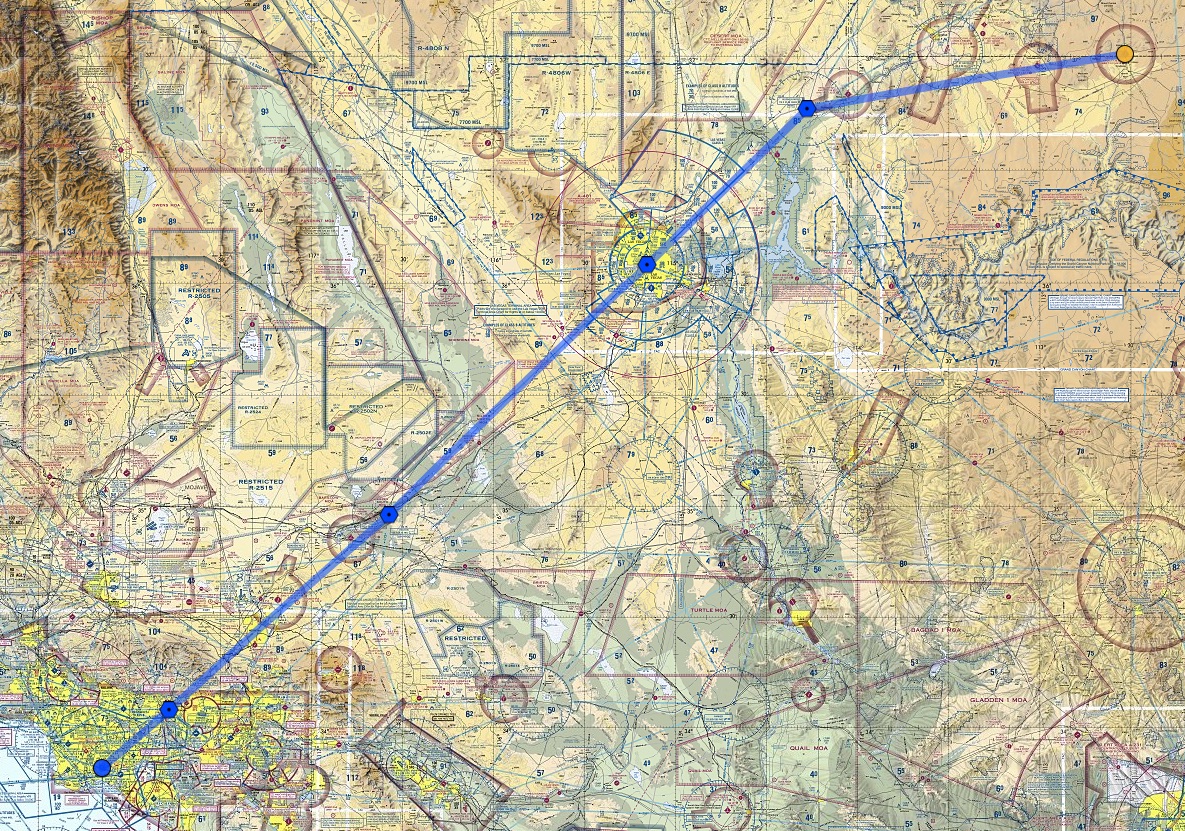
Yesterday I was able to carve out about three hours to complete the next flight in the PilotEdge Alphabet Challenge, Kanab (K) to Long Beach (L). This is one of the longest flights in the series, logging in at 345 nautical miles with the route I’d planned, a VFR flight of KKNB MMM LAS DAG POM KLGB. You can see the flight plan here:
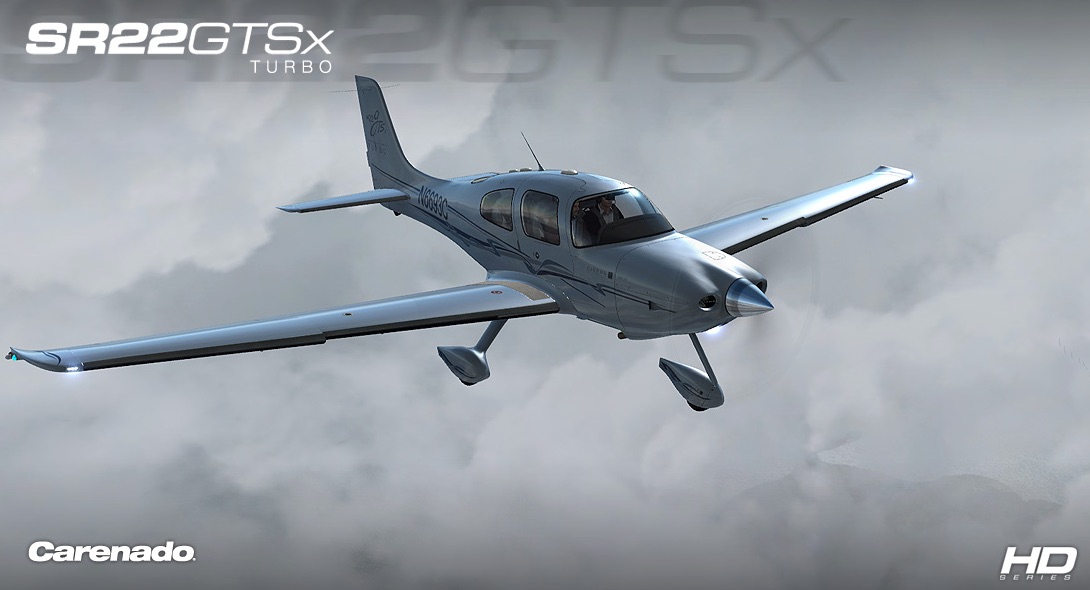
To keep this flight a manageable length, I decided to fly it in the Carenado Cirrus SR22GTSX turbo, which would let me clip along at about 170 knots once I climbed to the 12,500 feet cruising altitude I’d planned. It’s a beautiful airplane in real and simulated life:
Even with all that horsepower it was going to be about a two hour and five minute flight as we had headwinds, some 20 knots, the entire way. I departed Kanab on the CTAF frequency, and then once I was at 12,500 I picked up flight following by calling the PE LA Center frequency. Things went along fine from there, but there were missteps and complications along the way, each of which had its lessons:
All told, the flight felt like a workout, and a very useful training session. The great thing about the sim and the software is that conditions can get quite real, and they can require real decision making. This flight had a lot of them, and I felt like my training brain was working nearly the entire time. I suspect that’s valuable as a student pilot. At least, I hope so.
The next flight is Long Beach to Montgomery Field. This will be my first flight on Pilot Edge into the San Diego area, and I’m looking forward to it. And here’s the challenge progress so far. 112 pilots have started the challenge, and only 59 have made it this far.

Here’s a link worth following: www.pilotworkshops.com. PilotWorkshops runs an online proficiency center to provide professional training to general aviation pilots. With my membership to AOPA I get free access to their Pilot Proficiency Portal, but there are a number of free resources on the site as well, and many more for those who register. I look forward to using the site as I continue my real-world training, and many of the resources there would be a real value to any simmer interesting in making it “as real as it gets” with their own simulated pilotage.
A reader request flight around the Drzewiecki Design New York City X scenery, using the Aerosoft Beaver float plane just for fun. Thanks for watching.
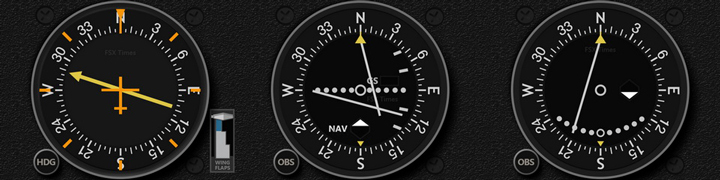
A follow-up to this post: Tom Tsui has now released the Saitek FIP nav gauges for the A2A 172 and 182. Get them here. The engine gauges are next, although Tom says it may be a month or so before they’re available. If you’ve not used his FIP gauges, I highly recommend them. They look great, work perfectly, and his support is top notch. Getting FIP instruments that work correctly with the A2A LNAV set has been a problem for some time, and Tom has fixed it. Great job, Tom.